
TL;DR:
- Ozone treatment permanently eliminates car odours by oxidising molecules at a molecular level with no residue left behind. Proper pre-cleaning, controlled treatment duration, and thorough ventilation are essential for safe and effective results. It is most effective against smoke, pet odours, and mould, but cannot neutralise chemical or fuel smells, requiring initial surface cleaning and treatment.
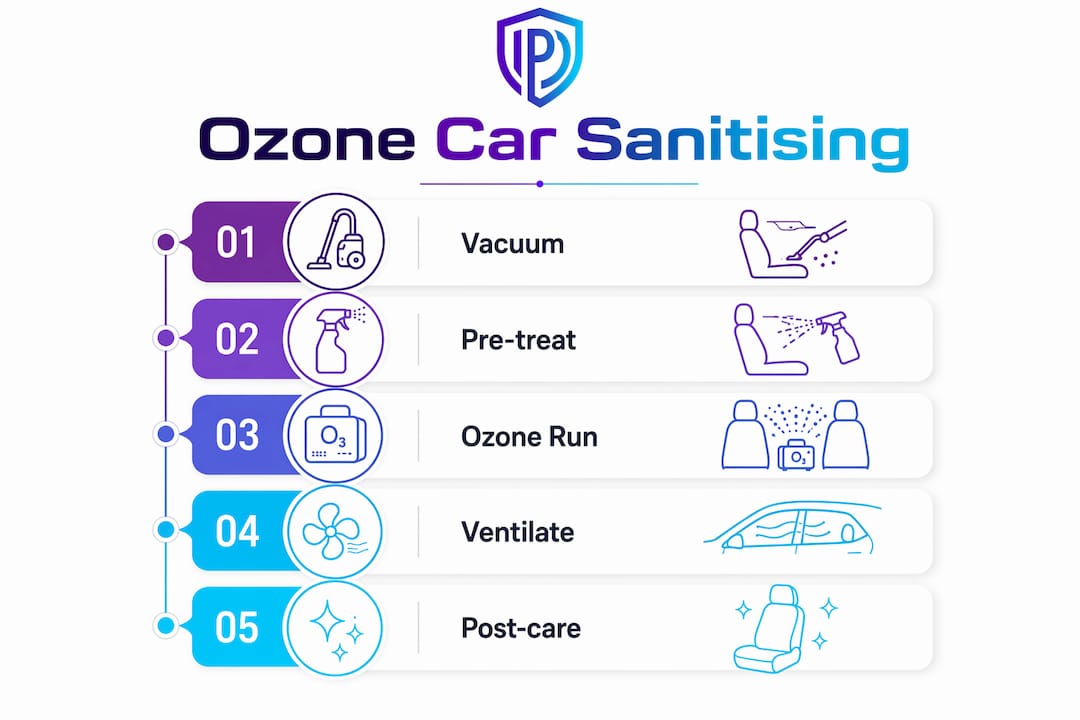
Ozone treatment is a chemical oxidation process that eliminates odours permanently by breaking down odour molecules at a molecular level, leaving no chemical residue once the gas dissipates. Unlike air fresheners that mask smells, ozone gas reacts directly with the compounds causing smoke, pet, and mould odours inside your car. Knowing how to sanitise your car with ozone treatment correctly means the difference between a genuinely fresh interior and a damaged one. This guide covers every step, from preparation through to safe re-entry, so you get lasting results without putting your health or your vehicle’s interior at risk.
What preparations are essential before starting ozone treatment?
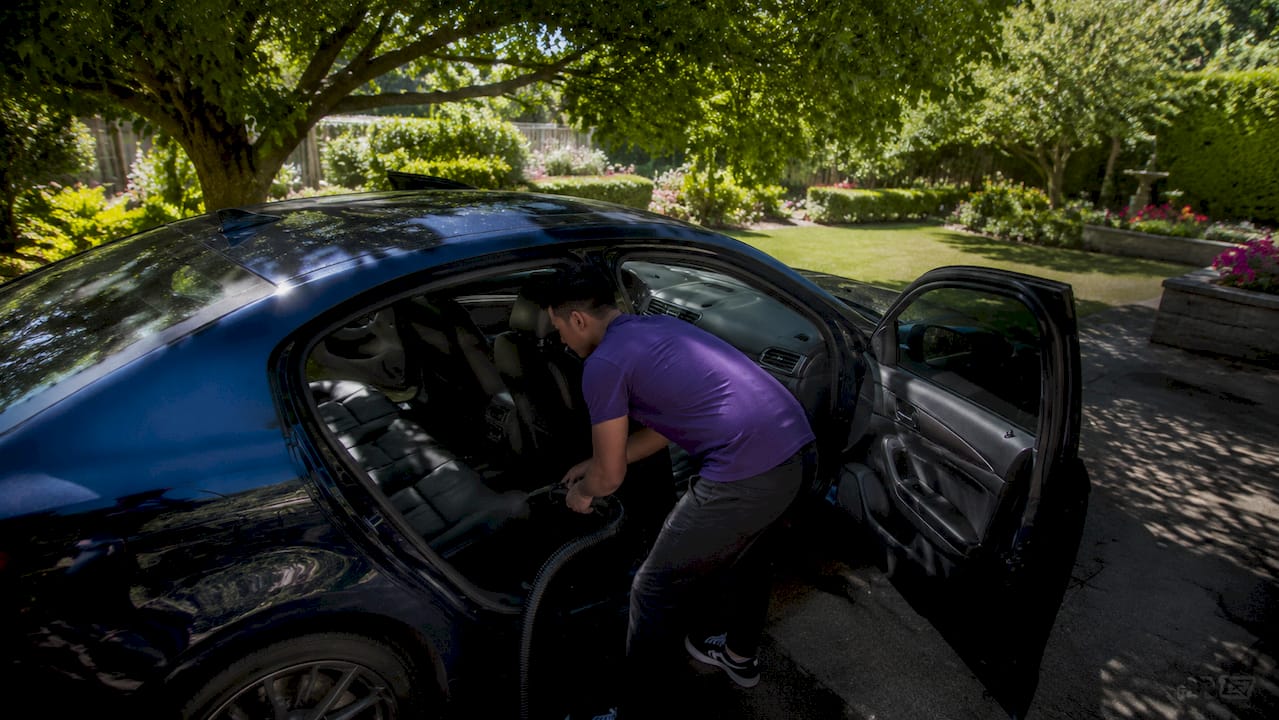
Pre-cleaning is the single most important step in the ozone car cleaning process, and skipping it guarantees poor results. Ozone oxidises odour molecules but cannot remove physical debris, so any dirt, crumbs, or residue left behind will continue producing smells after treatment. Think of ozone as the final weapon, not the first one.
Follow this preparation checklist before you run a single minute of ozone:
- Remove all personal items, rubbish, floor mats, and child seats from the vehicle. These items can block ozone from reaching contaminated surfaces beneath them.
- Vacuum every surface thoroughly, including under seats, in seat crevices, and in the boot. Pre-cleaning prevents residue odours from persisting after treatment.
- Wipe down all hard surfaces, including the dashboard, door cards, and centre console, using an appropriate interior cleaner.
- Treat visibly soiled upholstery and carpets before ozone. For pet urine specifically, use an enzymatic cleaner first. Enzymatic cleaners break down uric acid crystals that ozone alone cannot fully neutralise.
- Clean the air vents with a small brush or compressed air. If your cabin air filter is heavily soiled, replace it before treatment. A dirty filter reintroduces odours the moment you run the HVAC system.
- Make sure the interior is dry. Effective ozone penetration requires dry surfaces because moisture can interfere with even gas distribution and reduce treatment efficacy.
Pro Tip: If you are dealing with mould or mildew, wipe affected surfaces with a diluted white vinegar solution and allow the interior to dry completely before ozone treatment. Ozone will then target any remaining spores rather than fighting through active mould growth.
| Preparation step | Why it matters |
|---|---|
| Vacuum seats and floors | Removes physical debris ozone cannot oxidise |
| Enzymatic clean for pet urine | Breaks down uric acid before ozone treatment |
| Clean and replace cabin air filter | Prevents odours re-entering through HVAC system |
| Dry interior surfaces | Allows even ozone gas distribution throughout cabin |
For a thorough pre-treatment workflow, the car interior cleaning guide from Isaac’s Pro Detailing covers every step in detail.
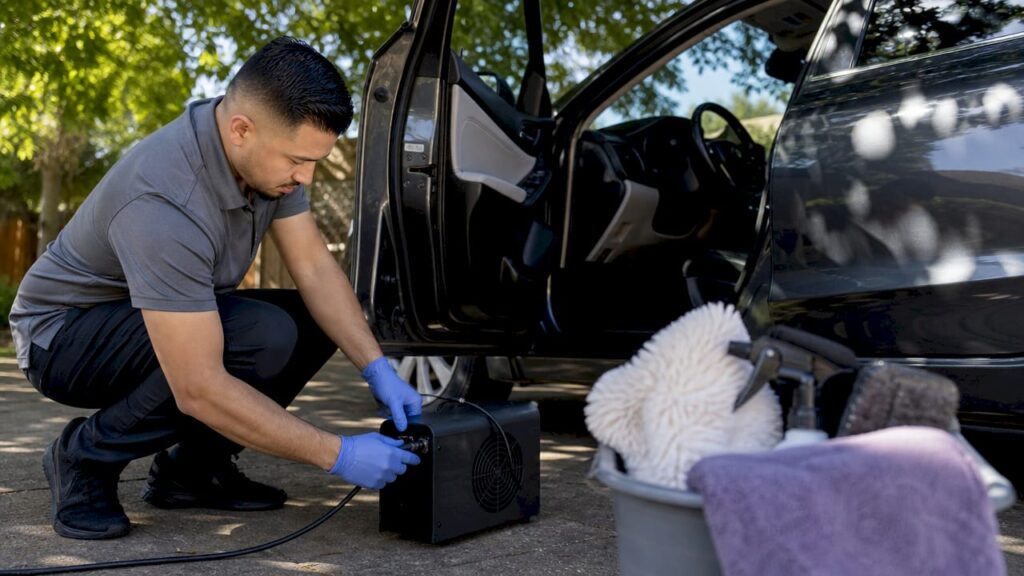
How to safely operate an ozone generator in your car
Running an ozone generator correctly is where most DIY attempts go wrong. Placement, sealing, duration, and HVAC settings all affect whether the treatment works and whether your interior survives it intact.
Follow these steps in order:
- Position the ozone generator on the passenger seat floor or boot floor, with the output nozzle facing upward or toward the centre of the cabin. Generator placement affects treatment uniformity, and poor positioning leaves untreated odour pockets in corners and under seats.
- Route the power cord through a slightly open window, then seal the gap with a folded towel or foam strip. Every other window and door must be fully closed.
- Turn the car’s HVAC system to recirculate mode before starting the generator. Running HVAC on recirculate distributes ozone through the air ducts and vents, reaching hidden odour sources that the cabin air alone cannot access.
- Set the treatment duration based on odour severity. A mild musty smell requires around 30 minutes. Heavy smoke or pet odour may need up to two hours. That said, longer treatment times do not proportionally improve results and increase the risk of material damage.
- Use a timer and step away from the vehicle immediately. Do not remain near the car during operation.
- Turn off the generator remotely or via the timer. Do not re-enter the vehicle to switch it off manually.
Safety rule: No humans or pets should be inside or immediately adjacent to the vehicle during an ozone cycle. The concentrations required to eliminate odours are toxic to the respiratory system. This is non-negotiable.
Pro Tip: For a car that has absorbed heavy cigarette smoke, run two separate 45-minute sessions with a full ventilation period between them rather than one 90-minute session. Multiple shorter cycles improve efficacy and reduce the risk of damage to rubber seals and plastic trims.
What post-treatment steps are needed for safe re-entry?
Ventilation after ozone treatment is not optional. Ozone gas at treatment concentrations is hazardous, and re-entering too soon causes respiratory irritation, headaches, and in extreme cases, more serious health effects.
Follow these steps after the generator shuts off:
- Open all doors and windows fully and allow the vehicle to air out for a minimum of 30 to 60 minutes. Guides recommend airing out for two to three hours or more for heavily treated vehicles or those with severe odour histories.
- Switch the HVAC system to fresh air mode (not recirculate) and run the fan on high for 10 to 15 minutes. This flushes residual ozone from the duct system.
- After ventilation, you may notice a faint metallic or chlorine-bleach-like smell. This residual ozone scent dissipates with continued airing and should not be confused with the original odour returning.
- Perform a smell test by leaning into the car without fully entering. If the original odour is still detectable beneath the ozone scent, a second treatment session is warranted once the vehicle has fully aired.
- If the original smell persists after two sessions, the odour source has not been fully addressed in the pre-cleaning stage. Return to enzymatic cleaning or surface treatment before running ozone again.
Patience here protects both you and your vehicle. Rushing re-entry is the most common and most avoidable mistake in the entire process.
What are the benefits and risks of ozone treatment for car interiors?
Ozone treatment delivers results that no spray-on product can match for certain odour types. Understanding where it excels and where it falls short helps you use it appropriately.
Where ozone treatment works best
Ozone is highly effective against smoke (cigarette and bushfire), pet odours, mould, mildew, and general mustiness. It oxidises odour molecules rather than masking them, which means the smell does not return once the source is treated. For Australian car owners dealing with mould from wet season humidity or smoke from bushfire events, this is a genuine advantage over conventional detailing products.
Where ozone treatment has limits
Ozone does not neutralise chemical spills, fuel odours, or odours caused by ongoing contamination like a leaking coolant system. If the source of the smell is mechanical or chemical rather than biological, ozone will not solve it. Addressing the root cause first is always the correct sequence.
| Odour type | Ozone effectiveness |
|---|---|
| Cigarette smoke | High |
| Pet odour | High (after enzymatic pre-clean) |
| Mould and mildew | High |
| Fuel or chemical spills | Low |
| General mustiness | High |
Material and health risks
Ozone can deteriorate rubber seals, plastic trims, and electronics if treatment is mishandled or run for excessive durations. This is why controlled dosing matters. Consumer-grade ozone machines often operate at concentrations that are either too low to be effective or too high to be safe, which is why professional-grade equipment consistently produces better and safer outcomes than DIY units purchased online.
Improper use can cause respiratory irritation and damage to interior components, making professional handling the recommended approach for anyone unfamiliar with ozone generator operation.
If your car’s AC system is contributing to odours, understanding car AC smell causes is worth reading before you run ozone through the HVAC system.
Common mistakes and best practices for ozone car sanitising
Most failed ozone treatments come down to a handful of repeatable errors. Avoiding them is straightforward once you know what they are.
- Skipping the pre-clean. Ozone cannot oxidise physical debris. Running a generator over a dirty interior produces partial results at best and leaves residual odours that frustrate car owners into thinking ozone does not work.
- Improper sealing. Gaps around windows or doors allow ozone to escape, reducing concentration inside the cabin and extending the time needed for effective treatment.
- Running the generator too long. Controlled dosing and ventilation dictate treatment success. Longer runtimes increase material risk without proportional odour reduction.
- Skipping ventilation. Re-entering a vehicle before ozone has fully dissipated is a health risk. Always allow the full airing period regardless of how mild the smell seems.
- Not addressing the odour source. Ozone treats the symptom. If a wet floor mat, a mouldy seat cushion, or a pet-soiled carpet is still in the vehicle, the odour returns within days.
Pro Tip: After ventilation, place a small open container of activated charcoal or baking soda under each seat for 24 hours. These absorb any trace residual compounds and leave the interior genuinely neutral rather than just ozone-scented.
For ongoing freshness, maintaining your vehicle interior with regular vacuuming and prompt spill treatment between professional services dramatically reduces how often ozone treatment is needed.
Key takeaways
Ozone treatment eliminates car odours permanently by oxidising odour molecules, but it requires thorough pre-cleaning, controlled dosing, and strict ventilation to be safe and effective.
| Point | Details |
|---|---|
| Pre-clean before ozone | Vacuum, wipe, and treat stains before running the generator or results will be partial. |
| Control treatment duration | Run 30 minutes to 2 hours based on odour severity; longer runtimes risk material damage. |
| HVAC on recirculate | Distributes ozone through vents to reach hidden odour sources in the duct system. |
| Ventilate for 30 to 60 minutes minimum | Re-entering too soon causes respiratory irritation; allow full dissipation before use. |
| Multiple short sessions beat one long one | Repeat shorter cycles for severe odours rather than extending a single session. |
What I have learned from treating Australian cars with ozone
After working on vehicles across the Sunshine Coast, the pattern I see most often is car owners who run ozone treatment without doing the hard work first. They buy a generator, seal the car, run it for an hour, and then wonder why the smell comes back within a week. The ozone worked. The preparation did not.
The other thing I notice is how much the Australian climate amplifies odour problems. Humidity from coastal air, heat from summer sun baking a sealed interior, and the frequency of beach trips with wet gear all create conditions where mould and mildew establish quickly. Ozone is genuinely one of the best tools available for these situations, but it needs to be respected. The gas is not benign. I have seen rubber door seals show premature cracking after repeated over-treatment by well-meaning owners using cheap consumer units.
My honest recommendation is this: if you are dealing with a mild musty smell, a properly prepared DIY treatment with a quality generator is entirely manageable. If you are dealing with heavy smoke, pet urine that has soaked into foam, or mould that has spread under carpets, bring in a professional. The pre-cleaning alone for those jobs requires extraction equipment and enzymatic treatment that most car owners do not have access to. Getting it right the first time costs less than fixing a damaged interior or repeating a failed treatment three times over.
— Isaac’s
Get professional ozone treatment on the Sunshine Coast
If the odour in your car is beyond a quick DIY fix, Isaac’s Pro Detailing brings professional-grade ozone sanitising directly to your home, workplace, or wherever your car is parked. Every treatment starts with a thorough interior clean using extraction equipment and enzymatic products before ozone is applied, which is the step most DIY attempts miss entirely. Whether you are a pet owner, a smoker looking to refresh a vehicle, or dealing with mould from Queensland’s coastal humidity, the mobile detailing service covers the full process safely and effectively. For a vehicle that smells genuinely clean rather than just treated, book a detail with Isaac’s Pro Detailing today.
FAQ
How long does ozone treatment take in a car?
Ozone treatment typically runs for 30 minutes to 2 hours depending on odour severity. Mild smells need around 30 minutes, while heavy smoke or pet odours may require up to two hours or multiple shorter sessions.
Is ozone treatment safe for car interiors?
Ozone is safe when used correctly with controlled durations and proper ventilation. Excessive runtimes can deteriorate rubber seals, plastic trims, and electronics, so following recommended treatment times is critical.
How long should I wait before getting back in after ozone treatment?
Wait at least 30 to 60 minutes after treatment ends, with all doors and windows open. For heavily treated vehicles, airing out for two to three hours is the safer standard.
Does ozone treatment remove cigarette smoke from a car?
Yes. Ozone is highly effective against cigarette smoke because it oxidises the odour compounds rather than masking them. Pre-cleaning the interior first produces significantly better results.
How often should I ozone treat my car?
Ozone treatment is not a routine maintenance step. Use it when a specific odour problem exists and cannot be resolved through standard cleaning. Overuse risks material damage to the interior.