
TL;DR:
- Living on the Sunshine Coast exposes vehicle interiors to harsh sun, salt air, and sand, accelerating damage. Proper cleaning, drying, and timely protector application are essential to maintain fabric longevity and resale value. Routine habits and professional services help overcome environmental challenges for lasting interior protection.
Living on the Sunshine Coast is brilliant, but your car’s interior pays the price. Between salty air drifting in from the beach, fine sand grinding into seat fibres, and Queensland’s relentless UV hammering through the windscreen, fabric interiors take a beating that most people don’t notice until the damage is already done. A spilled coffee here, a damp towel tossed on the back seat there, and suddenly you’re dealing with stains, fading, and odours that knock real money off your vehicle’s resale value. This guide walks you through every step of protecting your car’s fabrics properly, from the right tools to the smartest daily habits.
Table of Contents
- What you need to protect your car’s fabrics
- Prepping your interior: Cleaning for long-term protection
- How to apply fabric protectors for maximum effect
- The Sunshine Coast effect: Sun, sand, and environmental factors
- What to avoid: Common mistakes and misconceptions
- Why perfect protection is about habits, not just products
- Get pro-level fabric protection on the Sunshine Coast
- Frequently asked questions
Key Takeaways
| Point | Details |
|---|---|
| Read manuals first | Always check your vehicle’s owner’s manual for safe cleaning and protection methods. |
| Prevent moisture damage | Only clean with minimal moisture and allow for complete drying to avoid mould and odour. |
| Apply products correctly | Use light, even coats of fabric protector only on totally clean and dry seats for the best results. |
| Defend against sun | Proactively reduce sun and UV exposure with smart habits to prevent premature fabric fading. |
| Professional help pays off | Mobile detailing pros use specialised products and tailored routines to maximise fabric longevity. |
What you need to protect your car’s fabrics
Before you reach for any product, get the foundations right. The single biggest mistake vehicle owners make is grabbing whatever cleaner is under the kitchen sink and going to town on their upholstery. Some fabrics are extremely sensitive to alkaline cleaners, while others can handle a bit more aggression. As a starting point, check your owner’s manual for approved cleaning chemicals and any specific warnings before applying anything to your interior.
Once you know what your fabric can handle, gather the right gear. Here’s what you’ll need for a solid protection routine:
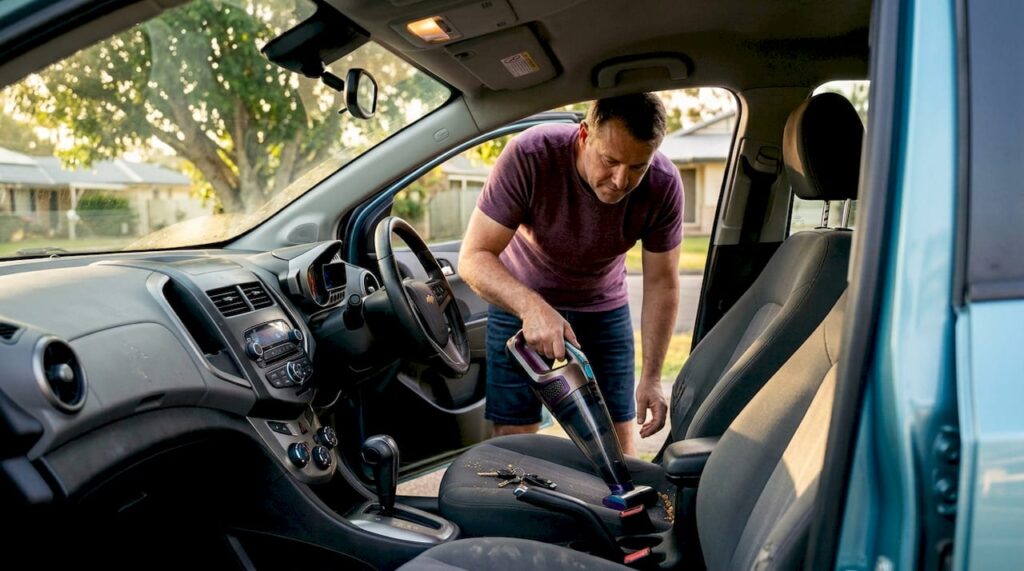
- A quality vacuum with a crevice tool and upholstery attachment
- Several clean microfibre cloths (at least four to six)
- A pH-neutral, fabric-safe interior cleaner
- A dedicated fabric protector spray (hydrophobic formula)
- A soft-bristle detailing brush for agitating fibres
- Masking tape to protect plastic trim during protector application
- A portable fan or access to sunlight for drying
Understanding your fabric type matters enormously. Different materials respond differently to cleaning agents and protectors.
| Fabric type | Common location | Key consideration |
|---|---|---|
| Woven polyester blend | Most modern seats | Responds well to hydrophobic sprays; avoid harsh solvents |
| Nylon upholstery | Older vehicles, commercial vans | Durable but prone to colour fading with bleach-based cleaners |
| Velour/microsuede | Premium interiors | Extremely sensitive to moisture; use minimal liquid |
| Canvas/heavy-duty cloth | 4WDs, utes | Tolerates more moisture but traps sand deeply |
| Recycled fabric blends | Newer eco models | Check manufacturer guidance; some repel water naturally |
Good car interior cleaning guide resources will always stress this point: knowing your material is not optional, it’s the difference between a fresh interior and a ruined one.
Pro Tip: Never use a steam cleaner without confirming your specific fabric and foam padding can handle the heat and moisture. Some seat foams break down with repeated steam exposure, leading to sagging and uneven support over time.
Prepping your interior: Cleaning for long-term protection
With the right gear assembled and your approach set, you’re ready to tackle the most important stage: cleaning. No protector in the world will perform well over dirt, grit, or residual moisture. Think of it like painting a wall without priming it first. The result always disappoints.
Follow this sequence for a thorough, safe clean:
- Remove all loose items and floor mats. Shake mats out and vacuum them separately.
- Vacuum the entire interior thoroughly. Work from top to bottom, using the crevice tool along seat seams and the base of the backrest where sand loves to hide.
- Spot-treat any stains first. Apply a small amount of fabric-safe cleaner to a microfibre cloth (not directly onto the seat) and work gently from the outside of the stain inward.
- Agitate lightly with a soft brush. This lifts embedded fibres and loosens stubborn grime without damaging the weave.
- Blot, don’t rub. Rubbing spreads the stain and pushes it deeper into the fabric.
- Use minimal moisture throughout. This is critical on the Sunshine Coast where humidity can slow drying and encourage mould growth.
- Allow the interior to dry completely before closing the vehicle. Leave doors open in a shaded area, or use a fan to circulate air.
The risk of oversaturation is real and often underestimated. Avoid oversaturation when cleaning fabric seats and carpet; use minimal moisture and blot or air-dry fully to reduce deeper grime penetration and mould or odour risk. This is especially relevant in coastal climates where ambient humidity is already high.
“Moisture trapped beneath fabric fibres is one of the leading causes of persistent odour in vehicle interiors. The problem is rarely visible until it’s significant, which is why thorough drying after every clean is non-negotiable.” — Professional detailing best practice guidance
Following cleaning best practices also means recognising that the Sunshine Coast’s warm, humid conditions create a faster mould growth window than cooler climates. What might take weeks to develop in Melbourne can appear in days here during summer.
Pro Tip: Always clean and allow 100% drying before any protector application. If you’re unsure whether the fabric is fully dry, wait another hour. Rushing this step wastes your protector and can seal in moisture that causes long-term damage.
How to apply fabric protectors for maximum effect
Preparation is done, and the fabrics are spotless — now you’re ready to lock in protection the right way. Fabric protectors work by coating individual fibres with a hydrophobic (water-repelling) layer that causes liquids to bead and roll off rather than soak in. But they only work as advertised when applied correctly.
Clean and fully dry the fabric before applying a fabric protector; trapped moisture will reduce protection and increase issues later. This is the single most cited reason DIY protector applications fail.
Here’s how to apply a hydrophobic fabric protector properly:
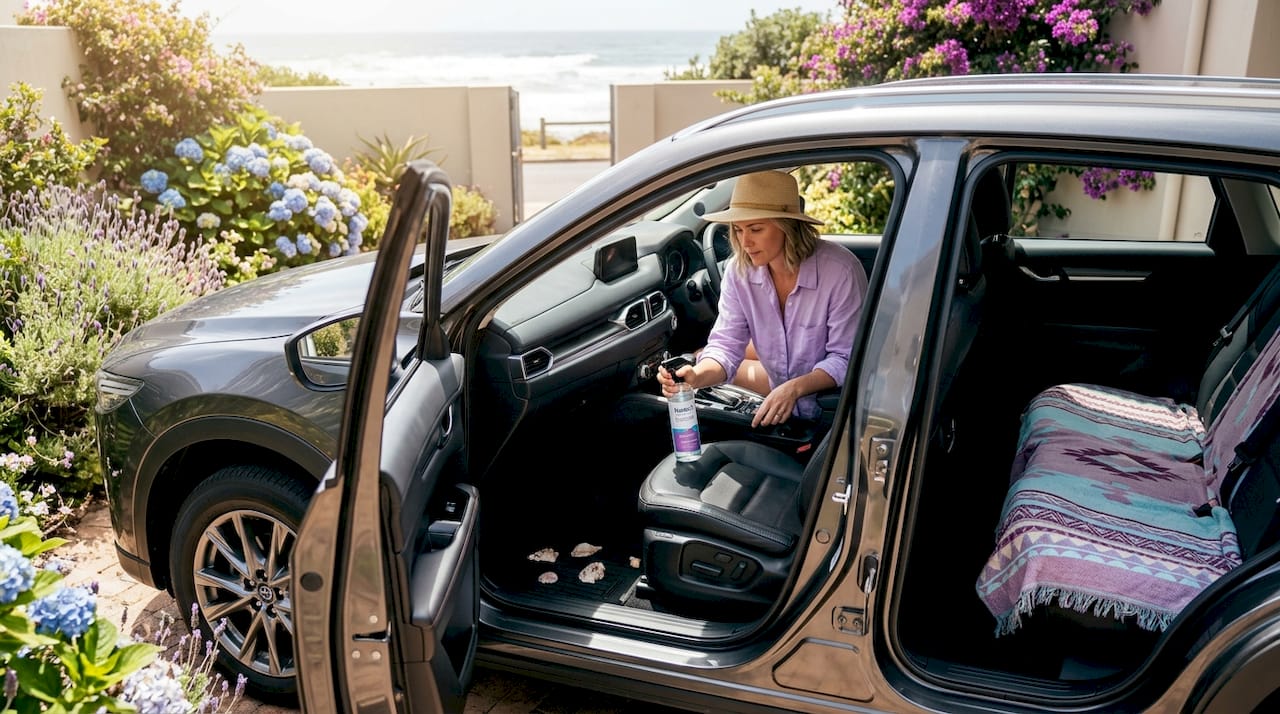
- Mask off all plastic, vinyl, and leather trim adjacent to the fabric using masking tape. Overspray on these surfaces can leave a hazy residue.
- Hold the spray nozzle 20 to 25 centimetres from the surface. Too close and you’ll oversaturate; too far and the product disperses unevenly.
- Apply a light, even first coat using slow, overlapping passes. Do not soak the fabric.
- Allow the first coat to dry for the time specified on the product label (usually 20 to 30 minutes).
- Apply a second light coat for added durability, particularly on high-contact areas like the driver’s seat and armrests.
- Allow full curing time before using the vehicle. Most products recommend 4 to 6 hours minimum.
Apply a light, even coat, do not saturate or overspray, optionally add a second coat, and allow proper drying time between coats for best results.
Here’s a quick comparison of DIY versus professional application to help you decide which route suits your needs:
| Factor | DIY spray application | Professional application |
|---|---|---|
| Product quality | Consumer-grade, widely available | Commercial-grade, longer-lasting |
| Application precision | Variable; relies on technique | Consistent, even coverage |
| Drying environment | Depends on conditions at home | Controlled, optimised for curing |
| Recoat timing | Often guessed | Precisely timed |
| Cost | Lower upfront | Higher but longer protection window |
| Risk of mistakes | Moderate to high | Very low |
Common pitfalls to avoid during application:
- Overspray onto non-fabric surfaces, which leaves a white haze on plastic trim
- Applying too much product in one coat, which can stiffen fabric and reduce breathability
- Skipping the second coat on high-wear areas where a single application wears off quickly
- Ignoring recoat intervals, which prevents proper bonding between layers
- Not checking the cleaning solutions compatibility with your specific fabric before application
Pro Tip: On warm Sunshine Coast days, a light application followed by 20 minutes of sun exposure (with doors open) can dramatically speed up curing. Just avoid direct sunlight during application itself, as it can cause the product to dry unevenly before it bonds properly.
The Sunshine Coast effect: Sun, sand, and environmental factors
Fabric protectors are only part of the story; long-term results depend on defending against local threats like sun and sand. Sunshine Coast drivers face a combination of environmental stressors that simply don’t exist at the same intensity in most other Australian cities.
Here’s how the main local threats stack up against your interior fabrics:
| Environmental factor | Impact on fabric | Risk level |
|---|---|---|
| UV radiation | Fading, fibre breakdown, brittleness | Very high |
| Fine beach sand | Abrasion, fibre cutting, embedded grit | High |
| Salt air | Corrosion of metal fittings, fibre degradation | Moderate to high |
| Humidity and moisture | Mould, mildew, persistent odour | High |
| Heat cycling | Expansion and contraction weakens fibres | High |
UV and environmental exposure are major drivers of interior fabric degradation, so consider sun exposure control as a core part of your protection plan, not an afterthought.
Practical daily habits that make a significant difference:
- Park in shade wherever possible, particularly during the midday and early afternoon hours when UV intensity peaks
- Use a quality windscreen sunshade every time the car is parked in direct sun
- Vacuum sand out promptly after beach trips rather than letting it grind into fibres over days
- Leave windows cracked in shaded parking to reduce interior heat build-up
- Wipe down surfaces with a dry microfibre cloth after rainy or humid days to remove salt residue
- Consider window tinting on rear and side windows to reduce UV penetration, within legal limits
The protecting vehicle interiors conversation always comes back to consistency. Doing these things once is helpful. Doing them as routine is transformative.
Pro Tip: Rotate your parking positions if you use the same spot daily. Consistent sun exposure from one direction fades one side of your interior faster than the other, creating an uneven, worn appearance that’s difficult to reverse.
What to avoid: Common mistakes and misconceptions
Armed with strategies, it’s just as important to know what not to do. Here are pitfalls even experienced owners miss.
Common mistakes that undo good work:
- Using steam on unsuitable materials. Steam is powerful but not universally safe. Steam cleaning can be risky for some interior materials; always confirm suitability for your specific fabric and foam padding before proceeding.
- Applying protector over damp or dirty fabric. This seals in the problem rather than solving it.
- Over-applying protector thinking more is better. Excess product sits on the surface, attracts dust, and can make fabric feel stiff and unpleasant.
- Relying on seat covers as a complete solution. Covers protect the surface beneath them only if that surface is also clean and dry. Moisture trapped under a cover creates perfect mould conditions.
- Skipping sun precautions because the car “looks fine.” Fading is cumulative and often invisible until it’s severe.
- Using household cleaning products not designed for automotive fabrics, which can strip protective coatings or leave residue that attracts more dirt.
“The most common error we see is people applying a protector spray as a shortcut, skipping the cleaning and drying steps entirely. The product can’t bond properly to a dirty or damp surface, and the protection window is dramatically shortened as a result.” — Detailing industry guidance
For families especially, the detailing steps for families approach recognises that real-world vehicles carry crumbs, wet swimmers, sports gear, and pets. The solution isn’t to avoid using your car. It’s to build a quick, consistent response routine so small issues never become big ones.
The nuance worth understanding is that no single product, habit, or technique is enough on its own. Lasting protection comes from combining the right chemicals, applied correctly, with smart environmental awareness and a consistent maintenance rhythm.
Why perfect protection is about habits, not just products
Here’s an uncomfortable truth from years of detailing vehicles across the Sunshine Coast: the cars that stay in the best condition long-term are rarely the ones with the most expensive protectors. They belong to owners who have developed a simple, consistent routine and actually stick to it.
The detailing industry sometimes oversells the idea that a single application of a premium product will protect your interior for years. In a controlled environment, maybe. But in a coastal Queensland climate with daily UV exposure, high humidity, regular beach trips, and kids in the back seat, no spray lasts as long as the label suggests. The pro interior maintenance tips that actually work are the boring ones: vacuum weekly, dry thoroughly after moisture exposure, reapply protector every three to four months, and deal with spills immediately rather than letting them set.
The contrarian point worth making is this: “set-and-forget” protection is a myth for Sunshine Coast climates. The environment here is simply too aggressive for any product to compensate for neglect. What mobile detailing professionals see consistently is that owners who treat their interior like it needs ongoing attention always outperform those who treat it like a one-time project.
Develop a weekly five-minute routine: a quick vacuum, a visual check for spills or moisture, and a wipe-down with a dry microfibre cloth. That habit alone, done consistently, will do more for your interior’s longevity than any single premium product applied once and forgotten.

Get pro-level fabric protection on the Sunshine Coast
Ready to take your car interior’s protection to the next level? Sometimes the most time-efficient and cost-effective choice is letting a professional handle the hard work properly the first time.

At Isaac’s Pro Detailing Sunshine Coast, we follow every evidence-backed step in this guide using commercial-grade equipment and products that simply aren’t available off the shelf. Our mobile car detailing workflow means we come to your home, workplace, or wherever suits you best, so there’s no disruption to your day. Whether you’re dealing with stubborn stains, persistent odours, or a premium interior that deserves careful handling, our team brings the expertise to protect your investment properly. Explore our full car interior cleaning guide or check out our complete detailing service menu to find the right package for your vehicle and budget.
Frequently asked questions
How long should you wait after cleaning before applying fabric protector?
All fabric should be absolutely dry, usually around 4 to 8 hours or longer if humid, before protector application. Trapped moisture will reduce protection effectiveness and can create conditions for mould growth beneath the treated surface.
Can you use steam on all car seats for deep cleaning?
No. Steam cleaning can be risky for some interior materials; always check your owner’s manual to confirm the fabric and foam padding are suitable before using steam.
What are the top ways to prevent your fabric seats from fading?
Park in shade, use a windscreen sunshade, and apply a UV-resistant fabric protector regularly. UV exposure is one of the primary drivers of interior fabric degradation, so reducing sun exposure directly extends the life of your upholstery.
Will a fabric protector stop all stains and spills?
No protection is absolute. Surface protection products create a barrier that makes cleanup easier and slows staining, but they cannot prevent every mark, particularly from substances left to sit for extended periods.
Should I use fabric protectors if I have seat covers?
Yes. Seat covers help, but the original seat beneath still needs to be clean and dry. Even with covers fitted, interiors require cleanliness and proper drying to avoid mould developing under the cover where you can’t see it.