
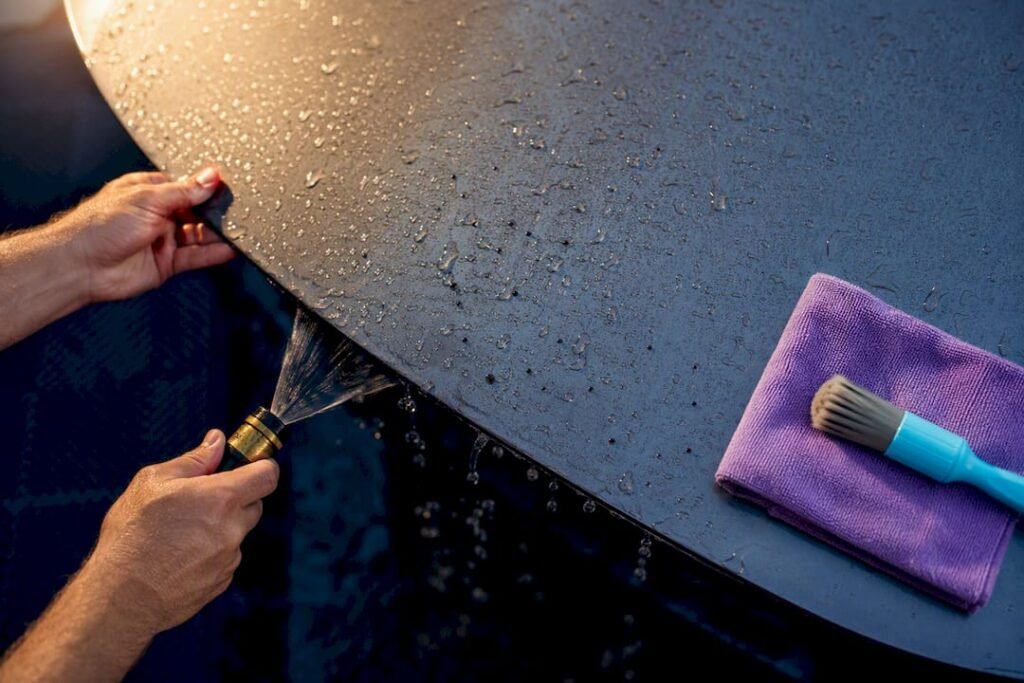
The safest way to handle bug splatter removal on a car is to pre-soak the area with water, apply a pH-neutral bug remover for a short dwell time recommended by professionals, lift the softened residue with a clean microfibre using straight-line pulls, then rinse and wash. Never dry-wipe or scrub, and skip household glass cleaners or ammonia-based sprays. Test any product on a small hidden patch first, especially near plastics, trim, or headlights.
TL;DR:
- Water-based bug removers that are coating-safe should be your default choice for fresh splatter, especially on protected surfaces like ceramic coatings.
- For splatter baked onto the paint for more than 24 hours, a longer pre-soak and stronger chemical agents are necessary, with clay bars as a final remedy for embedded contamination.
- Dull patches, craters, or persistent staining after cleaning usually indicate actual paint etching that requires machine polishing, not chemical cleaning.
- Pre-treatment with wax, sealants, or ceramic coatings can slow bug attachment and make removal easier, but prompt removal remains essential to prevent damage.
- When residue resists chemical removal or shows signs of iron or tar contamination, switching to solvent-based removers or clay bars prevents damage that DIY cleaning can’t fix.
Table of Contents
- What you need for bug splatter removal on car paint
- How do you remove bug splatter based on how old it is?
- When do you need to escalate beyond a normal wash?
- Can you prevent bug splatter damage before it happens?
- How do you clean bugs off a car without causing scratches?
- When should you call a professional detailer?
- Book a mobile detail when DIY hits its limit
- Sources
- FAQ
What you need for bug splatter removal on car paint
Most DIY jobs fail not because of poor technique but because of the wrong product sitting in the bucket. Insect residue is a mix of proteins, acids, and exoskeleton fragments that behaves differently depending on how long it has baked in the sun, so your kit needs some flexibility built in.
Here’s what actually earns its place in the boot or garage shelf:
- A spray bottle of plain water for pre-soaking before you touch the paint
- Two to three clean microfibre towels, kept separate from ones used for wheels or interiors
- A bug sponge or open-weave wash mitt designed to trap grit instead of grinding it into the surface
- A bucket with a grit guard, plus a pH-neutral car shampoo for the finishing wash
- A dedicated bug remover, ideally water-based for fresh splatter and an enzyme or mild solvent formula for anything a day or two old
- A clay bar kit and an iron remover for embedded contamination that a wash alone won’t shift
Choosing the right cleaner matters more than people expect. Water-based, coating-safe bug removers handle fresh splatter without stripping wax or ceramic protection, and they should be your default. Step up to enzyme or solvent-based products only when the water-based option leaves residue behind, and always check the label for “coating safe” wording if your car has a ceramic coating or sealant on it. Plastics, chrome trim, and headlight lenses are more sensitive than clear-coated paint, so run a test patch in an inconspicuous spot before treating the whole panel. A product that’s perfectly fine on your bonnet can haze a plastic bumper cover in seconds.
How do you remove bug splatter based on how old it is?
Timing changes everything here. Insect residue carries acidic compounds with a pH typically sitting between 4.5 and 6.5, and the longer that residue sits in heat or direct sun, the more it etches into the clear coat. A splat you clean off in the driveway tonight behaves nothing like one that’s been baking on the highway for two days. Match your approach to the age of the mess rather than reaching for the same routine every time.
Fresh splatter, 0 to 2 hours old:
- Mist the area generously with plain water and let it sit for 30 seconds to loosen surface residue.
- Wipe gently with a damp microfibre or bug sponge using straight pulls, not circles.
- Rinse the panel and move on. Fresh bugs rarely need chemical help at all.
Moderately aged splatter, 2 to 24 hours old:
- Pre-soak the panel with water for a minute to soften the outer layer.
- Spray a dedicated bug remover directly onto the residue and let it dwell for 60 to 90 seconds. This dwell window lines up with what professional detailing guides recommend for softening insect residue before any contact.
- Lift with a clean microfibre in straight lines, reloading with fresh water as needed.
- Rinse thoroughly, then run a full pH-neutral wash over the panel to clear any leftover chemical film.
Baked-on splatter, 24 to 48 hours or more:
- Pre-soak for several minutes. This longer pre-soak is standard advice for tougher, sun-baked residue, and it’s the step most people skip because it feels like wasted time.
- Apply a stronger bug remover or enzyme-based product and let it dwell for 2 to 3 minutes, keeping the surface wet the entire time.
- Lift gently, then repeat the dwell-and-lift cycle once more if residue remains.
- If the splatter still won’t budge after two attempts, stop. That’s your cue to move to clay bar or iron removal treatment, covered in the next section, rather than scrubbing harder.
Work in small sections, roughly one panel at a time, so chemicals never dry on the paint mid-job. A dried bug remover is worse than doing nothing, because now you’re trying to lift both the residue and a crusted layer of product. Turn your microfibre to a clean face every couple of wipes, and inspect the area after each pass under good light rather than assuming one wipe did the job.
Pro Tip: Warm, soapy water and a bug sponge will handle most fresh splatter on their own. Save the dedicated bug remover for anything that’s had time to bond, and you’ll use less product overall.
Finish every job, regardless of splatter age, with a complete pH-neutral wash. This neutralises any leftover chemical residue on the paint and stops it from continuing to react with the clear coat after you’ve packed the hose away. If the panel had wax or sealant on it before you started, plan to reapply protection once the paint is dry.

When do you need to escalate beyond a normal wash?
Some residue simply won’t lift with a bug remover and a microfibre, no matter how long you let it dwell. Knowing the difference between tar, iron contamination, and actual etching saves you from either wasting a Saturday scrubbing at something that needs different chemistry, or panicking over a stain that a proper wash would have handled.
- Iron contamination shows up as tiny orange-brown specks or a rusty shadow across the paint, usually worse near the wheel arches, and it comes from brake dust bonding to the clear coat rather than from insects at all.
- Tar feels sticky to the touch, sits proud of the surface as small black flecks, and typically collects along rocker panels and lower doors from road spray.
- True etching is different from both. It’s what’s left after you’ve cleaned the residue away and the paint underneath still shows a dull spot, a faint ring, or a shallow crater where the acid ate into the clear coat.
Each of these needs its own product. Solvent-based tar removers dissolve the asphalt binders that plain bug remover won’t touch. Iron removers use a chemical reaction, often changing colour from clear to purple or red on contact, to dissolve iron oxide particles before they can be wiped away. For contamination that’s bonded into the clear coat rather than sitting on top, a clay bar pulls embedded grit out using lubricant and light pressure, restoring a glass-smooth feel to the paint.
If you’ve cleared the residue and iron staining but a dull patch or visible etching remains, that’s a paint-depth problem, not a cleaning problem. No amount of extra product will fix it. At that point you’re looking at machine polishing to level the clear coat, which is a job better suited to a cut and polish process than another round of DIY chemicals.
Can you prevent bug splatter damage before it happens?
Prevention won’t stop bugs hitting your bonnet, but it changes how hard they stick and how much damage they do while they’re there. A well-protected surface buys you time between drives, which matters more than most people realise given how quickly heat and UV exposure accelerate etching on unprotected paint.
- Wax and sealants smooth the paint’s surface tension, so insect residue sits on top rather than gripping into microscopic pores. Reapply every 6 to 8 weeks for traditional wax, or every few months for synthetic sealants, depending on how much highway driving you do.
- Ceramic coatings and paint protection film go further, creating a harder, more chemical-resistant barrier that makes bug guts wipe away with far less effort. Neither is invincible. A coated panel still needs the same prompt-removal habit, just with a wider margin for error.
- Bug deflectors and front-end bras physically reduce impact on the bonnet and bumper during long trips, which is worth considering if you regularly drive rural roads at dusk when insect activity peaks.
- A quick-rinse kit in the boot, just a spray bottle and a microfibre, means you can knock off fresh splatter at a servo stop instead of letting it bake for another three hours.
Pro Tip: If you’re planning a long country drive, treat your bonnet and mirrors with a fresh coat of sealant the week before. It won’t stop the bugs, but it’ll cut your cleaning time in half when you get home.
How do you clean bugs off a car without causing scratches?
Technique matters as much as product choice, and this is where most swirl marks get put into paint that was otherwise fine. Straight-line pulls, not circles, are the standard for a reason: circular motions grind whatever grit is in your cloth around in the same spot instead of lifting it away.
Keep the surface wet throughout. A dried-out bug remover behaves like sandpaper once the liquid carrier evaporates, and dragging a cloth across that residue is the single most common way DIYers put fine scratches into paint they were trying to protect. If a section starts drying before you’ve finished, mist it again before continuing.
Cloth care matters more than people give it credit for. Fold your microfibre into quarters so you’ve got eight clean faces to rotate through, and switch faces the moment one picks up visible grime. Wash microfibres separately from other laundry, skip the fabric softener (it clogs the fibres), and never let one that’s touched wheels or tar anywhere near paintwork again.
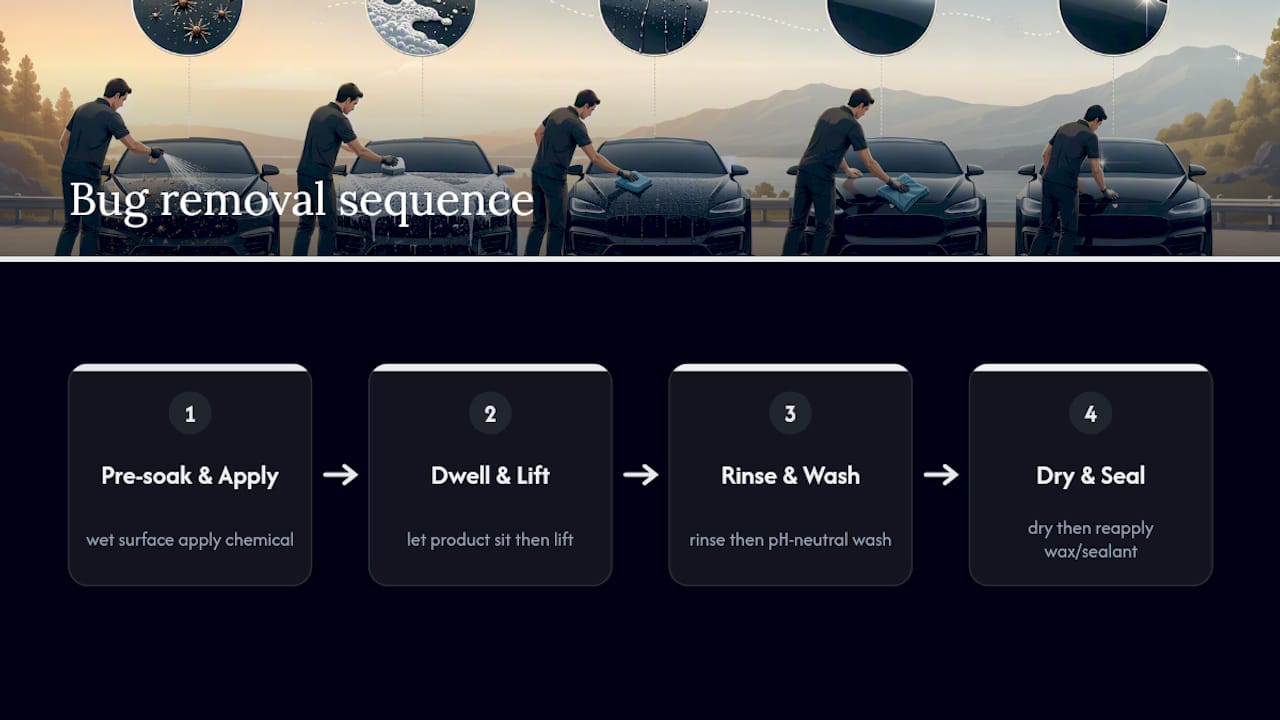
The full order, every time, looks like this: pre-soak, apply chemical, dwell, lift, rinse, pH-neutral wash, dry, then reapply wax or sealant if the panel needs it. Skipping the final wash step is a common shortcut that leaves chemical film on the paint, which then attracts dust and looks patchy within days.
When should you call a professional detailer?
Some jobs are DIY-friendly right up until they aren’t. Wide-area etching across a bonnet, deep pitting you can feel with a fingernail, or a mix of tar and iron contamination across multiple panels are all signs that further scrubbing will do more harm than good. If you’re not confident reading paint thickness or judging how aggressive a polish needs to be, that’s a reasonable line to stop at too.
A mobile detailer brings machine correction, professional-grade iron removal, and coating application that go beyond what a bucket and microfibre can achieve, all delivered at your home or workplace rather than requiring a drop-off. Before booking anyone, ask what test patch process they use, whether their coatings carry a warranty, and what chemical and machine methods they’ll run on your specific paint. A proper mobile detailing workflow should always start with an inspection, not a straight jump to polishing.
— isaac’s
Book a mobile detail when DIY hits its limit
A mobile detailing service can be an alternative to a workshop drop-off when bug splatter has turned into etching or a coating needs restoring. Rather than booking a slot and losing your car for a day, the whole job can happen at your home, workplace, or wherever you’ve parked, with workshop-grade results and no hidden extras added to the invoice.

If a panel has gone past what a microfibre and bug remover can fix, the Deluxe Detail and Revival Detail packages cover cut and polish work to correct etching and restore clarity to the clear coat. For owners who want to stop this cycle altogether, the Ultimate Protection Package layers sealants and coatings that make future bug splatter wipe away in seconds instead of needing a 3 minute dwell and repeat lifts. Prices for the Deluxe and Revival Details run from $375 to $775 AUD depending on vehicle size and condition, while the Ultimate Protection Package sits between $1,500 and $2,200 AUD. If your paint already has a coating and you just want faster bug removal without stripping it, the Graphene spray sealant coating package, from $339 to $739 AUD, is worth a look. Get in touch to book a time that suits, or check current availability across the Sunshine Coast.
Sources
For readers who want the technical detail behind the dwell times and chemistry mentioned above, these are worth a closer look:
- How to remove bugs from your car
- Do dead bugs damage car paint? The sticky truth
- The best ways to clean bugs off your car
- How to remove bugs from your car (without wrecking the paint)
FAQ
Does WD-40 remove bugs from a car?
WD-40 can loosen bug residue, but it isn’t formulated for paint and can leave an oily film that attracts dust and interferes with wax or coatings. Stick to a pH-neutral, coating-safe bug remover instead.
How do I remove a heavy build-up of bug splatter from my car?
Pre-soak for the full 3 to 5 minutes recommended for tougher residue, apply a stronger bug remover or enzyme formula, and repeat the dwell-and-lift cycle rather than scrubbing harder. If residue persists after two attempts, move to a clay bar treatment.
Can I use Goo Gone to remove bugs from my car?
Goo Gone is a citrus-based solvent designed for adhesives, not automotive paint, and it can strip wax or haze certain plastics and trims. A dedicated automotive bug remover is the safer choice, and always test patch before applying anything unfamiliar to a visible panel.
Will Dawn dish soap remove bugs from a car?
Dish soap can cut through bug residue, but its high alkalinity strips wax, sealants, and ceramic coatings faster than a proper pH-neutral car shampoo. Use it only in an emergency, and reapply protection afterwards.
How much does professional bug splatter or etching removal cost?
Correction work at Isaac’s Pro Detailing Sunshine Coast falls under the Deluxe Detail and Revival Detail packages, priced from $375 to $775 AUD depending on the vehicle and extent of the damage.