
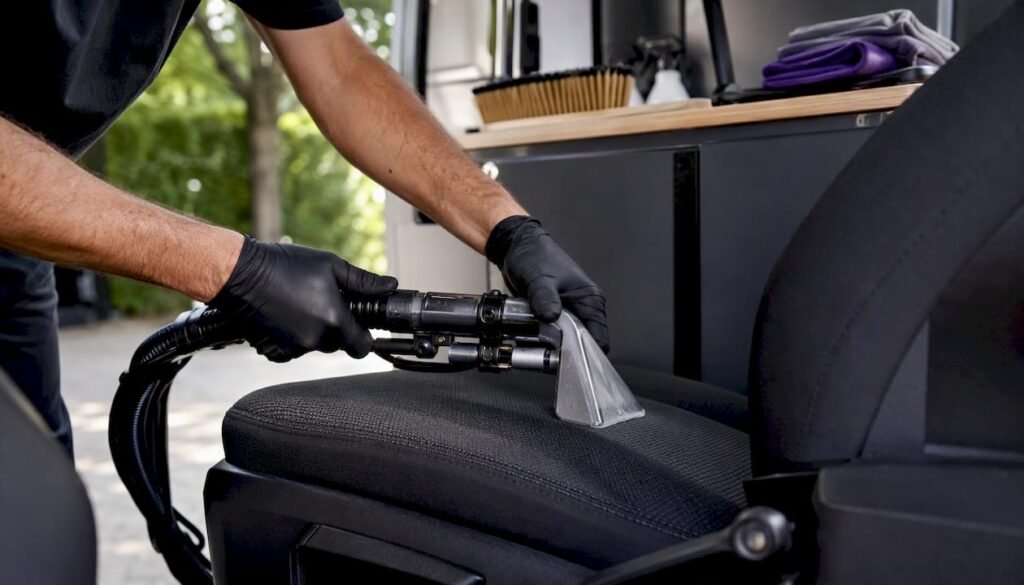
Professional seat extraction is the controlled process of injecting hot or warm water and targeted chemistry into automotive upholstery, then immediately recovering it with high-suction vacuum to lift embedded soil, stains, odours and allergens from the seat material. Surface cleaning — wiping, vacuuming, or a quick spray-and-wipe — cannot reach what has migrated into the weave, foam or backing. Extraction can.
Choose extraction over surface cleaning when you are dealing with:
- Embedded stains that have set into the fabric fibres (coffee, blood, grease, pet urine)
- Persistent odours that survive repeated surface treatments
- Allergen loads from pet dander, mould spores or heavy dust accumulation
- Heavy soiling from prolonged use, food, or work-related contamination
- Set-in grease or protein stains that require chemistry and agitation to break the bond
Before you touch a machine or a bottle of cleaner, do three things: identify the seat material, check whether the seat contains electrical components or SRS airbag modules, and perform a test patch on a discreet area. Document the seat’s condition with photos before you start.
Pro Tip: A two-minute pre-inspection saves you from a two-hour dispute. Photograph every existing stain, scuff and wear mark before extraction begins — it protects you and sets realistic expectations for the client.
Key takeaways
Professional seat extraction delivers results that surface cleaning cannot reach — but only when the right equipment, chemistry and drying method are matched to the seat material and soiling type.
| Point | Details |
|---|---|
| Inspect and test patch first | Photograph condition, identify material and electrical components, and test chemistry on a hidden area before treating visible surfaces. |
| Match equipment to the job | Dual-motor extractors recover significantly more moisture than single-motor units, shortening drying time and reducing mould risk. |
| Drying is non-negotiable | Active airflow and a final dry-extraction pass are required; a damp seat in a warm climate can develop mould within 48 hours. |
| SRS and electrical seats need OEM guidance | Queensland’s Vehicle Standards Instruction requires contacting the manufacturer before removing seats with SRS airbags; permanent removal requires certification. |
| Isaac’s Pro Detailing covers the full process | Mobile extraction across the Sunshine Coast with pre-inspection, documented results, eco-friendly chemistry and a rework policy. |
Table of Contents
- What does a professional seat extraction workflow look like?
- What equipment do professionals use for seat extraction?
- How to extract car seats like a professional, step by step
- How does seat material change your extraction approach?
- How do you dry seats properly and prevent mould?
- How do you fix common seat extraction problems?
- What are the WHS and OEM rules for seat removal in Australia?
- When should you call a professional for seat extraction?
- How Isaac’s Pro Detailing performs seat extraction on a mobile job
- Why DIY extraction often falls short — a pro’s perspective
- Book professional seat extraction on the Sunshine Coast
- Sources
What does a professional seat extraction workflow look like?
A professional does not pick up a wand and start spraying. The job follows a deliberate sequence, and skipping any step tends to create a new problem while solving the original one. Here is the end-to-end process that experienced detailers follow:
- Inspect — Identify seat material, soiling type, electrical components, SRS modules and existing damage. Photograph everything.
- Prepare — Ventilate the vehicle, set up PPE, protect surrounding trim and electronics, remove loose debris and pet hair with a dry vacuum and rubber brush.
- Test patch — Apply your chosen chemistry to a hidden area (under the seat bolster or rear face), agitate lightly, extract, and check for colour change, shrinkage or surface damage. Wait two minutes before proceeding.
- Pre-treat — Apply the appropriate cleaner to the soiled area. Allow the correct dwell time for the product and soil type — typically 1–3 minutes for light soiling, up to 5 minutes for heavy protein or grease stains.
- Agitate — Work the product into the fabric with a soft brush, upholstery pad or drill brush (on low speed, with caution). Agitation breaks the bond between soil and fibre.
- Extract and rinse — Make overlapping passes with the extraction wand, then follow with a clean-water rinse pass to remove chemistry residue.
- Repeat as needed — Heavily soiled seats rarely come clean in one pass. Repeat the pre-treat/agitate/extract loop until results plateau or the target is reached.
- Controlled drying — Use blowers, heated air, dehumidifiers or dual-motor extraction to bring moisture down before the vehicle is returned.
- Final inspection — Check by touch, smell and sight. Document the result with photos and note any areas requiring follow-up.
For a typical mid-sized car with moderately soiled cloth seats, budget 45–90 minutes per seat including drying time on a mobile job. Heavily contaminated seats or leather requiring careful moisture management will take longer. A mobile setup also requires time for machine priming, water management and pack-down — factor in 20–30 minutes of site setup and teardown on top of the seat work itself.
Pro Tip: Add a specialised odour-treatment step between extraction and drying if the client reports persistent smells. Enzyme treatments applied after the final extraction pass and before drying are far more effective than masking sprays applied at the end.
What equipment do professionals use for seat extraction?
Getting professional results from extraction depends more on machine capability than on technique alone. Here is what matters and why.
Extractor types
Portable spotter extractors are compact, single-motor units designed for targeted work on upholstery and small areas. The Mytee Lite 8070 is a well-known example: it carries an on-board heater and compact tanks that make heated spot extraction practical for automotive upholstery jobs. Heated solution improves grease and protein removal noticeably, but it also increases evaporation rate — balance temperature with immediate extraction to avoid heat-related fabric stress.
Garage-grade dual-motor extractors step up significantly in suction and tank capacity. The Kerrick VE366F, for example, runs dual 1000 W motors and includes an integrated blower port.
Key specs to evaluate
| Spec | What it means for the job |
|---|---|
| Water lift (inches/kPa) | Higher lift = stronger suction through the wand; critical for pulling moisture out of thick foam |
| Airflow (CFM/L/s) | Determines how fast the machine moves air across the surface; affects drying speed |
| Pump PSI | Controls solution injection pressure; too low = poor penetration, too high = over-wetting |
| Tank capacity (solution/recovery) | Larger tanks reduce refill stops on multi-seat jobs |
| Motor configuration | Dual-motor systems outperform single-motor units on moisture recovery |
Accessories and chemicals
Upholstery-specific tools matter. A narrow upholstery wand with an adjustable head lets you work into seat bolsters and seams without flooding the surrounding area. Soft natural-bristle brushes are safe on most fabrics; drill brushes on low speed work for heavily soiled cloth but need a careful hand on anything delicate. Microfibre cloths handle post-extraction blotting and final wipe-downs.
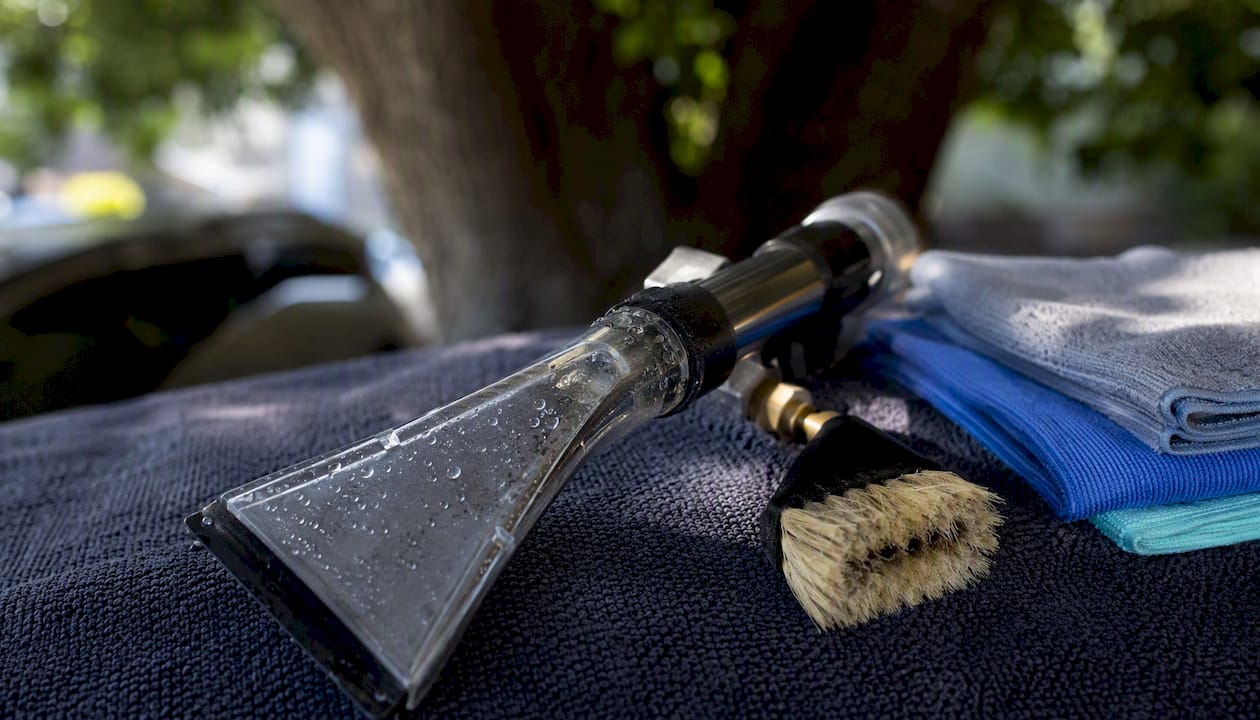
For chemistry, the choice between RTU (ready-to-use) and concentrate depends on job volume. Labocosmetica TEXIA is a low-foam, residue-free RTU fabric cleaner formulated for extractor compatibility and faster drying — a practical choice for mobile work where rework time is expensive. For a structured two-step approach, the Labocosmetica 2pH system uses GLICO followed by DUCTILE, with dry-vac steps between applications and a final injection-extraction rinse to lift soils effectively. Enzyme-based deodorisers handle odour at the source rather than masking it.
Australian power note: Most professional extractors run on 240 V / 10 A or 15 A circuits. On mobile jobs, confirm the client’s power supply before arrival or carry a generator rated to handle your machine’s combined motor load. Dual-motor units often require a 15 A outlet. Water disposal from recovery tanks must comply with local council requirements — grey water from extraction should not be discharged into stormwater drains.
How to extract car seats like a professional, step by step
This is where the workflow detail lives. Each step has a decision point — know what to look for before moving on.
Preparation
- Park the vehicle in shade or a covered area. Direct sun heats the seat surface and accelerates drying before extraction is complete, which can cause watermarks and residue.
- Put on PPE: nitrile gloves, safety glasses and, if working with enzyme or solvent products, a P2 respirator. For practical cleaning and safety guidance on workshop tasks and safe chemical handling when working on vehicles, see safe steps and ceramic protection.
- Open all doors and windows. Ventilation is not optional — chemical vapours accumulate quickly in a closed cabin.
- Protect electronics: cover the seat’s wiring harness connectors with plastic bags secured with tape. If the seat has a heated element or SRS module, do not proceed with removal until you have checked OEM documentation.
- Dry-vacuum the entire seat thoroughly. Remove loose debris, crumbs and surface dust before any liquid is introduced. For pet hair, a rubber-bristle brush or pet hair removal tool works better than vacuum alone.
Test patch protocol
Pick the most discreet area available — the rear face of the backrest or the underside of a bolster. Apply a small amount of your chosen cleaner, agitate lightly with a soft brush, extract, and wait two minutes. Look for:
- Colour change or dye bleed
- Fabric distortion or pile damage
- Residue or watermark formation
If any of those appear, switch chemistry or method before treating the visible surfaces. Photograph the test patch result.
Pre-treating and agitation
Apply the pre-treatment product evenly across the soiled area. Do not flood the fabric — the goal is saturation of the fibres, not the foam beneath. Allow dwell time as directed by the product (typically 1–3 minutes). Then agitate:
- Soft brush (manual): Safe on all fabric types. Use circular or back-and-forth strokes with light pressure.
- Upholstery pad: Good for larger flat surfaces like seat bases.
- Drill brush: Effective on heavily soiled cloth but use only on low speed and avoid on microsuede, alcantara-type fabrics or any material showing signs of wear.
Extraction technique
Hold the wand at a low angle (roughly 30–45 degrees to the surface). Make slow, overlapping passes — each pass should overlap the previous by about half the wand width. Work in one direction first, then cross-hatch if needed. Slow passes recover more moisture than fast ones.
Follow the extraction pass with a clean-water rinse pass to flush chemistry residue. Residue left in the fabric attracts soil and causes rapid re-soiling after the job.
Repeat loop and documentation
Heavily soiled seats need multiple cycles. After each extraction pass, assess the result: is the water running cleaner? Is the stain lighter? If progress has plateaued after three passes, the remaining discolouration may be in the foam or backing rather than the surface fibre — at that point, more extraction is unlikely to help and risks over-wetting.
Photograph the result after each significant pass. This gives you a before/after record and helps the client understand what was achievable.
Safety checklist
- Electrical seats: Disconnect the seat’s wiring harness before any significant wetting. Cover connectors with waterproof bags.
- Heated elements: Avoid saturating the seat base where heating elements run. Use a damp rather than wet extraction technique in those zones.
- Airbags: If the seat contains an SRS side airbag, do not remove the seat without consulting OEM documentation first. Accidental deployment is a serious injury risk.
- Connectors: Label every connector before disconnection. A labelled connector takes seconds to reconnect correctly; an unlabelled one can take much longer and risks incorrect reassembly.
How does seat material change your extraction approach?
The single biggest mistake in upholstery extraction is treating every seat the same way. Material dictates chemistry, agitation intensity and how much moisture is acceptable.
| Material | Safe pH range | Agitation level | Moisture limit | Key caution |
|---|---|---|---|---|
| Cloth (woven) | 6–9 | Moderate | Moderate | Check for dye bleed; rinse thoroughly |
| Nylon | 6–8 | Moderate | Moderate | Prone to pilling with abrasive brushes |
| Polyester | 6–9 | Moderate | Moderate | Generally forgiving; test for colour fastness |
| Microsuede / alcantara-type | 6–7 | Low only | Low | No rotary pads; soft brush in one direction only |
| Leather | 5–7 (pH-neutral) | Very low | Minimal | No extraction saturation; condition after cleaning |
| Vinyl | 6–8 | Low | Low | Avoid high-temp steam; wipe rather than extract |
Cloth, nylon and polyester are the most forgiving. They tolerate moderate agitation and a reasonable amount of solution, but they still need a thorough rinse pass to prevent residue build-up. Nylon can pill if you use a stiff brush — stick to soft bristles or a pad.
Microsuede and alcantara-type fabrics are the most unforgiving. Limit wetting to the minimum needed, use only a soft brush in a single direction (never circular), and avoid rotary pads entirely. Over-agitation crushes the pile and leaves permanent marks.
Leather and vinyl need a different mindset entirely. As Dura-Seal’s guidance makes clear, leather requires vacuuming first, light agitation only, pH-neutral cleaners and conditioning after cleaning — never full extraction saturation. Leather absorbs moisture through its grain and can crack, stiffen or develop mould in the backing if over-wetted. Use a damp microfibre cloth and a leather-specific cleaner rather than running an extraction wand directly over the surface. Follow immediately with a leather conditioner.
Proprietary and treated fabrics (factory-applied fabric protection, OEM-specific blends) may react unpredictably to standard chemistry. When in doubt, contact the vehicle manufacturer or a specialist before proceeding.
Do not list — non-negotiable:
- No bleach or bleach-based products on any automotive fabric
- No high-temperature steam directly on leather or vinyl
- No abrasive brushes on microsuede, alcantara or worn fabric
- No alkaline cleaners above pH 10 on nylon or treated fabrics
- No extraction saturation on leather seats
How do you dry seats properly and prevent mould?
Drying is where many otherwise good extraction jobs go wrong. A seat that feels damp to the touch after the client drives away is a mould risk within 24–48 hours in warm, humid conditions — and the Sunshine Coast’s climate makes that window even shorter.
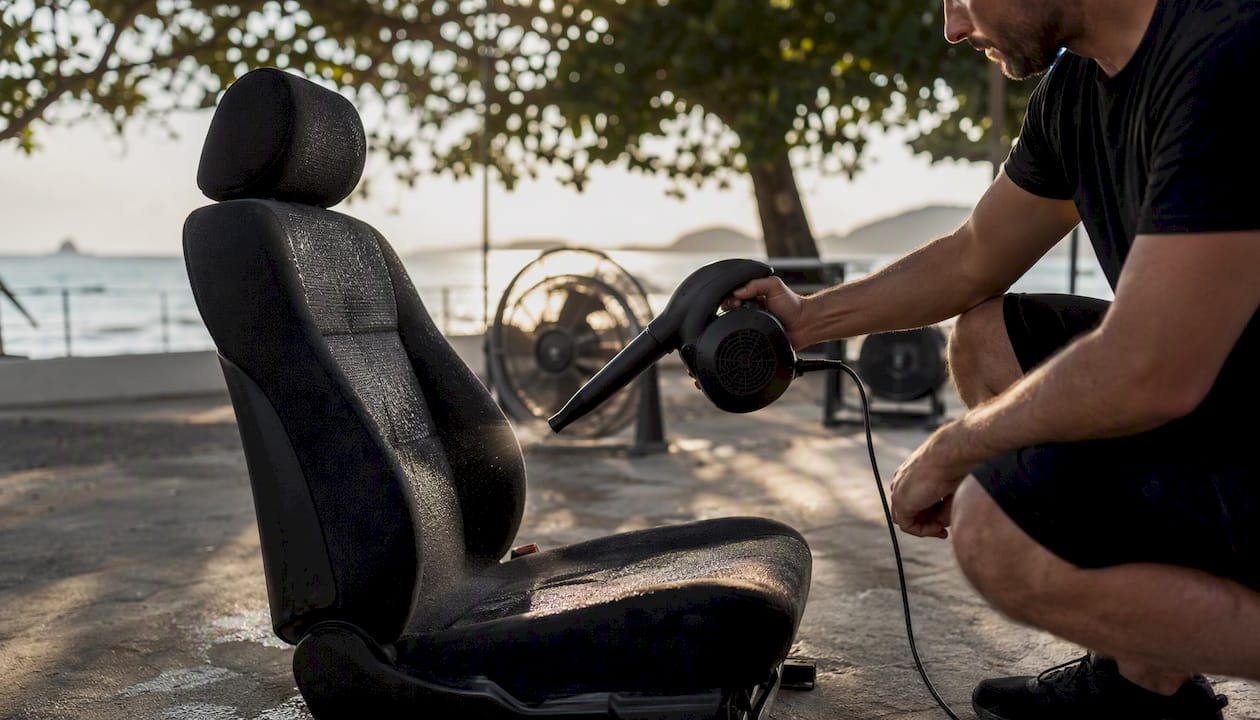
The goal is to get residual moisture as low as practically possible before the vehicle is returned.
Effective drying methods:
- Forced air blowers: Direct a high-velocity blower across the seat surface immediately after extraction. Position it to draw air through the fabric rather than just across the top.
- Heated blowers: Warm air accelerates evaporation without the risks of direct steam. Keep the temperature moderate — excessive heat can shrink fabric or stress adhesives.
- Dehumidifiers: In an enclosed space (garage or van), a dehumidifier running alongside blowers cuts drying time substantially.
- Vehicle ventilation: Open all doors and windows. Park in a shaded, well-ventilated area rather than a closed garage or direct sun.
- Final dry-extraction pass: After blowing for 10–15 minutes, run a dry extraction pass (no solution) over the seat to pull residual moisture from the surface layer.
Typical drying time estimates: cloth and polyester seats reach a safe moisture level in 1–3 hours with active airflow in moderate conditions. Microsuede takes longer due to its dense pile. Leather and vinyl dry faster on the surface but need time for any moisture that has penetrated the grain to migrate out — do not close the vehicle for at least 2 hours after cleaning leather.
Post-treatment steps:
- Apply a fabric protector (such as a fluorocarbon-based spray) once the seat is fully dry. This reduces future soiling and makes the next clean easier.
- For vinyl and leather, apply a UV protectant and conditioner after cleaning to restore suppleness and prevent cracking.
- Use an enzyme-based odour neutraliser rather than a fragrance masker if odour was part of the original complaint. Maskers wear off; enzymes break down the organic compounds causing the smell.
- For severe odours that survive extraction and enzyme treatment — particularly pet urine that has reached the foam — ozone treatment is the next step. This is a specialist service and requires the vehicle to be unoccupied during treatment.
Pro Tip: Run your hand across the seat after blowing. If it feels cool and slightly damp, it is still releasing moisture — keep the blower running. A seat that feels room temperature and dry to the touch is ready for protector application.
Final inspection checklist before handover:
- Touch: no damp patches, no sticky residue
- Smell: neutral or faintly fresh; no chemical or musty odour
- Visual: no watermarks, no tide lines, no colour variation between treated and untreated areas
- Seams and bolsters: no residue pooling in stitching channels
How do you fix common seat extraction problems?
Even a well-executed job throws up problems. Here is how professionals handle the most common ones.
Oil and grease stains: Pre-treat with a solvent-based spotter or a degreaser formulated for automotive upholstery. Allow a longer dwell time (3–5 minutes), agitate firmly with a soft brush, then extract. Repeat. Grease that has been heat-set (from a warm seat or sun exposure) may need two or three cycles.
Protein stains (blood, food, pet waste): Use a cold-water rinse first — hot water sets protein stains permanently. Apply an enzyme cleaner, allow full dwell time (5 minutes minimum), agitate gently and extract. Never use hot solution on a fresh protein stain.
Dye transfer: This is one of the harder problems. A dye-transfer remover or a mild solvent spotter applied carefully to the affected area, followed by immediate extraction, can lift transferred dye. Test on a hidden area first — the remover may affect the base fabric colour. If the transfer is severe, stop and consult a specialist.
Watermarks and tide lines: These form when dissolved minerals or chemistry residue dry at the edge of a wet area. Feather the extraction outward from the mark to blend the edge, then rinse the entire panel with clean water and extract again. Drying the whole panel evenly (rather than spot-drying) prevents new tide lines forming.
Burn marks: Extraction cannot reverse physical fibre damage. Light scorch marks can sometimes be reduced by careful trimming of damaged fibre tips with fine scissors, but deep burns require re-trimming or panel replacement.
Pet damage and embedded hair: Remove all pet hair before wetting — wet hair mats into fabric and is far harder to extract than dry hair. A rubber-bristle brush before extraction, then enzyme treatment for any urine contamination, then standard extraction.
When to stop: If the fabric surface shows distortion, pile damage or colour loss after two extraction cycles, continuing will worsen the damage. If odour persists after extraction and enzyme treatment, the source is likely in the foam or padding — at that point, ozone treatment or foam replacement is the appropriate path, not more extraction. Electrical component contamination (moisture in a seat control module or heating element) requires an auto electrician, not a detailer.
What are the WHS and OEM rules for seat removal in Australia?
Extraction does not always require seat removal, but when it does, Australian work health and safety requirements and OEM specifications apply. Getting this wrong creates legal exposure and, in the case of SRS-equipped seats, a genuine safety risk.
The nationally recognised competency AURVTT003 sets the performance criteria for removing and replacing interior trim in Australian automotive workplaces. It requires that trim removal follows workplace instructions and OEM specifications, that appropriate PPE and tools are selected, and that a final inspection and workplace documentation are completed. These are testable outcomes in automotive and marine trimming trades — not suggestions.
Queensland’s Vehicle Standards Instruction on seat removal draws a clear line between temporary and permanent removal. Temporary removal (for cleaning, for example) is generally permitted for quick-release seats. Permanent removal — where seating capacity is reduced — requires certification by an Approved Person and a Modification Plate. Misclassifying a permanent removal as temporary is a compliance failure.
SRS airbag seats: The same Vehicle Standards Instruction warns explicitly to contact the vehicle manufacturer before removing any seat that contains an SRS airbag module. Accidental deployment during removal can cause serious injury. Industry guidance is to isolate battery power and wait the manufacturer-specified discharge time before working near SRS components.
Safe handling practices:
- Label every electrical connector before disconnection — use masking tape and a marker
- Bag all hardware (bolts, clips, brackets) in labelled zip-lock bags
- Store removed trim panels flat or padded to prevent warping or cracking
- Follow OEM torque specifications when reinstalling seat bolts — under-torqued seat mounts are a safety issue
- If you are uncertain about any SRS or electrical component, contact the OEM or an Approved Person before proceeding
Important: The information above is general guidance. For any seat removal involving SRS components, electrical systems or permanent seating changes, confirm current requirements with the relevant state authority or a qualified automotive professional.
When should you call a professional for seat extraction?
Some jobs are straightforward enough for a capable car owner with the right equipment. Others are not — and misjudging the boundary costs more than a professional booking would have.
Call a professional when:
- The seat contains electrical heating elements or an SRS airbag module and you are not trained to work around them safely
- The foam or padding is saturated (you can feel moisture deep in the seat when you press it)
- Odour persists after two rounds of DIY extraction and enzyme treatment
- The carpet or padding beneath the seat is also soaked — extraction of the seat alone will not solve the problem
- The stain involves a substance that requires specialist chemistry (industrial chemicals, heavy dye transfer, mould)
- You do not have access to a proper extractor with adequate suction and a rinse function
What a professional service should include:
- Pre-inspection with documented condition report and photos
- Test patch before any chemistry is applied to visible surfaces
- Appropriate PPE and WHS-compliant work practices
- Controlled extraction with a machine capable of adequate suction and moisture recovery
- A drying plan — not just “leave the windows down”
- Before/after documentation
- A warranty or rework policy if results fall short of agreed expectations
Time and cost expectations for mobile extraction on the Sunshine Coast: A single-seat spot extraction on a small to mid-sized car typically takes 45–90 minutes on site. A full interior extraction covering all seats and carpets on a mid-sized vehicle is generally a half-day job. Pricing varies by vehicle size, soiling level and whether odour remediation is included — request an itemised quote that specifies what is included rather than accepting a flat price without scope. A reliable quote should follow a pre-inspection, not precede it.
How Isaac’s Pro Detailing performs seat extraction on a mobile job
Here is how a professional mobile extraction job runs from arrival to handover, using Isaac’s Pro Detailing’s field workflow as the example.
- Arrival and site setup: The van arrives with a fully self-contained mobile kit — extractor, blower, chemicals, PPE and water supply. The vehicle is positioned in shade or under cover where possible. Power is confirmed (240 V supply or generator).
- Pre-inspection: Every seat is checked for material type, soiling level, electrical components and existing damage. Condition is photographed. The client is walked through what is achievable and any limitations are noted upfront.
- Machine selection and priming: The extractor is selected and set up for the job — a spotter for targeted stain work, or a dual-motor unit for full-seat extraction. Solution temperature is set and the machine is primed.
- Test patch: A hidden area on each seat type is tested before any visible surface is treated. Results are checked and chemistry is confirmed or adjusted.
- Extraction passes: Pre-treatment is applied, dwell time is observed, agitation is performed with the appropriate brush for the material, and extraction passes are made with overlapping strokes. Rinse passes follow each extraction cycle.
- Repeat loop: The process repeats until results plateau or the agreed target is reached. Spot treatments for specific stains are applied as needed.
- Drying: A high-velocity blower is directed across each seat immediately after extraction. Where conditions allow, a dehumidifier runs in the cabin. A final dry-extraction pass pulls residual surface moisture.
- Final inspection and handover: Each seat is checked by touch, smell and sight. Before/after photos are reviewed with the client. Any follow-up recommendations (fabric protector reapplication schedule, ozone treatment for residual odour) are noted in writing.
Client-facing deliverables Isaac’s Pro Detailing provides:
- Documented pre-inspection with photos
- Clear scope and expected duration agreed before work starts
- Eco-friendly product use throughout
- Before/after photo record
- Post-job care recommendations in writing
- Rework policy if results fall short of what was agreed
For a broader look at how the mobile workflow is structured from setup to pack-down, the mobile car detailing workflow guide covers the full operational picture.
Why DIY extraction often falls short — a pro’s perspective
The most common DIY extraction failure is not bad technique. It is under-powered equipment combined with over-confidence in chemistry.
A domestic wet-dry vacuum or a hire-shop extractor simply does not generate the suction needed to recover adequate moisture from upholstery foam. The result is a seat that looks cleaner on the surface but is wetter underneath than before the job started. In a warm, humid climate like the Sunshine Coast, that moisture becomes mould within 48 hours. The seat smells worse after the DIY clean than it did before — and the owner cannot work out why.
The second most common mistake is skipping the test patch. It takes two minutes and prevents the kind of dye bleed or fabric distortion that turns a cleaning job into a replacement job. Professionals do it on every seat, every time, regardless of how familiar the material looks.
Wrong chemistry is the third failure point. Using a high-pH alkaline cleaner on nylon, or a solvent-based product on a fabric with factory protection, can strip the protection coating or cause irreversible colour change. The product that worked on your last car may not work on this one.
Professionals charge what they charge because the equipment cost is real (a dual-motor extractor is a significant investment), the procedural controls are non-negotiable, WHS compliance adds overhead, and a documented guarantee means they are accountable for the result. That accountability is what you are paying for as much as the clean itself.
Book professional seat extraction on the Sunshine Coast
Isaac’s Pro Detailing brings professional-grade seat extraction directly to your location across the Sunshine Coast — no drop-off, no waiting room, no guessing about what is included.
Every booking starts with a pre-inspection and test patch. The service covers cloth, nylon, polyester, microsuede, leather and vinyl seats, with on-site drying using high-velocity blowers and, where needed, ozone odour remediation for persistent smells. Eco-friendly, extractor-compatible chemistry is used throughout. You get before/after documentation and a clear rework policy — if the result falls short of what was agreed, it gets addressed.
Pricing is based on vehicle size and soiling level, so the quote follows the inspection rather than preceding it. View the full service and pricing menu or book directly through the Isaac’s Pro Detailing website to lock in a time that suits you.
Sources
The following references were used in preparing this guide. They cover Australian regulatory standards, training competencies, equipment specifications and chemistry systems.
Regulatory and training standards:
- AURVTT003 – Remove and replace interior trim components
- Permanent and temporary removal of seats from light motor vehicles (Vehicle Standards Instruction)
- Mytee Lite 8070 Spotter with Heat – PowerVac
- Labocosmetica 2pH Fabric Cleaning System | Alpha Details
- Care for fabric and leather — Dura-Seal protection
Equipment product pages (vendor-claimed specifications):
Chemistry and fabric care:
Isaac’s Pro Detailing resources: