
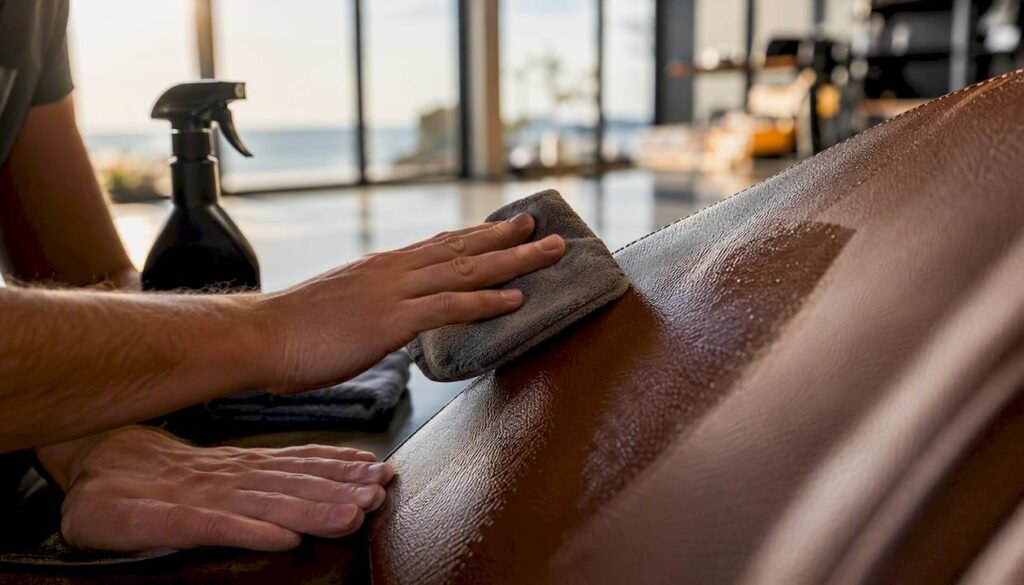
TL;DR:
- A proper leather care routine involves cleaning first, conditioning only when necessary, and sealing with a barrier protectant.
- Australian UV and heat accelerate leather aging, making prevention more cost-effective than restoration later.
The safest, most effective leather care workflow is three steps: clean first, condition only if the leather is dry or aged, then seal with a barrier protectant. Skip any step and you either trap dirt under the protectant or apply product to leather that can’t absorb it properly.
TL;DR: Wipe down with a pH-neutral cleaner, let it dry, then apply a protectant suited to your leather type.
Grab these three things right now:
- A clean microfibre cloth and a pH-neutral leather cleaner (or a diluted, leather-safe cleaner)
- A water-based conditioner if the leather feels stiff or looks dull
- A barrier protectant matched to your leather type (spray, cream or wipe)
Australian detailing experts consistently flag heat and UV as the primary accelerants of leather ageing in this country, which means prevention costs far less than restoration. Guardsman’s Protect & Preserve line, available nationally, is one example of a pH-balanced barrier product designed for finished leathers. And the pH-neutral cleaning standard matters because acidic or alkaline cleaners strip the topcoat that most modern leathers rely on for protection.
Pro Tip: Apply all products to the cloth first, never directly onto the leather. A pea-sized amount is usually enough for a 30 cm section.
Table of Contents
- What tools and products do you actually need?
- Deep-clean workflow for heavy soiling and car interiors
- How and when should you condition leather?
- How do you choose and apply the right leather protectant?
- What should you never use on leather?
- How does care differ for suede, nubuck, aniline and finished leather?
- How does Australia’s climate change your leather care routine?
- When should you DIY and when should you hire a professional?
- Key takeaways
- What professional detailers actually prioritise
- Isaac’s Pro Detailing brings professional leather care to your door
- Useful sources for further reading
What tools and products do you actually need?
Getting the kit right before you start saves you from mid-job improvisation that damages leather. Here’s what to have on hand.
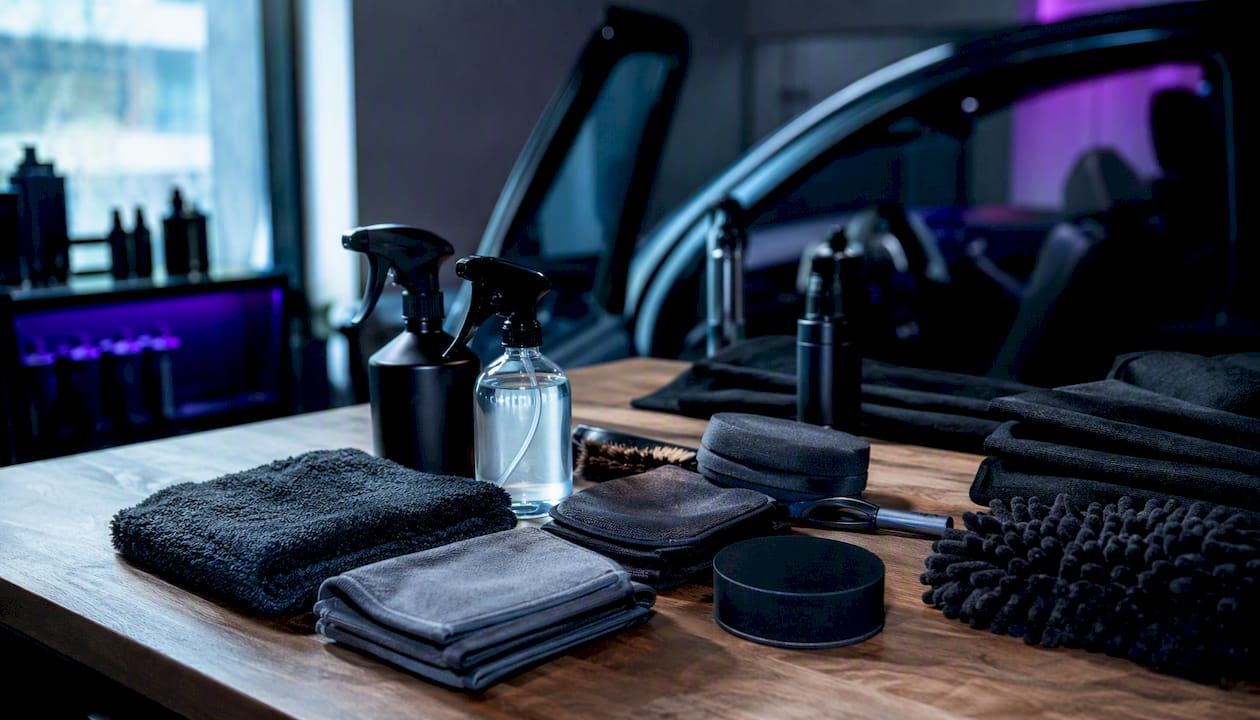
Core tools:
Product types to stock:
- pH-neutral leather cleaner: — Water-based, no solvents. Bowdens Own Leather Love is a locally available option formulated for automotive leather. Look for “pH-neutral” and “water-based” on the label.
- Barrier protectant: — Spray, cream or wipe format depending on your use case. Guardsman Protect & Preserve (finished leather, furniture and automotive), Waxit leather protectant (automotive and footwear), and Bowdens Own are all available through Australian auto and hardware retailers.
- Leather dye or repair filler: Advanced work only. If you’re filling cracks or re-colouring, footwear specialists and detailing suppliers stock repair kits, but this is a job where a patch test is non-negotiable.
Pro Tip: Never use the same cloth for cleaning and conditioning. Cross-contamination means you’re rubbing cleaner residue back into leather you’ve just conditioned.
| Product type | Best for | Application method | Suitable leather types | Reapply how often |
|---|---|---|---|---|
| pH-neutral spray cleaner | All routine cleaning | Spray onto cloth, wipe | Finished, semi-aniline, vinyl | Every clean |
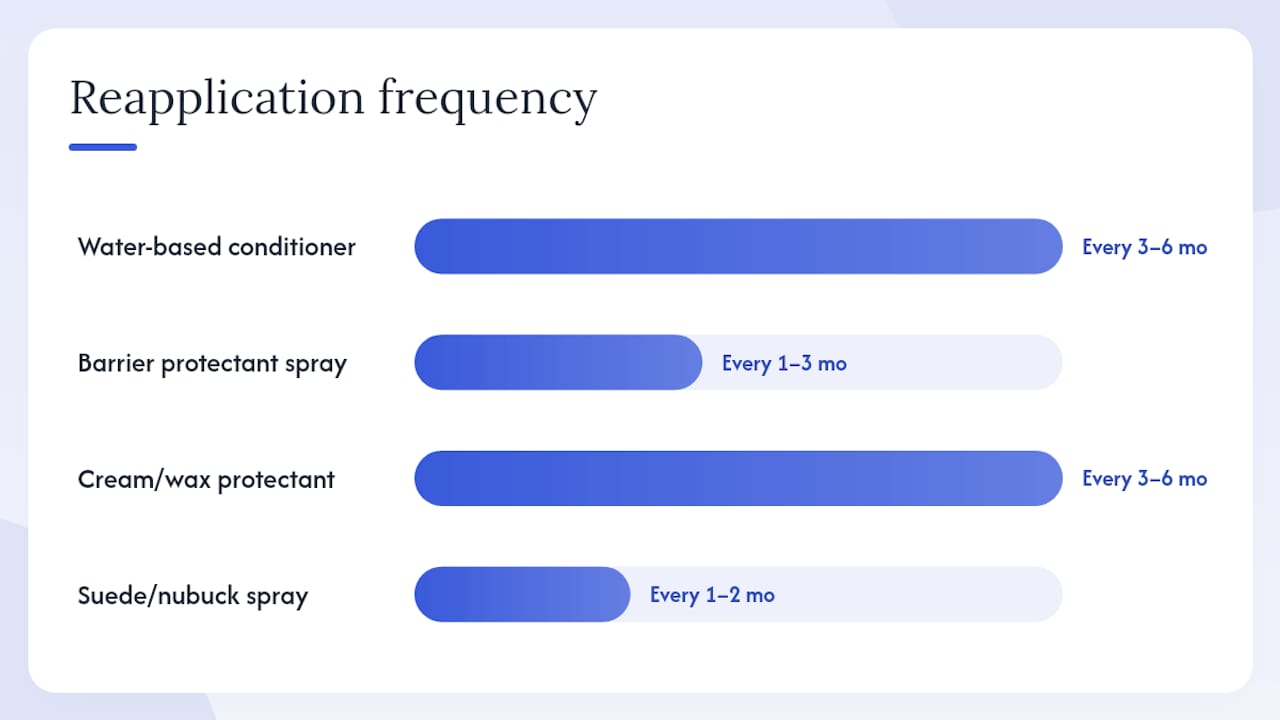
| Water-based conditioner | Dry, aged or cracking leather | Applicator pad, small amount | Finished, semi-aniline, aniline (test first) | Every 3–6 months |
| Barrier protectant spray | Quick water/stain repellence | Spray, buff off | Finished, semi-aniline, vinyl | Every 1–3 months |
| Cream/wax protectant | Older leather, restoration | Applicator pad, circular motion | Finished, semi-aniline | Every 3–6 months |
| Suede/nubuck spray | Nap leathers only | Hold 20 cm away, light coat | Suede, nubuck | Every 1–2 months |
Deep-clean workflow for heavy soiling and car interiors
Heavy soiling, ground-in grease or a car interior that hasn’t been touched in months needs a more deliberate approach. Rushing this step causes more damage than the dirt itself.
Before you start:
- Work in a shaded, ventilated space. Direct sunlight dries product too fast, leaving residue and streaks.
- Do a patch test on an inconspicuous area (under a seat bolster or inside a jacket hem) before applying any new product to the full surface.
- Disconnect seat heaters and check for perforated leather. Moisture can seep through perforations into the seat foam or heating elements, so use minimal product and extract thoroughly.
Step-by-step deep clean:
- Vacuum thoroughly. Use the crevice tool in every seam. For car seats, recline the seat fully to access the crease at the base.
- Pre-treat heavy soiling. Apply a slightly stronger concentration of pH-neutral cleaner to a soft brush (not directly to the leather). Work the brush gently in the soiled area before wiping.
- Agitate with a soft-bristled brush. Short, light strokes. Never scrub hard — the goal is to lift dirt to the surface, not push it deeper.
- Wipe and extract residue. Use a damp microfibre to lift the loosened soil. For car interiors with significant build-up, a wet/dry extraction machine with a leather-safe upholstery head removes far more than hand-wiping alone.
- Repeat on stubborn areas. Two light passes beat one heavy scrub every time.
- Final dry. Buff with a dry microfibre. Leave the doors open or the item in a ventilated area for at least 30 minutes before applying conditioner or protectant.
A note on perforated leather and seat heaters: Never saturate perforated leather. Apply product sparingly with a barely damp cloth and extract immediately. If your seats have integrated heaters or massage functions, keep all liquids well away from the side bolsters where wiring typically runs. When in doubt, a professional extraction service is safer than a DIY soak.
Equipment worth having for car interiors:
- Wet/dry extraction machine with upholstery nozzle
- Soft detailing brushes (boar’s hair or synthetic, never wire)
- Microfibre towels (not terry cloth, which can snag stitching)
For a full car interior cleaning workflow including equipment recommendations, Isaac’s Pro Detailing has a step-by-step guide covering Sunshine Coast conditions.
How and when should you condition leather?
Conditioning is the most misunderstood step in leather care. More product does not mean more protection.
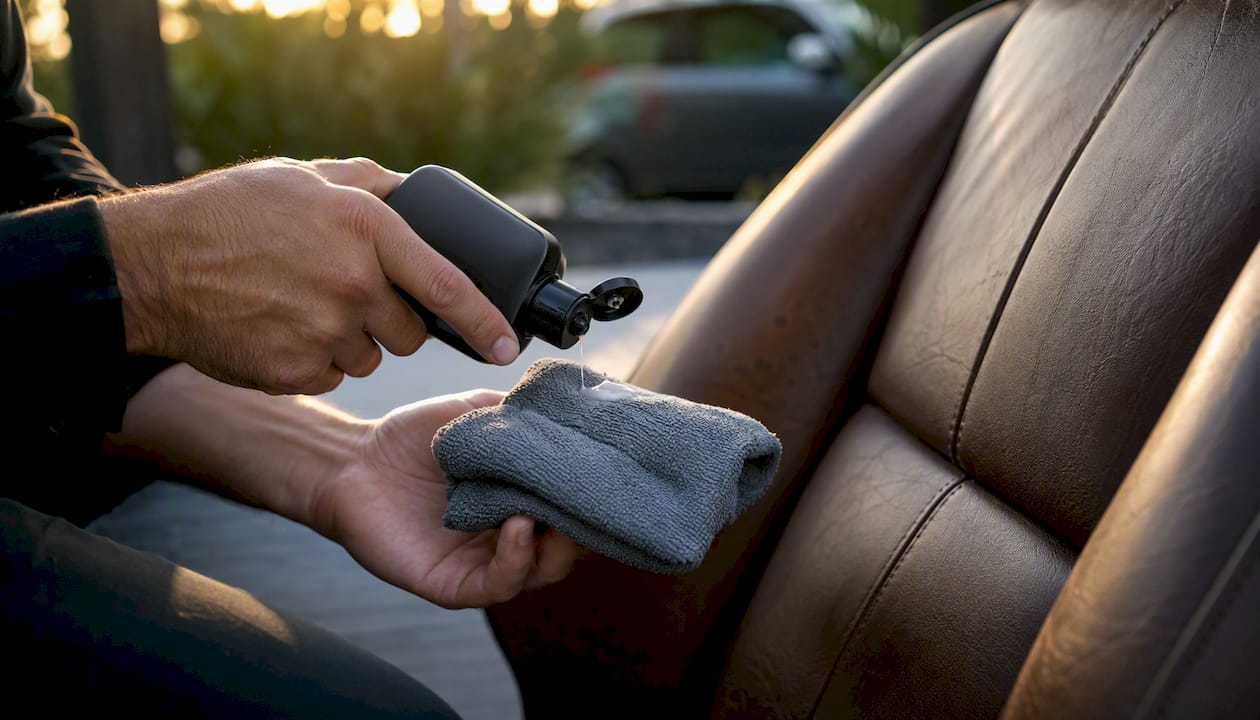
Condition leather only when it’s clean and dry, and only when it actually needs it: stiffness, a dull appearance, or slight surface cracking are the signals. New leather under roughly three years old generally doesn’t need heavy conditioning. COLOURLOCK Australia advises that new leather benefits more from a protective shield against dye transfer and friction, while older leather needs conditioning every three to six months to restore lost moisture.
Application method:
- Place a small amount (roughly the size of a 10-cent coin) onto a foam applicator pad or soft cloth.
- Work seam-to-seam across one panel at a time. Don’t rush across the whole surface at once.
- Use light, overlapping strokes. The goal is a thin, even layer.
- Remove any excess with a clean, dry microfibre immediately. Excess conditioner left on the surface attracts dust and creates a sticky layer that accelerates abrasion.
- For deeper penetration on aged leather, apply in the evening and leave overnight before buffing.
Frequency by item and climate:
- Car seats (Australian conditions): Every few months in temperate climates; more frequently in high-UV or low-humidity regions like inland Queensland or WA.
- Leather furniture: Consumer care guides recommend conditioning every 3–6 months, with more frequent attention for pieces in direct sun or air-conditioned rooms.
- Footwear: Every 1–2 months for regularly worn shoes; before and after any wet-weather exposure.
- Leather clothing: Twice a year, or after any significant rain exposure.
Do:
- Use a water-based conditioner for finished and semi-aniline leathers.
- Allow full drying time before applying a protectant on top.
- Test on a hidden area first, especially on light-coloured leathers — some conditioners cause temporary darkening.
Don’t:
- Apply conditioner to wet leather.
- Use cooking oils, olive oil or petroleum-based products as substitutes.
- Condition suede or nubuck with standard leather conditioner.
Pro Tip: Over-conditioning is a real problem. A sticky, greasy surface after conditioning means you’ve used too much. Wipe off the excess immediately and reduce the amount next time. Professionals apply small amounts and recommend regular light care rather than heavy, infrequent treatments.
How do you choose and apply the right leather protectant?
The protectant is the last line of defence, and the type you choose matters more than most people realise; explore high-quality options at the Diamondbrite Online Shop. A practical detailing workflow sequences it as: clean first, optional repel coating for longer protection, then a dye and friction blocker for high-contact areas.
Protectant types by use case:
- Spray protectants (e.g. Guardsman Protect & Preserve, Waxit leather spray): Fast application, good water and stain repellence, ideal for regular maintenance on finished leathers. Guardsman recommends cleaning and protecting leather 6–12 times a year for items in regular use.
- Cream/wax protectants: Better for older or drier leather where you want some nourishment alongside the barrier. Bowdens Own and similar Australian detailing brands offer cream-format options for automotive use.
- Wipes: Convenient for quick maintenance on footwear or small leather accessories. Less thorough than spray or cream but useful between full treatments.
Suitability by leather type:
| Leather type | Spray protectant | Cream protectant | Wipe | Notes |
|---|---|---|---|---|
| Finished (coated) | ✓ | ✓ | ✓ | Most common; products absorb well |
| Semi-aniline | ✓ | ✓ (light) | ✓ | Test first; some creams darken |
| Aniline (uncoated) | Caution | Caution | ✗ | Very absorbent; specialist products only |
| Suede / nubuck | Suede spray only | ✗ | ✗ | Standard protectants ruin the nap |
| Vinyl | ✓ | ✗ | ✓ | Not leather; use vinyl-specific products |
How to apply:
- Confirm leather is clean and fully dry.
- Shake the product (spray) or scoop a small amount (cream) onto an applicator pad.
- Apply in thin, even passes. Overlap each stroke slightly.
- Allow the recommended curing time (check the label; typically 10–30 minutes for sprays, longer for creams).
- Buff off any residue with a clean microfibre.
- Reapply to high-contact areas (driver’s seat bolster, armrests, shoe toe boxes) more frequently than low-contact areas.
Patch test every time you use a new product. Apply a small amount to an inconspicuous spot, wait 10 minutes, then check for colour change, tackiness or surface distortion before proceeding.
Pro Tip: For automotive leather, a repel coating applied before the protectant adds an extra layer of defence against dye transfer from denim and clothing. It’s a step most DIYers skip, but it makes a noticeable difference on light-coloured seats.
What should you never use on leather?
The list of things that damage leather is longer than most people expect, and the worst offenders are usually sitting in the kitchen or bathroom right now.
Items to avoid and why:
- Baby wipes: Guardsman explicitly warns against them, and journalistic sources confirm they can alter the finish, darken leather or strip the manufacturer’s protective barrier. The alcohol and fragrance compounds are the culprits.
- WD-40: Leaves an oily residue that attracts dust and degrades the topcoat over time.
- Vaseline / petroleum jelly: Sits on the surface, blocks the leather from breathing, and eventually causes the topcoat to peel.
- Household cleaning sprays (Spray & Wipe, Dettol, etc.): pH levels are wrong for leather. They strip the finish and dry out the hide.
- Harsh solvents (acetone, nail polish remover, methylated spirits): Remove colour and finish in seconds. Even a brief contact can cause permanent damage.
- Olive oil, coconut oil, cooking oils: Temporarily improve appearance but go rancid inside the leather, causing odour and attracting mould in humid conditions.
- Abrasive cloths or sponges: Scratch the topcoat. Use only microfibre or soft foam.
Common DIY mistakes:
- Scrubbing stains hard instead of blotting.
- Applying conditioner to wet or dirty leather.
- Using the same product on suede that you’d use on finished leather.
- Cleaning coloured or light leathers without a patch test.
- Over-conditioning until the surface feels greasy.
If you’ve already made a mistake: Wipe off any excess product immediately with a dry microfibre. For oily residues, a small amount of pH-neutral cleaner on a cloth can lift the surface layer. If the finish looks altered or the colour has shifted, stop and consult a professional before attempting further home remedies.
Pro Tip: If you’re tempted to try a household substitute because you don’t have the right product on hand, just use a barely damp microfibre cloth and nothing else. Water is safer than the wrong product.
How does care differ for suede, nubuck, aniline and finished leather?
Not all leather is the same, and using the wrong product on the wrong type causes permanent damage. Footwear specialists are emphatic that there’s no one-size-fits-all approach: always check product suitability and patch test before committing to a full application.
Quick descriptors:
- Finished (coated) leather: Has a polymer topcoat. The most common type in automotive, furniture and many shoes. Durable, easier to clean, less absorbent.
- Semi-aniline: Lightly coated with a thin protective layer over the dye. Softer feel than fully finished leather, slightly more absorbent.
- Aniline (uncoated): No surface coating. Absorbs liquids and products quickly. Shows natural markings and variations. Very sensitive to water and oils.
- Suede: Split leather with a napped (fuzzy) surface. No topcoat. Extremely sensitive to water and standard leather products.
- Nubuck: Full-grain leather buffed to create a nap similar to suede. More durable than suede but equally sensitive to standard leather products.
| Leather type | Cleaner class | Conditioner | Protectant | Patch test required? |
|---|---|---|---|---|
| Finished | pH-neutral, water-based | Water-based conditioner | Spray or cream barrier | Yes, always |
| Semi-aniline | pH-neutral, very diluted | Water-based, light application | Spray (test for darkening) | Yes, critical |
| Aniline | Specialist aniline cleaner only | Specialist aniline conditioner | Specialist aniline protectant | Yes, mandatory |
| Suede | Suede brush + suede eraser | None (standard conditioner damages nap) | Suede-specific spray only | Yes, always |
| Nubuck | Nubuck brush + specialist cleaner | None (standard conditioner damages nap) | Nubuck-specific spray only | Yes, always |
How to patch test safely:
- Choose a hidden area: the underside of a seat bolster, inside a jacket hem, the tongue of a shoe.
- Apply a small amount of product with a cotton bud or corner of a cloth.
- Wait 10 minutes and check for colour change, tackiness, surface distortion or darkening.
- If the area looks unchanged, proceed. If anything looks different, use a different product.
How does Australia’s climate change your leather care routine?
UV and heat are the primary accelerants of leather ageing in Australia. Australian detailing experts recommend shade, ventilation and regular maintenance as the first line of prevention, because once leather dries out and cracks from UV exposure, restoration is far more involved than prevention.
Immediate actions that make the biggest difference:
- Park in shade or a covered car park whenever possible.
- Use a windscreen sunshade. Cabin temperatures in a parked car in direct Queensland or WA sun can reach levels that dry out leather within a season.
- Crack windows when parked to reduce heat build-up.
- Keep leather furniture away from north-facing windows that receive direct afternoon sun.
- For storage (jackets, bags, shoes), use breathable cotton dust bags, not plastic. Plastic traps moisture and promotes mould in humid coastal areas.
Frequency adjustments by climate zone:
| Climate zone | Conditioning frequency | Protectant frequency | Key risk |
|---|---|---|---|
| High UV / low humidity (inland QLD, NT, WA) | Every 2–3 months | Every 1–2 months | Drying, cracking, fading |
| Subtropical / coastal (Sunshine Coast, Gold Coast) | Every 3–4 months | Every 2–3 months | UV plus humidity, mould risk |
| Temperate (Melbourne, ACT, southern NSW) | Every 4–6 months | Every 3–4 months | Drying in winter, UV in summer |
Storage best practices:
- Store leather items at room temperature, away from direct heat sources (heaters, car dashboards).
- Stuff leather bags and shoes with tissue paper to maintain shape and prevent creasing.
- Hang leather jackets on padded hangers, never wire.
- In high-humidity areas (tropical north, coastal Queensland), check stored leather monthly for mould. A light wipe with a barely damp cloth and thorough drying prevents surface mould from becoming structural.
Pro Tip: A car upholstery care routine on the Sunshine Coast should run more frequently than the standard national schedule suggests. The combination of high UV, salt air and humidity means leather in this region ages faster than in temperate southern cities.
When should you DIY and when should you hire a professional?
Most routine leather care is genuinely manageable at home. The decision to call a professional comes down to the size of the problem, the type of leather and whether any irreversible damage is at risk.
Book a professional when:
- The leather has structural cracks, deep scratches or areas where the topcoat has peeled away.
- Dye transfer covers a large area and hasn’t shifted after one careful home attempt.
- The leather is aniline or vintage and you’re unsure of the finish.
- There’s persistent odour or visible mould that has penetrated beyond the surface.
- The item is more than five years old with significant cracking or colour loss.
- Seat heaters, massage functions or electrical components are involved in the affected area.
What a professional can do that DIY can’t:
- Wet extraction with commercial-grade equipment that removes deep-seated soil without over-saturating the leather.
- Dye work and re-colouring for faded or stained panels.
- Leather filler for cracks and surface damage before re-colouring.
- Ceramic or repel coatings applied under controlled conditions for long-term protection.
- Odour elimination (ozone treatment) for persistent smells.
For leather protection and car interior care on the Sunshine Coast, Isaac’s Pro Detailing offers mobile leather protection, seat extraction and ceramic coatings at your location. No need to drop the car off.
Seat covers as an alternative? They protect against future soiling but don’t address existing damage and can trap moisture against already-compromised leather. A professional clean and protect before fitting covers is the better sequence.
Key takeaways
The most effective leather care strategy is consistent, light maintenance: clean before you protect, use less product than you think you need, and adjust your frequency for Australian UV and heat conditions.
| Point | Details |
|---|---|
| Clean before you protect | Applying protectant over dirt traps grime and degrades the leather faster than no treatment at all. |
| Less is more with conditioner | A pea-sized amount per panel, applied to a cloth first, prevents sticky build-up and over-saturation. |
| Patch test every new product | Apply to a hidden area and wait 10 minutes before proceeding, regardless of leather type. |
| Adjust frequency for Australian climate | High-UV and low-humidity regions need conditioning every 2–3 months; temperate zones every 4–6 months. |
| Isaac’s Pro Detailing for complex jobs | Mobile leather protection, extraction and ceramic coatings across the Sunshine Coast, at your location. |
What professional detailers actually prioritise
The single biggest gap between DIY leather care and professional results isn’t the products. It’s frequency and restraint. Most people wait until leather looks bad before doing anything, then over-apply product trying to fix it in one session. That approach accelerates wear rather than reversing it.
The detail that most home guides underplay is dye transfer from denim. Light-coloured car seats and cream leather furniture absorb blue dye from jeans within weeks of regular use, and once it’s set, standard cleaners won’t shift it. The professional approach is to apply a dye and friction blocker to contact areas immediately after cleaning, before the transfer starts. It’s a 10-minute step that saves hours of remediation later.
Vintage and delicate leathers deserve a separate mention. The instinct to condition heavily when leather looks dry is understandable, but on aged aniline or vintage pieces, the wrong product causes irreversible darkening or surface breakdown. If the item has sentimental or monetary value, photograph it, describe the condition to a specialist, and get a recommendation before touching it with anything.
Prevention, light frequency and the right product for the specific leather type: that’s the whole framework. Everything else is detail.
Isaac’s Pro Detailing brings professional leather care to your door
Doing the routine yourself keeps leather in good shape. But when the job calls for extraction equipment, dye work or a ceramic coating that actually lasts, mobile professional service is the more practical option for most Sunshine Coast vehicle owners.
Isaac’s Pro Detailing comes to your home, workplace or wherever the car is parked. Services include full interior extraction, leather cleaning and conditioning, fabric and leather protection treatments, and ceramic coatings for leather surfaces. No drop-off, no waiting around.
The wash menu covers packages from a basic interior clean through to full-detail protection with eco-friendly products, with pricing by vehicle size. If you’re not sure which service fits your situation, the mobile detailing workflow guide walks through what each stage involves. Book directly through the site and Isaac’s comes to you.
Useful sources for further reading
The sources below informed this guide. Each covers a specific aspect of leather care in more depth.
- How to take care of your leather interior – carsales
- Aussie Furniture Care Complete Leather Care Guide 2026 (PDF)
- How to care for leather – Guardsman Australia
- How to clean and protect leather car seats – COLOURLOCK Australia
- How to care for leather products – Florabelle Living
- How to clean, condition and protect leather car seats – Detailing Shed
- The complete guide to shoe care and repair – Andrew McDonald
- From beeswax to baby wipes: how to make your leather last a lifetime – The Guardian
Always follow the manufacturer’s instructions for any product you use, and patch test before applying anything new to a full leather surface.