
TL;DR:
- Headlight restoration removes oxidized and hazy polycarbonate lenses, applying a UV-protective coating to ensure lasting clarity. It restores visibility and safety at a lower cost than lens replacement, especially in high-UV regions like the Sunshine Coast. Proper, uniform sanding, polishing, and sealing are essential for durable results, whether DIY or professional.
Headlight restoration is the process of removing oxidised, yellowed, or hazy material from polycarbonate headlight lenses and applying a UV-protective coating to restore optical clarity and road safety. Most modern vehicles use polycarbonate plastic lenses rather than glass, and these lenses degrade over time due to UV exposure, road debris, and chemical contact. The result is reduced light output that compromises your visibility at night. Restoration is a proven, cost-effective alternative to full lens replacement, and brands like 3M, Meguiar’s, and products tested by Car and Driver have made quality results accessible to both DIY enthusiasts and professional detailers.
What is headlight restoration and why does it matter?
Headlight restoration is defined as the removal of damaged outer layers on polycarbonate lenses combined with the application of a durable UV-stable sealant to restore clarity and prevent re-oxidation. The process addresses the root cause of cloudy headlights rather than masking the symptom. Cloudy lenses scatter light instead of projecting it forward, which directly reduces how far you can see at night and in poor weather conditions.
The safety implications are significant. Degraded headlights reduce your effective beam distance, which shortens your reaction time on dark roads. For vehicle owners on the Sunshine Coast, where UV radiation is particularly intense year-round, lens degradation happens faster than in cooler climates. Restoration returns your headlights to near-factory performance without the cost of buying new assemblies.
Beyond safety, aesthetics matter too. Yellowed, foggy lenses age a vehicle’s appearance considerably, even on an otherwise well-maintained car. Restoration is one of the highest-impact, lowest-cost improvements you can make to how your vehicle looks and performs.
Why do headlight lenses go cloudy?
Polycarbonate plastic is the standard material for modern headlight lenses because it is lightweight, impact-resistant, and mouldable into complex shapes. The problem is that polycarbonate is naturally vulnerable to UV radiation. Manufacturers apply a thin UV-hardcoat to the lens surface during production, but this coating degrades over three to five years of sun exposure, road grime, and cleaning chemicals.
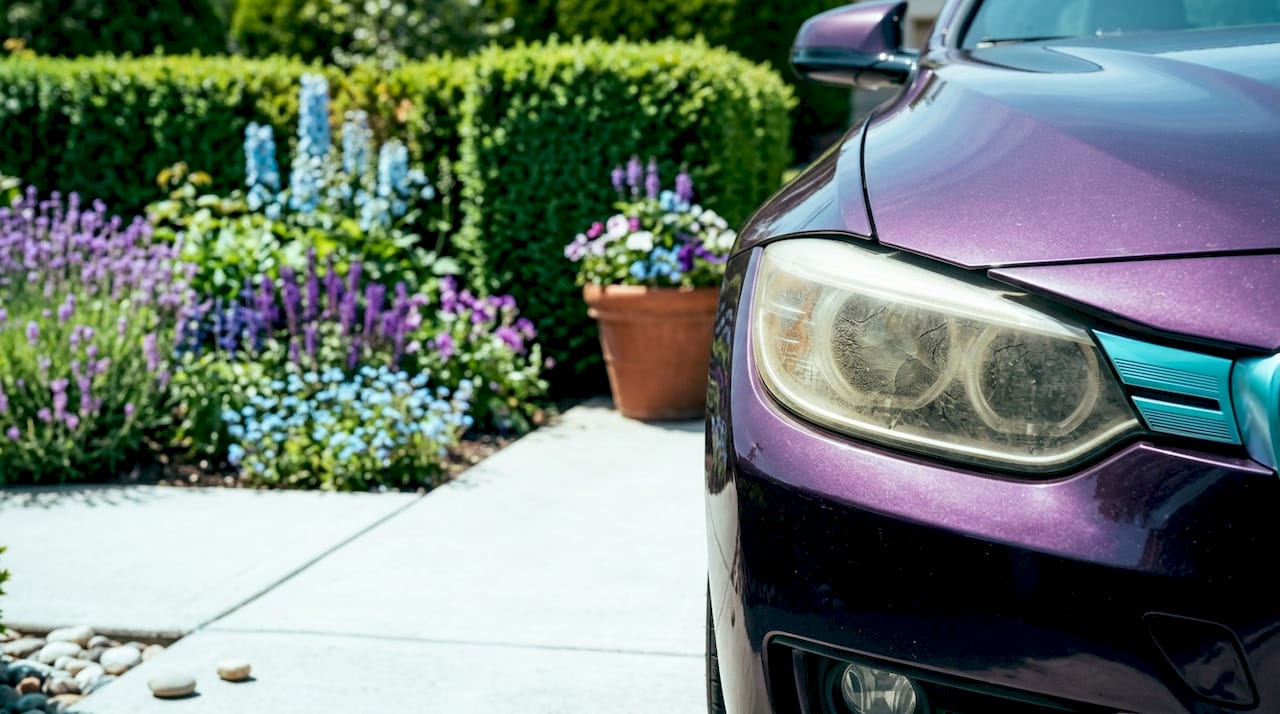
Once the hardcoat breaks down, UV light attacks the polycarbonate directly. The plastic oxidises, turning yellow and opaque. Road debris and grit cause micro-abrasions that scatter light further. Chemical exposure from car wash products and fuel residue accelerates the process. The progression moves from mild yellowing to heavy oxidation, and eventually to crazing, which is a network of fine surface cracks that cannot be polished away.
Important distinction: Surface oxidation responds well to restoration. Internal damage such as fogging inside the housing, cracks, or heat damage cannot be fixed by sanding and polishing. If moisture is visible inside the lens assembly, replacement is the only effective solution.
Simple cleaning with soap or glass cleaner does nothing to address oxidation because the damage is in the lens material itself, not on top of it. Toothpaste and household abrasives can temporarily reduce haziness, but they do not remove the damaged layer uniformly and provide zero UV protection. The haze returns within weeks.
How does the headlight restoration process work?
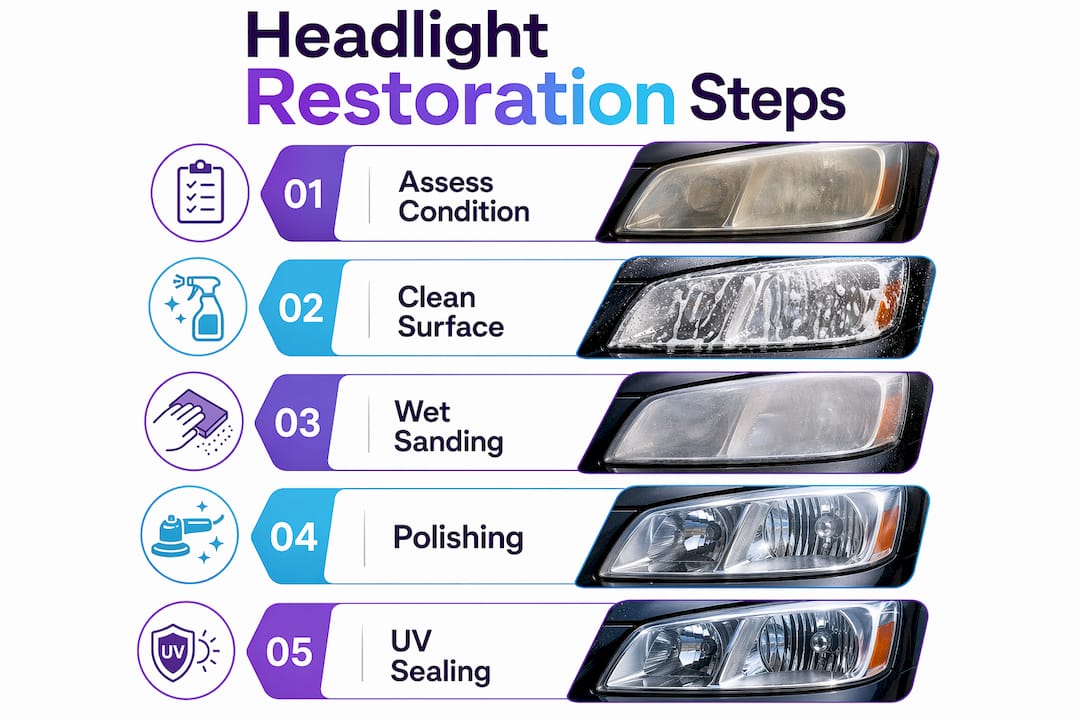
The standard restoration workflow follows a clear sequence: clean, sand, compound, polish, and seal. Each stage builds on the last, and skipping any step compromises the final result. Here is how the process works from start to finish.
- Wash and degrease the lens. Remove all surface dirt, wax, and contaminants before touching the lens with abrasives. Any grit left on the surface will cause deep scratches during sanding.
- Mask the surrounding paintwork. Use painter’s tape to protect the paint and trim around the lens. Sandpaper removes clear coat from bodywork just as effectively as it removes oxidation from plastic.
- Wet sand with a coarse starting grit. For heavily yellowed lenses, start sanding at P600 to P800 grit to remove the bulk of the damaged material. Wet sanding keeps the surface cool and reduces clogging of the abrasive paper.
- Progress through finer grits. Work through P1000, P1500, P2000, and up to P3000 or P5000 for optical clarity. Each grit removes the scratches left by the previous one. Rushing this stage leaves visible sanding marks that polishing cannot fully correct.
- Compound and polish. Use a cutting compound to remove the fine sanding haze, then follow with a polishing product to bring the lens to a clear, glossy finish. Products like Meguiar’s PlastX are purpose-built for this stage.
- Apply a UV-protective coating. This is the most critical step. Sanding and polishing alone are insufficient because they leave bare polycarbonate exposed to UV radiation. Apply a dedicated UV sealant, ceramic coating, or urethane clear coat and allow it to cure fully before exposing the lens to sunlight.
Pro Tip: Always work in the shade or indoors during restoration. Direct sunlight dries sanding water too quickly and causes the polishing compound to flash off before it can do its job. It also makes it harder to see surface defects under raking light.
Uniformity matters throughout the sanding stages. Consistent grit progression and surface quality are non-negotiable before you move to compounding. Uneven sanding creates low spots that catch light differently and leave the finished lens looking patchy rather than clear.
DIY kits vs professional restoration: which is right for you?
Both DIY and professional methods follow the same fundamental two-step approach of sanding then resealing, but the quality of materials and the durability of results differ considerably. Understanding the trade-offs helps you choose the right option for your situation.
| Factor | DIY restoration kits | Professional service |
|---|---|---|
| Typical cost | $10 to $70 per kit | $100 to $250 for both headlights |
| UV protection included | Varies by kit; better kits include UV sealant | Urethane or acrylic clear coat standard |
| Durability | Several months to 1 year | 2 to 5 years with quality coating |
| Skill required | Moderate; results vary with technique | Handled by trained technician |
| Best for | Mild to moderate oxidation | Severe oxidation or time-poor owners |
DIY restoration kits vary widely in quality. Car and Driver recommends kits that include UV and oxidation protection as part of the package, not just sanding pads and polish. Kits from 3M and Meguiar’s consistently rank well in independent testing because they include purpose-formulated UV sealants rather than generic wax.
The durability gap between DIY and professional results comes down to coating quality. Professional shops apply urethane or acrylic clear coats that withstand sun, rain, wash chemicals, and temperature swings far better than most consumer kit sealants. A professional restoration on the Sunshine Coast, where UV intensity is high, will typically outlast a DIY result by two to three years.
Consider professional service when:
- The lenses show heavy crazing or deep pitting that requires aggressive sanding
- You notice internal fogging or moisture inside the housing (this requires replacement, not restoration)
- You want results that last several years without reapplication
- You lack the time or confidence to execute the multi-stage sanding process correctly
For mild to moderate yellowing on a budget, a quality DIY kit with an included UV sealant is a reasonable choice. Just understand that you will likely need to repeat the process within 12 months.
How to maintain restored headlights and know when to replace them
Restoration is not a permanent fix. The longevity of your results depends on how well you protect the lens after treatment and how much UV exposure the vehicle receives. A few straightforward habits extend the life of any restoration significantly.
- Reapply a UV sealant or paint protection coating every six to twelve months, depending on your climate and how often the vehicle is parked outdoors.
- Park in a garage or shaded area whenever possible. Direct sun is the single biggest factor in how quickly a restored lens degrades.
- Avoid harsh alkaline car wash products on your headlights. pH-neutral shampoos are gentler on UV coatings and extend their service life.
- Consider applying a dedicated headlight protection film after restoration. These thin polyurethane films act as a sacrificial layer against UV and abrasion.
Pro Tip: After restoration, apply a thin layer of ceramic coating over the UV sealant for an added layer of protection. Ceramic coatings bond to the surface at a molecular level and resist UV degradation, heat, and chemical exposure far better than wax-based sealants.
Restoration has clear limits. If you can see moisture, condensation, or fogging inside the lens housing, no amount of external sanding will fix the problem. Cracked lens housings and heat-damaged reflectors also fall outside what restoration can address. In these cases, replacement is the only path to safe, effective lighting.
The environmental and economic case for restoration over replacement is strong. A new OEM headlight assembly for a mid-range vehicle can cost $300 to $800 or more per side. Restoration at a fraction of that cost keeps functional components out of landfill and extends the working life of your vehicle.
Key takeaways
Headlight restoration works because it removes the damaged UV-hardcoat layer and replaces it with a durable UV-stable sealant, addressing the root cause of lens cloudiness rather than masking it.
| Point | Details |
|---|---|
| Define the problem first | Surface oxidation responds to restoration; internal fogging or cracks require lens replacement. |
| Coating is non-negotiable | Skipping the UV sealant causes haze to return within three to six months due to rapid re-oxidation. |
| Grit progression matters | Start at P600 to P800 for heavy yellowing and refine to P3000 or finer for optical clarity. |
| DIY vs professional trade-off | Professional coatings last two to five years; most DIY kit sealants last six to twelve months. |
| Maintenance extends results | Reapplying UV sealant and parking in shade significantly prolongs restored lens clarity. |
What I’ve learned restoring headlights on the Sunshine Coast
The single most common mistake I see is stopping the job at the polishing stage. The lens looks great at that point, clear and glossy, and it is tempting to call it done. But bare polycarbonate without a UV coating will haze over again within three to six months under Queensland sun. The UV coating step is not optional. It is the entire reason the restoration lasts.
The second issue I see regularly is uneven sanding. People rush through the coarser grits or skip a step in the progression, and the result is a lens that looks clear in the driveway but shows patchy cloudiness in direct sunlight. Taking the time to sand uniformly at each grit level, and checking the surface under a torch at a low angle, makes the difference between a result that lasts and one that disappoints.
My honest advice: if you are going to do this yourself, buy a kit that includes a proper UV sealant, not just polish and pads. And if your lenses are severely degraded or you want results that hold up for years rather than months, book a professional. The cost difference between a quality professional restoration and a new headlight assembly is substantial, and the vehicle polishing process done right will serve you well. Realistic expectations matter too. Restoration will not make a ten-year-old lens look factory new, but it will make a meaningful difference to both your night visibility and how your car presents.
— Isaac’s
Get your headlights professionally restored on the Sunshine Coast
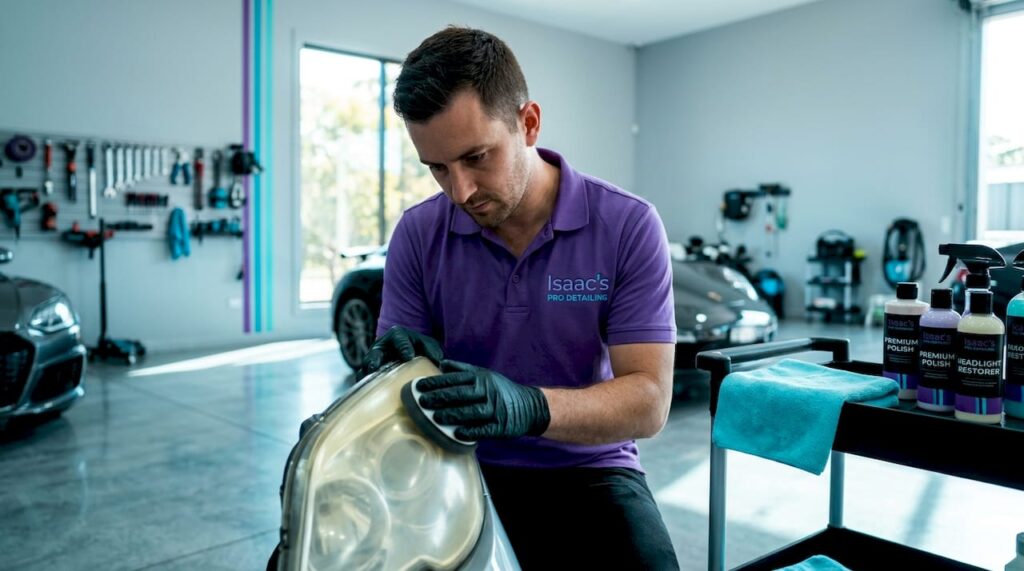
If you want lasting clarity without the trial and error of a DIY attempt, Isaac’s Pro Detailing brings professional-grade headlight restoration directly to your home, workplace, or wherever your vehicle is parked.
Isaac’s uses professional UV-stable coatings that outlast consumer kit sealants by years, not months. The mobile detailing service covers the full Sunshine Coast region, so there is no need to drop your car at a workshop and wait. At a fraction of the cost of lens replacement, a professional restoration restores your night visibility, improves your vehicle’s appearance, and protects your investment. Book with Isaac’s Pro Detailing today for headlights that stay clear through Queensland’s toughest UV conditions.
FAQ
What does headlight restoration actually involve?
Headlight restoration involves wet sanding the lens surface through progressively finer grits to remove oxidised material, then polishing to clarity and sealing with a UV-protective coating. The coating step is what prevents rapid re-oxidation and makes the result last.
How long does a headlight restoration last?
DIY kit restorations typically last six to twelve months depending on UV sealant quality and sun exposure. Professional restorations using urethane or acrylic clear coats can last two to five years, particularly when the vehicle is parked in shade regularly.
Can I restore headlights myself at home?
Yes, with a quality kit that includes UV sealant, moderate oxidation can be addressed at home. Kits from brands like 3M and Meguiar’s include the necessary abrasives and sealants. Severe crazing or internal fogging requires professional assessment or lens replacement.
How do I know if my headlights need restoration or replacement?
If the cloudiness is on the outer surface of the lens, restoration is likely effective. If you can see moisture, condensation, or fogging inside the housing, or if the lens has cracks, replacement is required as external restoration cannot address internal damage.
Is headlight restoration worth the cost?
Restoration is significantly more cost-effective than replacement. Professional restoration costs $100 to $250 for both headlights, compared to $300 to $800 or more per side for a new OEM assembly. It also restores meaningful night visibility, making it a worthwhile investment for safety alone.