
TL;DR:
- Sunshine Coast’s harsh environment accelerates paint deterioration due to UV, humidity, and airborne contaminants. Proper surface prep, correction, and using quality ceramic coatings or sealants ensure long-lasting protection and glossy finishes. Professional detailing services provide expert care to optimal results, especially in challenging coastal conditions.
Imagine walking out to your car after a week of Sunshine Coast sun, salt air, and the occasional seagull visit, only to find the paint looking dull, chalky, or worse, pitted with tiny rust-coloured spots from iron contamination. It’s a frustrating sight, and it happens faster here than most car owners expect. The Sunshine Coast’s UV intensity, coastal humidity, and airborne contaminants create one of the harshest environments for automotive paint in Australia. The good news is that proper paint protection, done in the right order with the right products, can keep your car’s finish looking showroom-fresh for years. This guide walks you through every step.
Table of Contents
- What you need to protect your car’s paint
- Prepare your car’s paint: Cleaning and paint correction
- Choose and apply the right protection method
- Avoid these common mistakes and troubleshoot issues
- Check your work: How to verify and maintain the finish
- Our take: Why good protection is about details, not just products
- Let the pros protect your paint for you
- Frequently asked questions
Key Takeaways
| Point | Details |
|---|---|
| Preparation is key | Thorough cleaning and correction are essential before applying any paint protection. |
| Choose the right method | Wax, sealant, or ceramic coatings all offer protection but differ in durability and cost. |
| Follow cure times | After application, allow enough curing time before exposing the paint to water or chemicals. |
| Avoid shortcuts | Skipping steps or rushing application leads to poor results and wasted effort. |
| Regular maintenance matters | Keep up gentle washes and periodic checks to maintain a flawless finish. |
What you need to protect your car’s paint
Now that you know what’s at stake, let’s look at the tools, products, and essentials you’ll need to give your car’s paint proper, lasting protection.
Having the right gear before you start makes a significant difference in your results. Using cheap or incorrect products is one of the fastest ways to introduce swirl marks, scratches, or patchy protection. Here’s what you’ll want on hand:
- Microfibre towels (multiple, high-GSM for drying and buffing)
- pH-neutral car wash soap (safe for coatings and wax)
- Two-bucket wash system (one for soapy water, one for rinsing your mitt)
- Clay bar or clay mitt (for decontamination)
- Iron remover spray (to dissolve embedded metal particles)
- Paint correction compound (for scratches, oxidation, and swirl marks)
- Dual-action polisher or polishing pads (for machine correction)
- Ceramic coating kit, paint sealant, or carnauba wax (depending on chosen method)
- Foam applicator pads
- Nitrile gloves (to protect your hands and prevent skin oils contaminating surfaces)
- Isopropyl alcohol (IPA) wipe-down (to remove polish oils before coating)
- Detailing light or torch (to inspect the surface under good lighting)
| Tool or product | Purpose |
|---|---|
| Microfibre towels | Scratch-free drying, buffing, and product removal |
| pH-neutral wash soap | Cleans without stripping existing protection |
| Clay bar | Removes bonded surface contaminants |
| Iron remover | Dissolves embedded iron and brake dust |
| Polishing compound | Corrects scratches, swirls, and oxidation |
| Ceramic coating | Long-term hydrophobic paint protection |
| IPA wipe-down | Removes oils before coating for clean bonding |
| Detailing light | Reveals surface defects invisible in normal light |
Proper surface prep and paint correction before applying any paint protection product is critical to achieving results that actually last. Skipping even one step in this sequence can mean poor bonding, uneven finish, and protection that fails within weeks rather than years. You can also review the Sunshine Coast paint protection steps for a region-specific overview before you begin.
Pro Tip: Always use high-quality microfibre cloths with a GSM of at least 350. Budget cloths leave fine scratches in clear coat that become visible once you apply a glossy coating.
Prepare your car’s paint: Cleaning and paint correction
Once you’ve gathered your tools, attention turns to prepping your paintwork. This is arguably the most important stage for lasting results, and it’s the one most DIY detailers rush or skip entirely.
Think of paint preparation like priming a wall before you paint it. Any dust, grease, or bumps left underneath will show through and undermine everything on top. The same principle applies here. Surface prep is 80% of the job when applying a coating, and the bonding and optical results depend entirely on how clean and smooth the surface is underneath.
“Prep is 80% of the job. You can use the best ceramic coating on the market, but if the surface underneath isn’t clean and corrected, you’re wasting your time and money.”
Follow these steps in order:
- Rinse the vehicle thoroughly to remove loose dirt and debris before any contact washing begins.
- Wash using the two-bucket method with pH-neutral soap and a quality wash mitt, working from the roof down.
- Apply iron remover across all painted panels and wheel arches. Watch for the chemical turn purple as it reacts with embedded iron particles. Rinse thoroughly after the recommended dwell time.
- Clay bar the entire surface using a clay lubricant to lift bonded contaminants. Run your hand over a panel in a plastic bag after claying. If it feels glass-smooth, you’re ready to move on.
- Dry the vehicle completely with a clean microfibre drying towel or forced-air blower.
- Perform paint correction using a dual-action polisher and the appropriate compound or polish for your paint’s condition. Light swirls need a finishing polish. Deeper scratches require a cutting compound first.
- Wipe down with IPA solution (typically a 1:4 mix of IPA to water) to strip any polish oils from the surface, leaving bare, clean paint ready for protection.
| Preparation level | Time required | Effort | Result |
|---|---|---|---|
| Basic wash only | 30 to 45 minutes | Low | Surface contaminants remain, poor coating bond |
| Wash and clay bar | 2 to 3 hours | Medium | Clean surface, noticeably better coating adhesion |
| Full prep with correction | 4 to 8 hours | High | Flawless base, maximum protection longevity |
For a detailed walkthrough of the coating application process that follows, the ceramic coating step-by-step guide covers each stage clearly. You can also check the broader paint protection guide for additional Sunshine Coast context.
Pro Tip: Always work in the shade. Direct Queensland sun dries water and products almost instantly, which causes water spots on a freshly washed surface and prevents ceramic coatings from levelling properly.
Choose and apply the right protection method
With the surface prepped, the next decision is which paint protection method suits your needs, budget, and the local environment.
The Sunshine Coast’s climate makes this choice more consequential than it might be elsewhere. Intense UV radiation breaks down paint protection faster, salt air accelerates oxidation, and sand acts as fine-grit abrasive during windy days. Here’s how the three main options stack up:
Carnauba wax
- Pros: Warm, deep gloss, easy to apply, forgiving of minor application errors, affordable
- Cons: Lasts only 4 to 8 weeks, limited UV resistance, requires frequent reapplication
- Best for: Show car finishes where you want that classic warm glow and don’t mind regular upkeep
Paint sealant
- Pros: Synthetic polymer formula lasts 4 to 6 months, better UV protection than wax, water beading performance
- Cons: Can appear slightly colder or more clinical in gloss than wax, some sealants need light buffing to avoid haze
- Best for: Daily drivers who want reliable protection and minimal maintenance between applications
Ceramic coating
- Pros: Lasts 2 to 5 years with proper maintenance, exceptional UV and chemical resistance, hardened surface layer, hydrophobic properties repel water and contaminants
- Cons: Requires careful surface prep, application errors are harder to correct once the coating begins to cure, higher upfront cost
- Best for: Sunshine Coast drivers who want long-term, serious protection against the region’s harsh conditions
Given local conditions, ceramic coating is the most suitable choice for lasting protection. Here’s a simplified application process:
- Confirm the panel is clean, corrected, and IPA-wiped.
- Apply a few drops of ceramic coating to a foam applicator pad.
- Work the product across one panel at a time using overlapping straight-line passes.
- Allow the coating to flash (go slightly cloudy or streaky) for the manufacturer’s recommended time, typically 1 to 3 minutes depending on temperature and humidity.
- Remove the excess with a clean, soft microfibre cloth using light pressure.
- Move to the next panel and repeat.
- Allow the vehicle to cure for 12 to 24 hours before any water exposure. Avoid washing, rain, or heavy dew during this window.
For Sunshine Coast-specific advice on coating options and product selection, the Sunshine Coast ceramic coatings guide is worth reading before you commit to a product.
Avoid these common mistakes and troubleshoot issues
Even the best method can fall short if common pitfalls aren’t avoided. Here’s how to steer clear of trouble and fix minor slip-ups before they become permanent problems.
Protection applied over contamination or defects won’t perform as intended, which is why skipping prep is the single most costly mistake you can make. But it’s not the only one.
Common mistakes to avoid:
- Skipping the clay bar and assuming a freshly washed car is clean enough for coating
- Applying too much product at once, which leads to high spots, streaks, and uneven curing
- Working in direct sunlight or high heat, which causes ceramic coatings to flash too fast and leave marks that are difficult to remove
- Not allowing full cure time before exposing the car to water or bird droppings
- Using a regular household cloth instead of proper microfibre, which introduces fine scratches immediately
- Ignoring the edges of panels, bonnets, and door shuts where contamination accumulates
- Rushing the wipe-off stage when removing ceramic coating, which smears partially cured product into the paint
Quick fixes for common issues:
If you notice high spots (shiny, thick areas where the coating didn’t level), catch them within the first hour by lightly buffing with a clean microfibre. Once fully cured, high spots require machine polishing to remove.
Streaks or haze after wax or sealant application usually mean too much product was applied. Buff the panel with a clean microfibre in circular motions, then follow with a straight-line pass to remove any swirling.
A dull or flat finish after coating often means the surface had residual polish oils that weren’t fully removed by the IPA wipe. You may need to strip and reapply in that area. For more detailing tips for a flawless finish, that guide covers corrective techniques in greater depth.
Pro Tip: Less is genuinely more with ceramic coatings. A thin, even layer applied correctly cures harder and performs better than a thick, uneven layer applied in a rush.
Check your work: How to verify and maintain the finish
Once you’ve protected your paint, regular checks and gentle upkeep maintain the look for months or years to come.
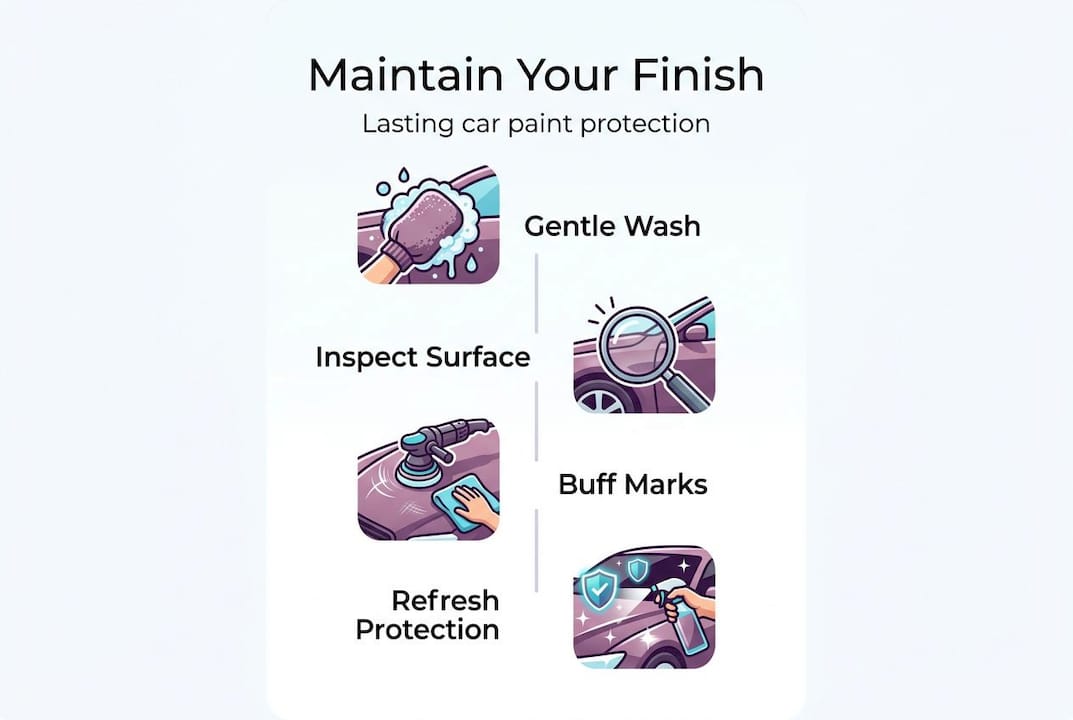
Proper paint protection only performs as intended when applied over clean, defect-free paint, and that same principle applies to ongoing maintenance. Neglecting your coated car is still a way to let the protection fail prematurely.
Here’s how to inspect your work and keep it performing well:
- Inspect for uniform gloss by walking around the car in good natural light or under artificial lighting. Any dull patches or high spots will be immediately obvious.
- Test water beading by running a hose or misting water over the panels. On a properly coated surface, water should sheet off or bead tightly. Flat, spreading water indicates the coating didn’t bond or has already degraded.
- Touch-check after full cure to feel for smoothness. The surface should feel almost frictionless compared to unprotected paint.
- Wash gently every two weeks using pH-neutral shampoo and a soft microfibre mitt. Avoid automatic car washes with brushes, which scratch and degrade coatings rapidly.
- Decontaminate every three to four months with a light clay mitt or iron remover spray to remove fresh contaminants before they bond deeply.
- Top up protection annually with a ceramic coating booster spray or fresh wax layer over your sealant to refresh water beading and gloss.
Adopting consistent exterior cleaning best practices will do more for your paint’s long-term condition than any single product application. Understanding the role of exterior detailing in the broader context of vehicle maintenance helps put this into perspective.
Our take: Why good protection is about details, not just products
Here’s something the detailing industry doesn’t always say loudly enough: the product you choose matters far less than how carefully you follow the process.
We see it regularly. A car owner invests in a premium ceramic coating, applies it over a hastily washed surface without claying or correction, and then wonders why the finish looks streaky and dull after three months. Meanwhile, a car treated with a mid-range sealant applied over a properly prepped, corrected surface holds its gloss and water beading well into the following year. The difference isn’t the product. It’s the process.
Every experienced detailer knows that patience is the real variable. Taking the time to properly decontaminate, correct, and prep a surface before any protection is applied determines whether that protection actually bonds, lasts, and performs. A dual-action polisher and an extra hour of surface work will do more for your car’s finish than switching to a more expensive coating brand.
The same logic applies to ongoing care. A car that’s washed gently every fortnight with a quality pH-neutral shampoo and decontaminated quarterly will outlast a car that’s treated to a full detail once a year and then run through an automatic brush wash every other week. Lasting shine and protection come from consistency and attention, not from any single product in a bottle.
The uncomfortable truth is that shortcuts always cost more in the long run. A proper detail done right the first time is an investment. A quick, poorly prepped application is money spent on something that won’t last the season.
Let the pros protect your paint for you
If these steps seem daunting or you want maximum peace of mind, consider letting professionals look after your car’s finish.
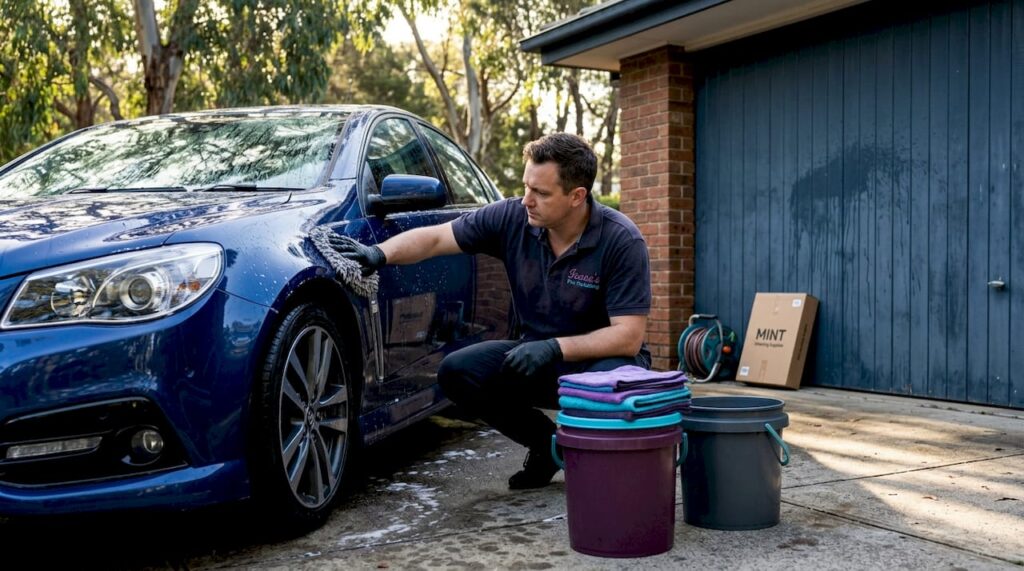
At Isaac’s Pro Detailing Sunshine Coast, we bring everything to you. Our mobile service means your car gets expert-level surface preparation, machine correction, and professional-grade ceramic coating applied at your home, workplace, or wherever suits you best. We understand the specific challenges the Sunshine Coast climate presents, from UV degradation to salt air contamination, and we tailor our approach accordingly.

Whether you’re after the essential paint protection steps handled professionally, a full ceramic coating guide consultation, or simply want a trusted team to assess what your car needs, we’re here for it. Browse our Sunshine Coast paint protection solutions or get in touch to book your next detail with a team that takes the process as seriously as the product.
Frequently asked questions
What’s the best way to protect car paint on the Sunshine Coast?
Thorough surface preparation, followed by a ceramic coating and regular maintenance, delivers the most effective and lasting protection. Proper surface prep and correction before applying any protection product is critical for results that hold up against Sunshine Coast conditions.
How long should I wait after applying ceramic coating before exposing my car to water?
Wait at least 12 to 24 hours after application, and longer if possible, to allow the coating to cure properly. Following cure time guidance is essential before any water exposure, including rain or heavy dew.
Can I apply paint protection if my car has scratches or swirl marks?
No, paint protection should only be applied to clean, defect-free paint. Protection applied over defects or contamination won’t bond or perform as intended, and may actually lock those imperfections in under the coating.
Is wax, sealant, or ceramic coating better for Queensland weather?
Ceramic coatings offer the most durable and long-lasting protection for Queensland’s harsh UV, heat, and salt air conditions. Ceramic coating cure times and application precision are worth the extra effort given how demanding the local climate is on paintwork.
Can professional detailers help if I’m unsure about DIY protection?
Yes, professional detailers use proper surface preparation, premium products, and proven application techniques that remove the guesswork and reduce the risk of costly mistakes. It’s the most reliable way to ensure your protection actually performs.
Recommended
- Essential Car Paint Protection Steps For Sunshine Coast Drivers
- Paint Protection Guide: Sunshine Coast Solutions For Lasting Shine
- Role Of Exterior Detailing – Enhancing Vehicle Longevity
- How To Detail Your Car For Lasting Shine And Protection
- Nettoyage Intérieur Véhicule OFFERT chez Freeglass | Lavage habitacle