
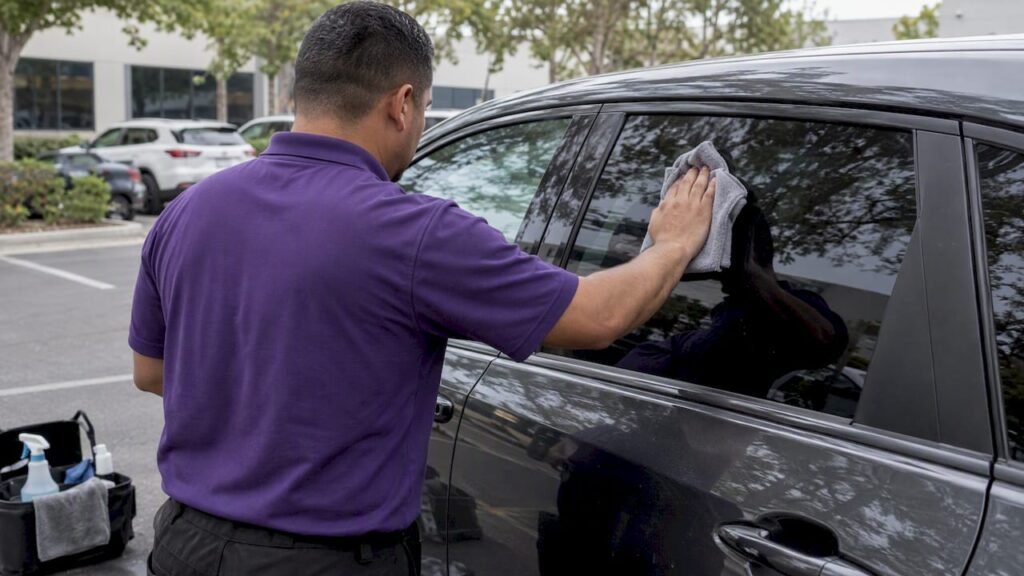
A mild soapy water solution, about a quarter teaspoon of dishwashing liquid in 2 litres of water, applied with a soft microfibre, is the safest routine cleaner for tinted windows. Avoid ammonia, vinegar, citrus cleaners, abrasive tools and steam cleaners entirely. If your film was installed in the last 30 days, hold off on cleaning altogether while it finishes curing.
TL;DR:
- After installation, wait about 30 days before cleaning; temporary haze or small moisture blisters usually fade, but persistent edge lift warrants an installer.
- Mix about a quarter teaspoon of dishwashing liquid into 2 liters of water, rinse away grit first, then use soft microfiber and straight strokes.
- Choose commercial cleaners labeled ammonia free or tint safe, and check the safety sheet; manufacturers may permit ammonia after curing, but installers advise against it.
- Daily drivers generally need a light clean every one to two weeks, while coastal salt, dust, or heavy pollen can call for more frequent cleaning.
Table of Contents
- What makes a cleaner genuinely safe for window tint
- How to make and use a safe DIY cleaning solution
- Choosing commercial tint-safe products and reading the label
- Tools, technique and common mistakes that damage tint
- After-install care and what to do about blisters or haze
- How often you should actually clean tinted windows
- Does the type of tint change how you should clean it
- What we’ve learned cleaning tinted windows on the road
- Mobile tint-safe cleaning as part of your detail
- FAQ
- Sources
What makes a cleaner genuinely safe for window tint
“Tint-safe” isn’t a marketing word with a fixed legal meaning, but in practice it points to a short list of qualities: no ammonia, no abrasive particles, no strong solvents, and a pH close to neutral. “Ammonia-free” matters because ammonia reacts with the adhesive layer beneath window film and can weaken it over repeated use, eventually causing edges to lift or discolour.
Cleaners that fit comfortably within these limits include:
- Plain water for light dust and pollen.
- A mild soapy water mix using a small amount of dishwashing liquid.
- Commercial cleaners explicitly labelled ammonia-free or tint-safe.
- Certain alcohol-based quick-dry formulas, but only when the label specifically states they’re suitable for film.
On the other side of the ledger, installer instructions consistently warn against ammonia, vinegar, citrus-based cleaners, solvents, steam cleaners and anything abrasive on film surfaces, because these either attack the adhesive or physically scratch the film coating. Steam in particular introduces both heat and moisture in a way that can loosen edges, which is why it sits on the avoid list even though it feels “chemical-free.”
A cleaner doesn’t need to be exotic to be safe. The simplest formulas, built around water and a touch of dish soap, remain the most reliable choice for everyday maintenance.
How to make and use a safe DIY cleaning solution
A simple recipe works for most tinted windows: mix about a quarter teaspoon of dishwashing liquid into a couple of litres of fresh water. That low concentration matters, because too much soap leaves residue that streaks as it dries, while too little won’t lift grime effectively.
- Pour the mixed solution into a clean spray bottle.
- Spray the glass generously and let it sit for a few seconds to loosen dust and grit.
- Rinse or flush away loose particles before wiping, so you’re not dragging grit across the film.
- Wipe with a dedicated microfibre cloth, using one for interior glass and a separate one for exterior glass.
- Dry immediately with a clean, dry microfibre to stop water spots forming.
Pro Tip:Keep three cloths in rotation, one for exterior glass, one for interior glass, and one for drying, and rinse each under running water every few passes so you’re never wiping grit back onto the film.
Microfibre is forgiving but not indestructible. A cloth that’s picked up road grit becomes an abrasive tool in disguise, so rinse often and retire any cloth that feels gritty or has lost its softness.

Choosing commercial tint-safe products and reading the label
Shelf cleaners marketed for glass vary enormously in what they contain, so the label is your first checkpoint. Look for:
- The words “ammonia-free” or “tint safe” stated explicitly, not implied.
- A safety data sheet (SDS) that lists the active ingredients and confirms suitability for film or tinted surfaces.
- No mention of ammonia, bleach or abrasive particulates in the ingredient list.
Some manufacturers complicate this picture. 3M notes that certain automotive films can tolerate normal household cleaners, including ammonia-based ones, once the curing period after installation has passed, while abrasive products are still discouraged even then. Installers, however, often continue to recommend avoiding ammonia altogether, since the long-term risk to adhesive outweighs the convenience for most owners. When you’re not certain whether a product suits your specific film, spray a small hidden corner, wait as directed on the label, and check back after 24 to 48 hours for any lifting at the edges before treating the whole window. If doubt remains, contact the supplier or the installer who fitted your film rather than guessing.
Tools, technique and common mistakes that damage tint
The tools you reach for matter almost as much as the cleaner itself. Soft microfibre cloths, a soft chamois and a non-scratch squeegee are safe choices. Paper towel, scouring pads and hard plastic scrapers are not, because each can leave fine scratches that dull the film over time.
- Rinse away loose grit before wiping, rather than wiping it straight into the surface.
- Use straight, gentle strokes rather than circular scrubbing, which concentrates pressure on small areas.
- Swap to a clean cloth as soon as the one in hand feels dirty or gritty.
Pro Tip:Work top to bottom in straight lines so any remaining moisture runs down and off, rather than pooling and drying into spots.
The mistakes that cause the most damage are predictable: reaching for a household glass cleaner that contains ammonia, using citrus-based degreasers, running a steam cleaner over the glass, and scrubbing hard along the window edges where the film seal is most vulnerable. Each of these shows up later as peeling, haze or faint scratch lines that catch the light.
After-install care and what to do about blisters or haze
Most installers and manufacturers point to a similar window: avoid cleaning for about a month after installation, because residual moisture trapped under the film during this period can cause temporary haze or small humidity blisters. This isn’t a fault, it’s part of the adhesive curing process, and it typically clears on its own.
Resist the urge to pop or press on blisters, since doing so can tear the film or push moisture into the wrong place. A few general rules help during this stage:
- Leave windows alone for about a month wherever possible.
- Expect some cloudiness or small bubbles to fade as curing finishes.
- Contact your installer if you notice adhesive failure, significant edge lift or blisters that haven’t settled well past the curing window, rather than attempting repeated DIY fixes.
Professional assessment is the safer path for anything beyond cosmetic curing effects, since improper removal attempts risk damaging the glass or trim underneath.
How often you should actually clean tinted windows
Tinted film behaves a bit like a non-stick surface: dust and light grime wipe off easily, and it rarely needs anything stronger than a gentle wipe-down to look good. For most daily drivers, a light clean every one to two weeks, alongside a regular exterior wash, keeps film clear without unnecessary handling.
Vehicles parked outdoors or exposed to coastal salt air, dust or heavy pollen may need attention more often, simply because grime builds up faster and sits longer against the glass. The goal isn’t frequency for its own sake, it’s catching dirt before it has time to bake on in the sun, which makes it harder to lift later without extra scrubbing.
Over-cleaning carries its own small risk. Every wipe is a chance for stray grit to scratch the surface, so there’s little benefit in cleaning tinted glass daily if it isn’t visibly dirty. A sensible middle ground, clean when you notice smudges or haze rather than on a rigid schedule, protects the film better than either extreme. If you’re cleaning the rest of the car’s glass and bodywork as part of a routine wash, tinted windows can simply join that same light pass with the soapy water method described earlier.
Does the type of tint change how you should clean it
Dyed, metalised and ceramic films share the same basic vulnerability: a surface layer that can scratch, and an adhesive layer underneath that ammonia and solvents can weaken. Because of that, the gentle soapy water method and soft microfibre approach works safely across all three types.
Where the types differ slightly is durability and heat sensitivity. Dyed film is generally the most budget-friendly option and can be a touch more prone to visible scratching, so sticking strictly to soft cloths and avoiding any abrasive tool matters more here. Metalised film includes a thin metallic layer that gives it extra scratch resistance, but the same ammonia-avoidance rule still applies to protect the adhesive bond. Ceramic film tends to be the most robust of the three and often handles routine cleaning with the least visible wear, though it’s still not immune to scratching from gritty cloths or rough tools.
None of these differences change the core cleaning method, they just affect how forgiving the film is if you occasionally use a less-than-ideal cloth. Regardless of tint type, the safest approach stays the same: mild soap, soft microfibre, gentle strokes, and nothing ammonia-based or abrasive.

What we’ve learned cleaning tinted windows on the road
In vehicle detailing work, the most common damage seen isn’t from neglect, but from owners using unsuitable glass cleaners. Ammonia-based sprays and old, gritty cloths tend to cause more edge peeling and haze than dirt.
The reassuring part is that routine, gentle maintenance prevents nearly all of it. A soft cloth and mild soapy water, used consistently, keep film clear for years. When you’d rather hand that job to someone else, we’re glad to take care of it during a scheduled detail.
— isaac’s
Mobile tint-safe cleaning as part of your detail
We build tint-safe glass cleaning into our standard mobile detailing work, so your windows get the same gentle, ammonia-free treatment as the rest of your vehicle’s glass and paint. Our Deluxe Detail and Revival Detail packages cover full exterior and interior cleaning, including glass, at your home, workplace or wherever suits you on the Sunshine Coast.

We use eco-friendly products across our services, which means no harsh ammonia near your tint and no chemical smell lingering in the cabin afterwards. If you’re after longer-term protection for paint and surfaces alongside your regular wash, our Ultimate Protection Package adds another layer of care. Book a mobile detail and we’ll handle the glass properly while we’re there.
FAQ
What cleaner is safe to use on tinted windows?
A mild soapy water solution, roughly a quarter teaspoon of dishwashing liquid per 2 litres of water, applied with a soft microfibre cloth, is widely recommended as the safest DIY option. Ammonia-free commercial cleaners labelled “tint safe” are also suitable once you’ve checked the label or SDS.
Is Windex ok for tinted car windows?
Standard household glass cleaners, including many Windex formulas, often contain ammonia, which installers commonly warn can break down the adhesive beneath window film over time. Some manufacturers permit ammonia-based cleaners once film has fully cured, but sticking with an ammonia-free cleaner avoids the risk entirely.
What not to clean tinted windows with?
Avoid ammonia-based cleaners, vinegar, citrus solvents, steam cleaners and anything abrasive, including scouring pads, paper towel and hard scrapers. These either attack the adhesive layer or physically scratch the film surface.
What is the best way to clean tinted car windows?
Spray on a mild soapy water solution, let it loosen grime for a few seconds, then wipe gently with a soft microfibre cloth using straight strokes rather than circular scrubbing. Dry immediately with a separate clean cloth to prevent streaks and water spots, and use separate cloths for interior and exterior glass.
How soon after tinting can I clean my windows?
Most installers recommend waiting around 30 days after installation before cleaning, since residual moisture under the film can cause temporary haze or small blisters while it cures. Light dusting is generally fine in the meantime, but avoid wiping or spraying liquid directly on the film until that period has passed.
Sources
- Illicit Tint aftercare
- Tintkits DIY tint installation instructions
- QTint caring for your new window tinting
- 3M Australia — How do I clean my 3M™ Automotive Window Films?