
TL;DR:
- Paint correction removes surface imperfections by physically leveling the clear coat, unlike waxing that only adds temporary shine. Proper correction involves careful steps like decontamination, inspection, and polishing to ensure long-lasting results, especially in harsh coastal climates. Applying protection afterward, such as ceramic coatings, is essential to preserve the corrected surface against UV, salt air, and wear.
Most car owners believe a good wax will bring their faded, scratched paint back to life. It won’t. Waxing adds a temporary layer of shine on top of existing imperfections, but it doesn’t actually fix them. Paint correction is an entirely different process, and for Sunshine Coast drivers dealing with harsh UV exposure, salt air, and humidity, understanding the difference could be the single most important thing you do for your vehicle’s appearance and long-term value. This guide explains exactly what paint correction is, how it works, and how to use it wisely.
Table of Contents
- What is vehicle paint correction?
- How paint correction works: the step-by-step workflow
- When to choose paint correction and when not to
- Why protection matters after paint correction
- Common risks and how to avoid them
- The truth most car owners miss about paint correction
- Get expert paint correction and protection on the Sunshine Coast
- Frequently asked questions
Key Takeaways
| Point | Details |
|---|---|
| Paint correction defined | Paint correction removes paint imperfections and goes far beyond what simple waxing can achieve. |
| Workflow matters | Correcting paint safely involves multiple steps, specialist tools, and is best finished with a protective layer. |
| Choose wisely | Not all defects are fixable with correction—checking your clear coat first is crucial. |
| Protection is essential | Failing to protect corrected paint means it will quickly lose its shine and durability. |
| Balance is best | Smart correction and consistent protection keep your car looking its best for longer, without unnecessary risk. |
What is vehicle paint correction?
Paint correction is the process of removing surface imperfections from a vehicle’s clear coat using abrasive compounds and polishing machines. The clear coat is the transparent outer layer that protects your car’s colour and gives it that glossy, showroom finish. Over time, swirl marks from improper washing, fine scratches from road debris, and oxidation from sun exposure all accumulate within this layer, making even a well-maintained car look dull and tired.
Here’s where the misconception kicks in. Many car owners reach for a tin of wax and call it a day. But polishing and correction are abrasive processes that physically change the paint surface to reduce defects, while wax and sealant primarily add a protective layer and do not remove existing defects. Wax fills in scratches temporarily and adds gloss, but the moment that wax wears off, those scratches are still there waiting. Paint correction, on the other hand, permanently removes those imperfections by levelling the clear coat itself.
Paint correction vs waxing: what’s the difference?
| Feature | Paint correction | Waxing or sealing |
|---|---|---|
| Removes swirls and scratches | Yes | No |
| Alters the clear coat surface | Yes (abrasive) | No |
| Improves paint permanently | Yes | No |
| Adds protective layer | No (needs follow-up) | Yes |
| Requires professional tools | Usually | No |
| Long-term results | High | Low to moderate |
This distinction matters enormously when you’re considering what your car actually needs. If your paint looks dull or scratched, no amount of wax will fix it. And if you’re looking to sell your vehicle, corrected paint makes a measurable difference to buyer perception and resale value. A car that looks well-maintained commands a noticeably higher price on the Sunshine Coast used vehicle market.
“Waxing your car without correcting the paint first is like painting over a cracked wall. The result looks better initially, but the underlying problems remain.”
How paint correction works: the step-by-step workflow
With that understanding in place, let’s demystify how paint correction is actually performed from start to finish.
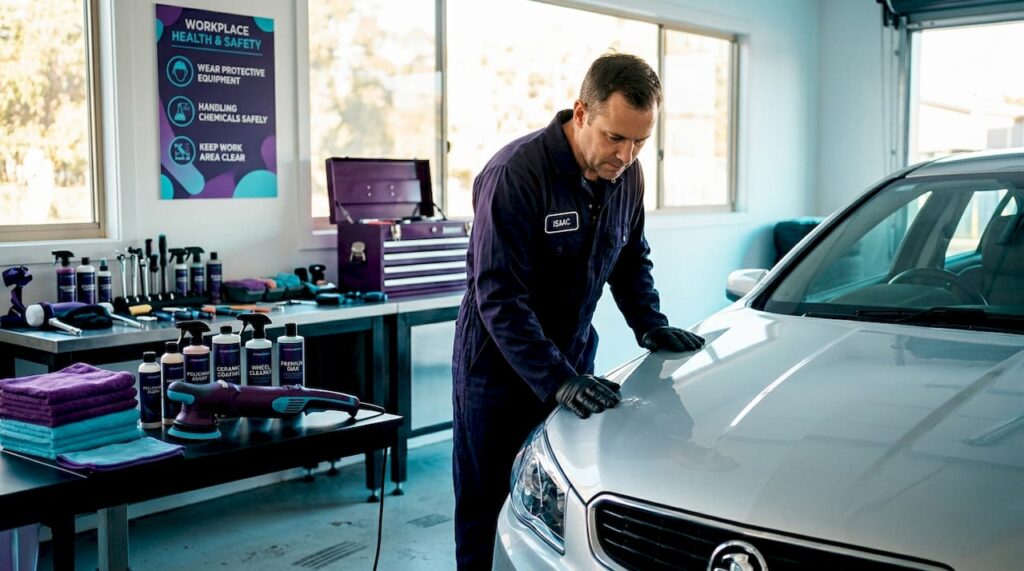
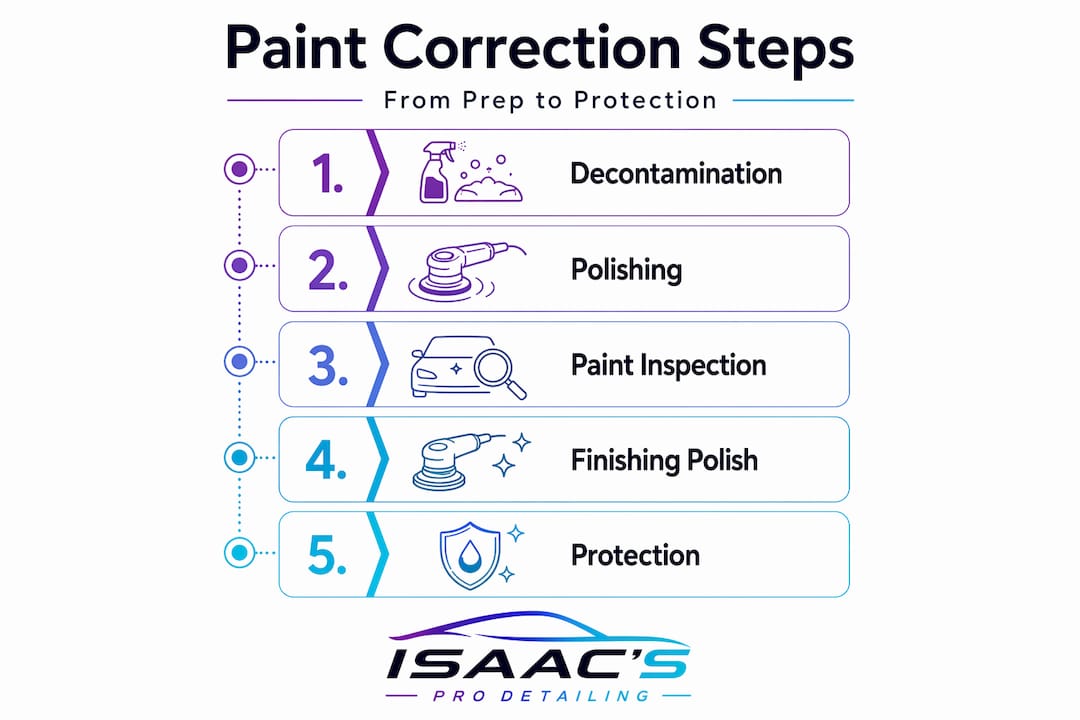
A typical professional paint correction workflow includes thoroughly washing and decontaminating the vehicle, inspecting the paint, testing a small area, compounding to cut defects, polishing to refine the finish, and then applying protection to preserve the corrected surface. Each step has a specific purpose, and skipping any one of them can compromise the final result.
Here is what the process looks like in practice:
- Decontamination wash. The vehicle is washed using a two-bucket method or foam cannon to remove all loose dirt, then treated with an iron remover to dissolve embedded metallic contaminants, and clay-barred to strip out any bonded surface contamination. You cannot correct paint that still has debris sitting on or in it.
- Paint inspection. The detailer uses a paint depth gauge to measure the thickness of the clear coat across different panels. This reading is critical because it tells you how much correction is safe to perform without thinning the clear coat beyond a safe threshold.
- Test spot. A small, inconspicuous area is polished first to determine which combination of pad and compound delivers the best result without being overly aggressive. Every car’s paint behaves differently.
- Compounding or cutting. A machine polisher fitted with a cutting pad and a more abrasive compound is used to remove the majority of defects, including heavier swirls, scratches, and oxidation. This is the most aggressive phase of the process.
- Polishing and refining. After compounding, a finer polish and softer pad are used to remove any haze or micro-marring left by the compound, restoring full clarity and gloss to the paint.
- Protection application. The corrected paint is then sealed using wax, paint sealant, or ceramic coating to lock in the results and protect against future damage.
Professionals who use the right common paint correction tools can work through this process methodically and efficiently. If you want to understand each polishing phase in greater detail, a thorough polishing step-by-step walkthrough can give you a closer look at what each stage involves.
Paint correction workflow at a glance
| Step | Tools used | Outcome |
|---|---|---|
| Decontamination wash | Foam cannon, iron remover, clay bar | Clean, contaminant-free surface |
| Inspection | Paint depth gauge, lighting | Safe working parameters established |
| Test spot | Machine polisher, various pads | Optimal combination identified |
| Compounding | DA or rotary polisher, cutting pad | Defects removed |
| Polishing | Polisher, finishing pad | Haze removed, gloss restored |
| Protection | Applicator, wax or ceramic | Finish preserved |
Pro Tip: Matching the pad and compound to your specific paint hardness is crucial. Softer paints found on many Japanese and European vehicles can be damaged by compounds that would be perfectly appropriate for harder paints. Always start with the least aggressive option and work up only if needed.
When to choose paint correction and when not to
Understanding the method is vital, but when is paint correction actually the right choice for your car?
Paint correction works brilliantly for a specific range of problems. When your clear coat is intact but showing signs of wear, the process can deliver genuinely transformative results. However, when clear coat is failing, peeling, or delaminating, no amount of polishing will fix it. In those situations, the panel needs to be repainted, full stop.
Suitable for paint correction:
- Swirl marks from automatic car washes or improper hand washing technique
- Light to moderate random deep scratches that haven’t broken through to the base coat
- Oxidation causing a chalky, faded appearance, common on older Sunshine Coast vehicles exposed to intense UV radiation
- Water spot etching from hard tap water or mineral-heavy rain
- Light bird dropping etching caught before it has fully cured into the clear coat
Not suitable for paint correction:
- Clear coat that is peeling, flaking, or bubbling
- Scratches that expose the bare metal or primer beneath the paint
- Deep rust that has formed under the paint surface
- Full delamination of the clear coat from the base coat beneath
Pro Tip: Before booking any correction service, have your paint thickness measured with a digital gauge. Clear coat is typically only 30 to 50 microns thick. One round of professional correction removes only a few microns, but repeated aggressive corrections over time can leave you with very little clear coat to work with. Knowing your starting thickness helps you and your detailer make smarter decisions about how aggressively to correct. For context on what to do after correction to preserve that thickness, reviewing car paint protection steps is a smart next move.
Why protection matters after paint correction
Once correction is complete, the next step is crucial: protecting that flawless finish.
After the polishing process, your paint is at its most vulnerable. The abrasive correction process removes oxidation and contamination, leaving the clear coat freshly levelled and more exposed to the elements than it was before. Applying protection after correction is strongly recommended because without it, the freshly levelled surface can re-oxidise and re-scratch much faster through normal everyday use.
Think of it this way: correction restores your paint to its best possible condition, and protection locks that condition in place. Skipping protection after correction is like refinishing timber floors and then leaving them unsealed. The results will deteriorate far faster than they should.
Choosing the right protection for Sunshine Coast conditions:
- Carnauba wax provides a warm, deep shine but typically lasts only four to eight weeks before it needs reapplication. Fine for cars that are regularly maintained but not ideal for our intense Queensland UV.
- Synthetic paint sealants last longer than wax, typically three to six months, and offer better resistance to heat and UV degradation. A solid mid-range option.
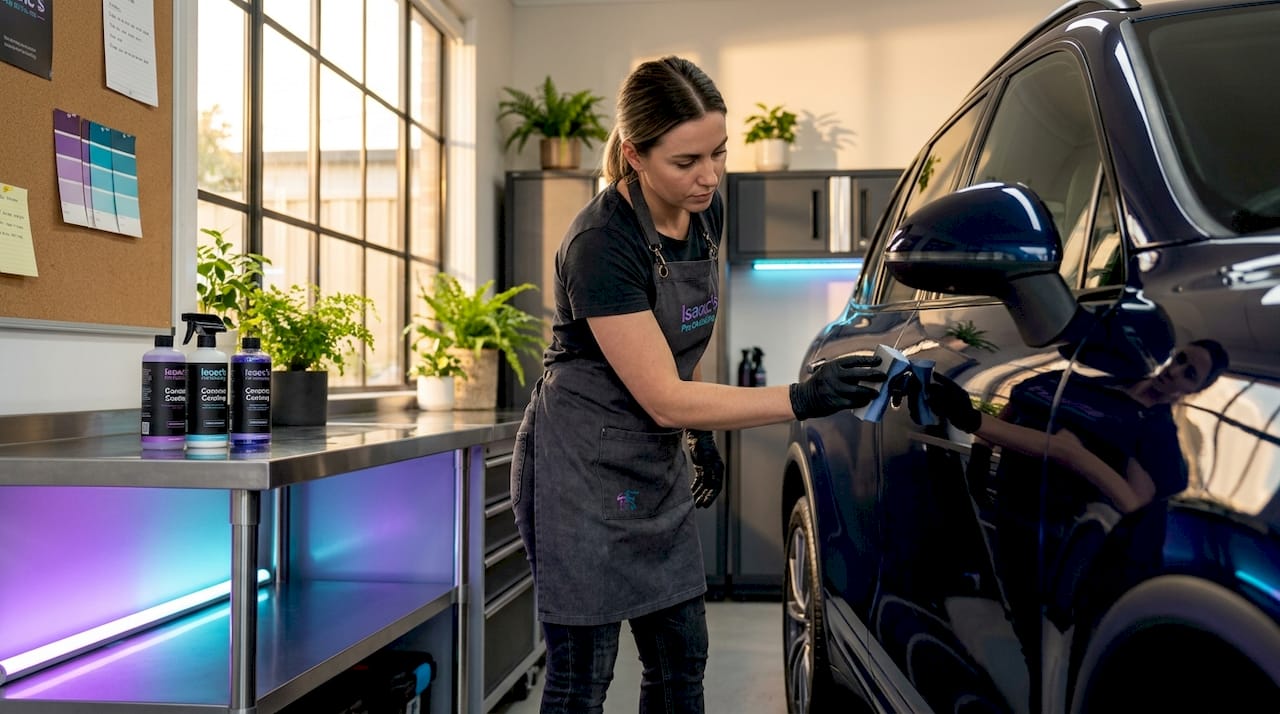
- Ceramic coatings bond chemically to the clear coat and can last two to five years or more with proper maintenance. They offer superior protection against UV, bird droppings, salt air, and water spotting. For Sunshine Coast conditions, this is the gold standard.
Learning more about ceramic coating application and how it works in practice can help you decide whether it’s the right next step for your vehicle. Our ceramic coating guide tailored specifically for Sunshine Coast car owners is another excellent resource.
Pro Tip: Ceramic coatings offer significantly longer-lasting results in coastal climates. The salt in the air around the Sunshine Coast region accelerates oxidation and paint degradation, making durable protection far more valuable here than it would be in a drier, inland environment.
Common risks and how to avoid them
While paint correction offers impressive results, it’s essential to understand the risks if not done with care.
The most significant danger in paint correction is removing too much clear coat. Over-aggressive correction can weaken the clear coat over time, reducing its ability to protect the base coat and colour beneath. Once that protective layer is gone, you face repainting costs rather than correction costs. The difference is significant.
Common risks and how to avoid them:
- Overheating the paint. Using a rotary polisher at high speed without experience can generate enough heat to burn through the clear coat, especially on panel edges and corners. Use a dual-action machine polisher if you’re less experienced, and always keep the machine moving.
- Uneven finish or holograms. Using the wrong pad and compound combination can leave a holographic swirl pattern, particularly visible in direct sunlight. Always follow a compounding step with a refining polish.
- Clear coat thinning over successive corrections. Each correction removes a small amount of material. Repeated aggressive treatments year after year will eventually leave you with dangerously thin clear coat. Measure before every session.
- Applying correction to compromised paint. Correcting paint that has hidden rust, bubbling, or delamination underneath will make the problem worse and more expensive to fix later.
“Every time you correct paint, you’re making a permanent trade: a small amount of clear coat in exchange for a better-looking surface. Respect the trade, because you can’t get that material back.”
For anyone who is uncertain about their paint’s condition, always consult a professional before attempting any correction work. Understanding proper exterior car cleaning practices before and between correction treatments also helps preserve your investment significantly. And if you want a broader picture of what’s available, browsing paint protection solutions will give you a clearer view of the full range of options.
The truth most car owners miss about paint correction
After years of detailing vehicles across the Sunshine Coast, the pattern we see most often isn’t paint that’s been neglected. It’s paint that’s been over-corrected in the pursuit of perfection.
There’s a belief among some enthusiasts that more correction equals better paint. More passes, more aggressive compound, deeper cut. In reality, chasing a perfect finish on a daily driver is one of the most counterproductive things you can do. Your car is going to pick up new swirls the very next time you drive it through a carwash or wipe it down with a dirty cloth. The relentless pursuit of zero defects on a car that lives outside in Queensland weather is a losing battle, and it comes at the cost of your clear coat’s long-term health.
The smarter philosophy is balanced correction followed by durable protection. Correct the paint to a level that genuinely improves its appearance and condition, apply a high-quality ceramic coating to shield it, and then focus on proper maintenance habits to slow the accumulation of new defects. That approach delivers a vehicle that looks consistently excellent over many years rather than perfect for one week and then degraded again.
We’ve seen cars come in for their second or third full correction in just a few years because the owner kept going for that 100% result without protecting the work afterward. By the time they reached us, their clear coat was borderline unsafe to correct further. That’s an expensive and avoidable situation. Our pro detailing tips cover the kind of ongoing habits that genuinely make a difference in how your paint ages.
The Sunshine Coast climate is beautiful, but it is genuinely harsh on vehicle paint. UV intensity, coastal salt air, and humidity create conditions that accelerate paint degradation faster than most parts of Australia. That makes protection even more critical here, and it makes over-correction even more risky. Treat correction as a precise, considered tool rather than a fix-all solution, and your paint will reward you for it.
Get expert paint correction and protection on the Sunshine Coast
If you’ve read this far and you’re ready to do something about your vehicle’s paint, the good news is that you don’t need to take time off work or drive across town to get it done properly.

Isaac’s Pro Detailing Sunshine Coast brings professional-grade correction and protection directly to you, whether you’re at home, at work, or anywhere else across the region. Understanding the full mobile car detailing workflow makes it clear just how thorough and well-organised an on-site service can be. From paint depth assessment through to correction, polishing, and full ceramic coating application, every step is performed with the equipment and expertise your car deserves. Explore your paint protection options or get in touch directly through Isaac’s Pro Detailing Sunshine Coast to book your service or ask about what your specific vehicle needs.
Frequently asked questions
What does paint correction actually remove from my car?
Paint correction removes imperfections such as swirl marks, light scratches, and oxidation by polishing the clear coat at a microscopic level, restoring clarity and gloss to the surface.
How do I know if my car is suitable for paint correction?
If your clear coat is intact but looks dull or scratched, correction can deliver excellent results. However, when clear coat is peeling or delaminated, repainting is the appropriate solution rather than correction.
Why is protection recommended after paint correction?
Without protection after correction, the freshly levelled surface re-oxidises and re-scratches far more quickly through normal use, so applying wax, sealant, or ceramic coating is essential to maintain the results.
Can paint correction damage my clear coat?
Yes, if performed too aggressively or too frequently. Over-aggressive correction removes too much clear coat and weakens its ability to protect the paint over time, which is why measured technique and professional assessment matter.