
A flooded car interior can usually be saved if water stayed below the dashboard and you act within 24 to 48 hours, but engines, electronics, and airbag systems are a different story entirely. Do not start the engine. Photograph everything, call your insurer before you touch anything major, and arrange a tow rather than driving it, even a short distance.
TL;DR:
- Water below the door sills generally allows interior repair if dried within 24 to 48 hours, but electronics and airbags are at high risk of permanent damage.
- Photographing all exterior and interior damage, recording conditions, and postponing repairs until thorough drying is essential for an accurate insurance claim.
- Disassembling and drying every layer of the interior is necessary to prevent mold growth and long-term issues, which can take three to five days with professional equipment.
- Cleaning and disinfecting require staged extraction, mould-specific disinfectants, and proper odour neutralization, rather than surface cleaning or masking smells.
- Electrical connectors and wiring harnesses must be gently dried and inspected by professionals to avoid corrosion and delayed faults.
Table of Contents
- What are the safety and insurance steps for flooded car interior cleanup?
- What should you do in the first hour after a car floods?
- Why does a flooded car need a full teardown to dry properly?
- How do you clean and disinfect a flooded car interior?
- What electrical damage should you check for after a flood?
- When does a flooded car need parts replaced instead of cleaned?
- When should you call in a professional restorer?
- How do you handle wet electrical connectors and wiring harnesses?
- What tools and products do you need for DIY flooded car interior cleanup?
- How do you clean and restore upholstery and leather after a flood?
- How do you stop mould and odour coming back after cleanup?
- The most common mistakes after a flooded interior
- Book a flooded car assessment before the damage sets in
- Sources
- FAQ
What are the safety and insurance steps for flooded car interior cleanup?
Starting a submerged engine is the single most damaging mistake you can make. Water sitting in the intake or cylinders gets pulled in the moment the engine turns over, causing hydrostatic lock and bent connecting rods that no amount of cleaning will fix.
Electric and hybrid vehicles carry an extra layer of risk. High-voltage battery packs exposed to floodwater can pose electrocution and fire hazards, so stand clear of the vehicle and tell the tow operator it’s been flooded so they can arrange specialist handling.
Before anything else, protect your insurance position:
- Photograph the exterior waterline, door sills, and interior from multiple angles.
- Note the time, location, and conditions (rising flood, storm surge, flash flood).
- Call your insurer before major repairs begin, since documenting damage early helps preserve your claim.
- Arrange a tow instead of attempting to drive, even for a few metres.
Pro Tip: Keep the ignition off entirely, including accessory mode. Even running the fan or radio while sitting in water can push moisture into electrical modules you haven’t inspected yet.
Water above the door sills usually pushes an assessor toward a write-off conversation. Below that line, most interiors are repairable with proper teardown and drying.
What should you do in the first hour after a car floods?
Move fast, but move carefully. Here’s the order that limits damage without risking further harm:
- Open all doors, the boot, and any vents once it’s safe, to start air movement.
- Remove valuables, loose electronics, and anything that can be lifted out without force.
- Pull floor mats and any trim that lifts freely, but stop if something feels like it’s concealing wiring.
- Disconnect the 12-volt battery only if you’re confident doing so; otherwise leave it for a professional.
- Photograph the VIN, odometer, interior soaking level, and exterior waterline for your insurer.
Resist the urge to rip out seats or carpet yourself if you’re not confident. Disaster guidance from the Insurance Council of Australia warns that well-meaning helpers removing repairable components can complicate an insurer’s assessment. Stick to items that pose a health risk (soaked mats, loose debris) and leave structural teardown to someone who knows what they’re doing.
Pro Tip: Label every item you remove with where it came from. A phone photo of the empty cavity before you pull anything out saves enormous confusion during reassembly.
Why does a flooded car need a full teardown to dry properly?
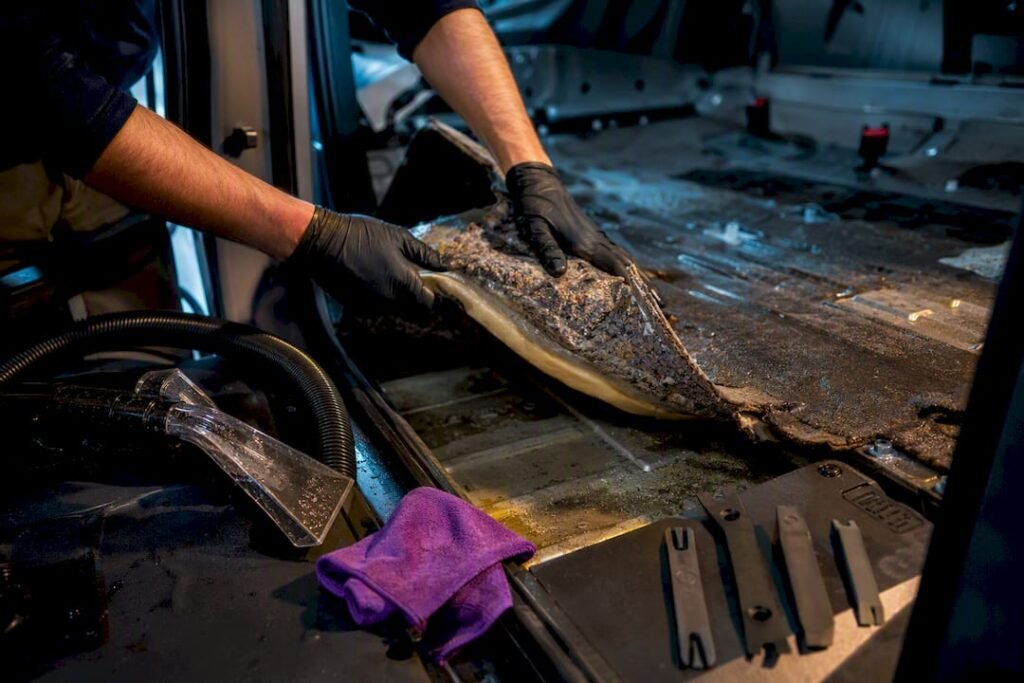
Surface drying fails because water doesn’t stay on the surface. It wicks into carpet underlay, seat foam, and cavities under the trim panels, where it sits and breeds mould long after the visible fabric looks dry. Professional detailers treat disassembly as the difference between a temporary fix and a genuine restoration, because drying every layer is the only way to stop hidden moisture from causing problems weeks later.
The practical sequence looks like this:
- Remove seats and carpet completely, exposing the subfloor.
- Inspect cavities, sound-deadening pads, and wiring channels for trapped water.
- Extract standing and absorbed water with a wet vacuum before any drying equipment goes in.
- Position air movers to create cross-ventilation, and run dehumidifiers to pull ambient moisture out of the cabin air.
- Use desiccant bags or crystals in enclosed pockets like door cavities where airflow can’t reach.
| Equipment | Purpose | Typical placement |
|---|---|---|
| Air movers | Push moving air across wet surfaces | Angled across seats, floor, and open door cavities |
| Dehumidifiers | Pull moisture out of cabin air | Centre of cabin, doors closed for cycles |
| Desiccant packs | Absorb residual moisture in tight spots | Door pockets, under-dash cavities, glovebox |
Drying typically takes three to five days for a moderately soaked interior, longer if carpet underlay or seat foam was fully submerged. Check dryness with a moisture meter against carpet, foam, and subfloor. If a reading still climbs when you press into padding, it’s not done.
How do you clean and disinfect a flooded car interior?
Cleaning follows a strict order: extract as much water and residue as possible first, apply a detergent or encapsulation treatment to break down contamination, extract again as a rinse, then disinfect last. Skipping the extraction rinse just pushes dirty water deeper into the padding you’re trying to save.
For mould, use an EPA-style disinfectant suited to fabric and foam, not just a general surface cleaner. Steam can help lift mould from hard trim and seams, but avoid saturating fabric further. Ozone treatment and ionisers have a place for lingering odour, though they need proper ventilation and are often best left to a professional given the equipment and exposure risks involved.
Odour removal is its own project:
- Enzyme cleaners break down organic residue that causes smell, rather than masking it.
- Activated carbon absorbs airborne odour molecules over several days.
- Repeated airing with doors open speeds up off-gassing from cleaned surfaces.
- A professional-grade neutraliser applied after cleaning, not instead of it, gets rid of what’s left.
Pro Tip: If a carpet or seat still smells musty after a full dry cycle, the smell is coming from something you haven’t cleaned yet, not something that needs more perfume. Small mould patches can often be handled with targeted carpet treatment, but foam that stays contaminated after cleaning needs replacing, not another round of product.
What electrical damage should you check for after a flood?
Flood damage to wiring is often invisible at first. Corrosion builds slowly inside connectors and plugs, and a car can drive fine for weeks before a connection fails, because corrosion in wiring doesn’t announce itself the way a soaked carpet does.
Priority inspection points for a mechanic or assessor:
- Fusebox and any connectors mounted low in the engine bay or footwells.
- ECU and other control modules, particularly if mounted under seats or in the floor.
- Airbag modules and their wiring, given the safety stakes if they fail to deploy correctly.
- Under-seat wiring harnesses and connectors, which sit exactly where water pools.
Don’t try to dry or fiddle with connectors yourself beyond basic inspection. Disturbing corroded pins or forcing a dry-out with a heat gun can cause more damage than the water did, and it can also complicate an insurer’s assessment of what caused a fault. Tell your mechanic or tow operator the observed water level, which doors were submerged, and any warning lights that appeared.
When does a flooded car need parts replaced instead of cleaned?
Replace rather than clean when foam or padding shows internal mould, when odour persists after a full dry and disinfect cycle, or when structural components have started to collapse or delaminate. Retained padding keeps harbouring microbes no matter how well the surface looks, since contaminated foam rarely responds to cleaning alone.
Cost drivers to expect:
- Labour for full teardown and reassembly, which is the biggest line item on most quotes.
- Electronics diagnosis, especially where multiple modules need testing.
- Seat heater elements and airbag modules, both expensive to replace individually.
Professional restoration jobs requiring teardown and component replacement commonly start in the low thousands and climb quickly once electronics are involved. Insurers weigh the cost of full restoration against the vehicle’s value. Getting a written, itemised quote from a qualified restorer gives you leverage if the initial insurer assessment looks light.
When should you call in a professional restorer?
Bring in a professional once water has crossed the door sills, cushions are fully soaked through, mould is visible, or you’re not certain whether electronics got wet. Beyond that point, DIY effort mostly delays the inevitable.
A proper restoration service runs controlled teardown, industrial-strength water extraction, measured drying with monitored humidity, and odour neutralisation that goes beyond a can of spray deodoriser. Isaac’s Pro Detailing works mobile across the Sunshine Coast, running seat and carpet extraction, odour elimination, and ozone deodorisation protocols on-site, and following a documented interior workflow rather than a one-size approach.
When choosing any restoration provider, ask about:
- What extraction and drying equipment they actually own versus hire.
- Experience handling insurer documentation and write-off assessments.
- Whether they guarantee odour and mould results, and for how long.
How do you handle wet electrical connectors and wiring harnesses?
Inspection is only half the job. Once you’ve identified wet connectors and harnesses, handling them the wrong way causes the exact corrosion you’re trying to prevent.
Never force a connector apart while it’s still wet or muddy. Debris trapped in the pins can scratch contact surfaces on separation, and that scratch becomes a corrosion starting point later. If a connector needs disconnecting for drying access, do it gently, and only if you’re confident about how it reconnects.
Compressed air is useful for pushing standing water out of connector housings, but keep the nozzle a reasonable distance away. Blasting air directly into a plug at close range can drive water further into the pin cavity instead of out.
Contact cleaner designed for electrical connectors, applied sparingly, displaces residual moisture and helps prevent corrosion forming on pins during the drying period. General-purpose degreasers aren’t the right tool here. They leave residue that attracts dirt and can interfere with the connection.
Wiring harnesses wrapped in loom tape hold water inside the wrap long after the outer surface looks dry. If a harness ran through standing water, the wrap likely needs to be cut back, dried, and retaped rather than dried through the tape itself.
Leave connectors and harnesses open to air rather than sealing them back up early. Reconnecting or retaping before full drying traps whatever moisture remains, and that’s exactly the scenario that produces the delayed, hard-to-diagnose faults owners see weeks after a flood. If in doubt, this is where a technician’s time is worth paying for.
What tools and products do you need for DIY flooded car interior cleanup?
Having the right gear on hand before you start saves time and stops you improvising with the wrong product halfway through.
Extraction and drying gear:
- Wet/dry shop vacuum with a hose attachment for tight cavities.
- Moisture meter to check carpet, foam, and subfloor readings as you go.
- Portable dehumidifier and at least one air mover or high-output fan.
- Desiccant packs for door cavities and enclosed pockets.
Cleaning and disinfecting products:
- Carpet and upholstery detergent suited to encapsulation cleaning.
- An EPA-style disinfectant rated for fabric and soft surfaces.
- Enzyme-based odour treatment for organic contamination.
- Electrical contact cleaner for connectors, not general degreaser.
Basic tools and supplies:
- Panel-removal tool set for trim clips (a screwdriver alone risks cracking plastic).
- Nitrile gloves and a respirator mask rated for mould exposure.
- A torch for inspecting dark cavities under seats and carpet.
- Sealable bags and a marker for labelling removed parts.
Skip anything marketed as an instant odour fix. Perfumed sprays and gel deodorisers cover a smell for a day or two, then it comes back once the actual contamination reasserts itself. Spend the money on extraction and disinfection instead, and treat odour as the last step, not the first.
How do you clean and restore upholstery and leather after a flood?
Fabric upholstery and leather need genuinely different treatment, and using the wrong method on either shortens its life.
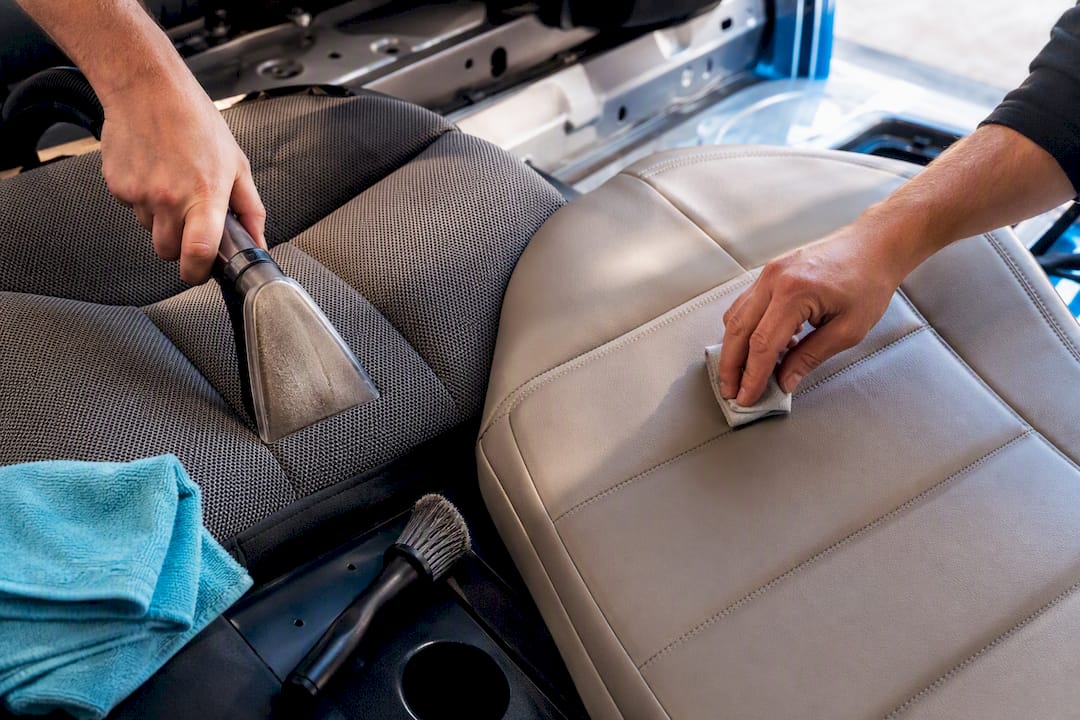
For fabric seats and carpet, extraction comes before any cleaning agent. Run a wet vacuum pass first to remove as much water as possible, then apply a carpet and upholstery detergent, agitate gently with a soft brush, and extract again as a rinse. Repeating the extraction step, rather than adding more product, is what actually gets contamination out rather than just moving it around.
Leather behaves differently because it’s porous and reacts badly to prolonged soaking. Wipe down standing water immediately rather than letting it sit, then clean with a pH-balanced leather cleaner rather than a general upholstery product, which can strip the leather’s finish. Dry leather slowly at room temperature. Direct heat or sun exposure causes cracking as the material loses moisture unevenly.
Once leather is properly dry, a conditioner restores flexibility and helps prevent the cracking that shows up weeks after a flood if the material dried out too fast. Skipping conditioner on flood-affected leather is a common reason seats look fine for a month, then develop stiff, cracked patches.
Stitching and seams deserve a second look. Thread absorbs and holds water longer than the surrounding leather or fabric, and mould often starts at a seam before it’s visible anywhere else. If you notice a musty smell concentrated at a stitch line, that’s usually where the underlying padding is still wet.
How do you stop mould and odour coming back after cleanup?
Restoration only holds if the conditions that caused the problem don’t return. A car that’s been dried and cleaned once can still redevelop odour if moisture management stops the day the job finishes.
Keep humidity down for the following weeks, not just during active drying. A small desiccant unit left in the cabin for a month after restoration catches residual moisture that wasn’t obvious at the time. Crack windows slightly on dry days to keep air moving through the cabin, and avoid parking in full sun with windows sealed, since heat and trapped moisture together are what mould needs most.
Check under seats and in door pockets periodically for the first month. These are the spots most likely to hold onto dampness after everything else feels dry, and catching a damp patch early is far easier than treating established mould later.
If the car sits unused for more than a couple of days, leave a window cracked or run the ventilation system briefly to prevent stagnant, humid air building up inside a sealed cabin. Persistent odour issues sometimes need a dedicated removal approach rather than repeated masking, particularly if the smell reappears after humid weather. For ongoing prevention, fabric and leather protection treatments applied after restoration make future spills and dampness easier to manage before they set in.
The most common mistakes after a flooded interior
Owners lose more cars to delay than to the flood itself. Waiting on electrical checks, drying only the visible surface, or masking odour instead of removing the contamination behind it are the three mistakes that turn a repairable car into a write-off. Restoration genuinely works, but electrical gremlins can surface months later even after a proper job.
— isaac’s
Book a flooded car assessment before the damage sets in
Isaac’s Pro Detailing runs mobile flood assessments across the Sunshine Coast, coming to your home, work, or wherever the car’s parked, rather than adding a tow to an already stressful day. That matters because every hour a flooded interior sits closed up is another hour mould gets a head start.
The first visit covers a full assessment of water level and affected areas, a written estimate before any work starts, and a rundown of the equipment involved, extraction gear, air movers, dehumidifiers, and ozone deodorisation where needed. Services cover seat and carpet extraction, odour elimination, and fabric and leather protection once the interior is dry and clean. Check the wash and detailing menu for package options suited to flood-affected interiors, and book an assessment while the damage is still fresh rather than after odour and mould have had weeks to settle in.
Sources
- What to do if your car’s been submerged in floodwater – ABC News
- What to do if your vehicle has been flooded | RACQ
- Detailing a Flooded Car: It’s All in the Tear-Down
- What to do if your car was in a flood | Insurance and safety | Youi
FAQ
How do you clean a car interior after a flood?
Remove seats and carpet, extract all standing water, dry thoroughly with air movers and dehumidifiers, then clean with detergent, disinfectant, and enzyme-based odour treatment in that order.
What should you do first if your car interior has water damage?
Don’t start the engine, photograph the damage, and contact your insurer before beginning major repairs or removing structural components.
Is a flooded car ruined?
Not automatically. Interiors soaked below the door sill are often repairable, but water above that line, or exposure of the engine and electronics, pushes many insurers toward a write-off.
How long does it take a flooded car to dry out?
A moderately soaked interior typically takes three to five days to dry properly with proper extraction and dehumidifying equipment, longer if seat foam or carpet underlay was fully submerged.