
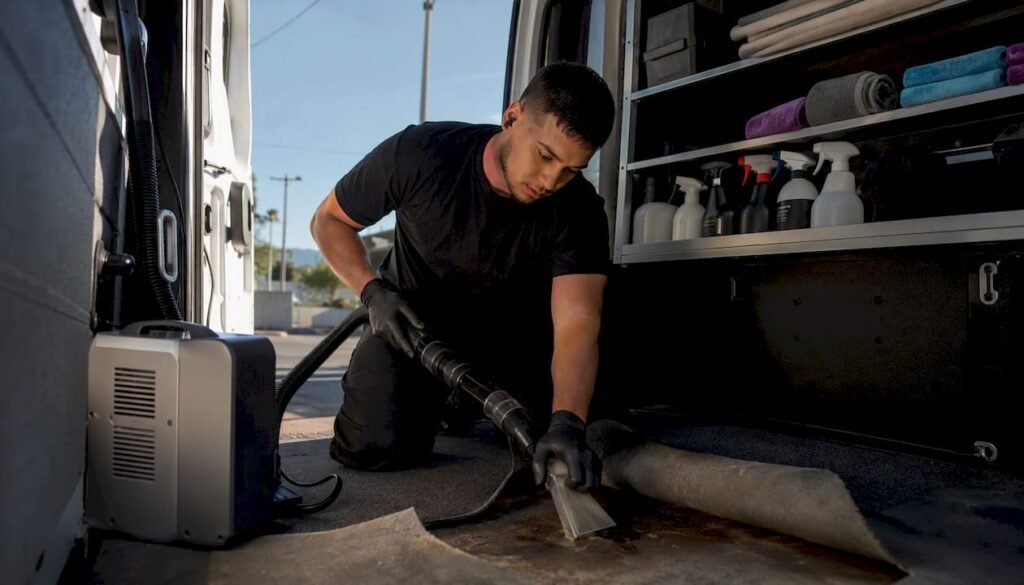
Stop the smell getting worse by drying the carpet fast: pull out any standing water with a wet/dry vacuum, then get air moving through the cabin non-stop for at least 24 hours. That’s the whole game. Everything else, the baking soda, the vinegar, the enzymatic sprays, only works once the carpet and padding underneath are properly dry. If the padding stayed wet for more than a day or two, or you can see mould through the carpet weave, drying alone won’t cut it and you’re looking at extraction or replacement.
Shell Australia’s own drying guide backs this up: act quickly, because mould can start growing in wet fabric and foam within a couple of days. Miss it, and a simple damp-carpet job turns into a mould remediation job.
Run through this in the first hour:
- Pull out the floor mats and hang them somewhere dry.
- Blot standing water with old towels, pressing hard rather than wiping.
- Get a wet/dry vacuum onto the carpet, even a cheap hire unit works.
- Open windows or doors if the weather’s dry, and point a fan or two at the footwells.
- Remove anything else wet, gym gear, towels, shoes, so it isn’t adding moisture back into the cabin.
If this feels beyond a quick fix, or you’re not confident doing it yourself, a mobile detailer like Isaac’s Pro Detailing can run the extraction and drying process properly the first time, which matters more than people expect once mould’s involved.
Key Takeaways
Fast extraction followed by full drying fixes most wet carpet smells, while soaked or mouldy padding usually needs professional removal and replacement to stop the odour returning for good.
| Point | Details |
|---|---|
| Act within 24 to 48 hours | Extract standing water and start airflow immediately to stop mould taking hold in damp carpet. |
| Extraction beats masking | A wet/dry vacuum or carpet extractor removes trapped moisture and residue that air fresheners never reach. |
| Padding is the hidden culprit | Soaked underlay holds moisture long after the surface feels dry, and it’s the usual reason smells return. |
| Know your DIY limits | Visible mould, persistent odour after full drying, or vent smells all point to calling a professional. |
| Book a mobile assessment | Isaac’s Pro Detailing offers on-site extraction, antimicrobial treatment and padding assessment across the Sunshine Coast. |
Table of Contents
- What to do in the first 0 to 24 hours
- Step-by-step DIY carpet extraction and deodorising
- Why does the musty smell keep coming back?
- Products and tools that actually work (and what to skip)
- When to call a professional detailer
- What experienced detailers check that you might miss
- Preventing wet carpet smell before it starts
- How long does it actually take, and what does it cost?
- A mobile detailer’s honest take on wet carpet jobs
- Get a professional to sort it properly, on your driveway
- Frequently asked questions
- Sources
What to do in the first 0 to 24 hours
Timing decides whether this is a Saturday-afternoon fix or a week-long headache. Mould spores don’t wait for a convenient weekend, they start colonising damp carpet fibres within a day or two in warm, humid conditions, and once they’re established you’re no longer dealing with a smell problem, you’re dealing with a biological one.
- Hour 0 to 1: Remove floor mats, clear loose items and clutter, and blot every wet patch with towels. If it’s safe and dry outside, open the doors and windows to start air exchange immediately.
- Hour 1 to 6: Run a wet/dry vacuum over the carpet and, where you can access them, under the front seats. Lift removable cushions or seat covers. Set up fans pointed directly at the wet carpet, not just circulating cabin air generally. Scatter a few open containers of baking soda in footwells and cupholders to start soaking up residual moisture.
- Hour 6 to 24: Bring in a dehumidifier if you have access to one, and rotate your fans every few hours so airflow reaches every damp section evenly. Do a squelch test underfoot in a few spots. If the carpet’s still noticeably wet after 24 to 48 hours, that’s your signal to call in professional extraction rather than keep waiting it out.
Pro Tip: Skip the heat gun or hairdryer-on-high approach. Blasting hot air at damp carpet can actually push moisture deeper into the padding before it evaporates, which just delays the problem and can warp trim. Airflow and extraction beat heat every time.
Step-by-step DIY carpet extraction and deodorising
Once the standing water’s gone, the real work starts: getting the carpet and padding clean enough that the smell doesn’t just evaporate for a week and come back. This is where most DIY attempts go wrong, people treat the surface and skip the extraction step, so residue and moisture stay trapped underneath.
You’ll want a few things on hand before you start:
- A wet/dry vacuum (shop-vac style) or a hired carpet extractor/steam cleaner.
- An enzymatic cleaner for anything organic, urine, food spills, drink stains.
- White vinegar diluted with water for light surface mildew.
- Baking soda and activated charcoal for odour absorption once things are dry.
- Gloves and a mask if you’re dealing with visible mould.
Here’s the sequence that actually works, in order:
- Inspect and isolate the source. Figure out if this is rainwater, a spilled drink, pet accident, or something worse, because that changes which product you reach for.
- Extract standing water first. Wet/dry vacuum every section of carpet, working in overlapping passes rather than one quick sweep.
- Shampoo and extract again. A carpet extractor or hired steam cleaner lifts embedded dirt and residue that a vacuum alone leaves behind. This is the step most people skip, and it’s the one that stops smells returning.
- Treat mould or mildew. For light surface mildew, a diluted vinegar wipe followed by full drying works well, according to RAC WA’s odour guide. For anything more established, an enzymatic or antimicrobial cleaner does a better job breaking down the organic matter causing the smell.
- Deodorise. Once everything is genuinely dry, not just dry to the touch, sprinkle baking soda over the carpet, leave it a few hours, then vacuum it up. Activated charcoal pouches left overnight help with lingering musty notes.
- Dry fully. Fans and a dehumidifier running for a further 24 hours minimum, checking corners and under-seat areas where air doesn’t naturally reach.
A detailed DIY extraction walkthrough covers the hire-machine version of this process if you want more detail on renting equipment.
Pro Tip: Never soak carpet with detergent trying to “really clean it.” Excess detergent leaves a sticky residue that attracts dirt and can actually feed odour-causing bacteria later. Less product, more extraction passes, is the better trade.
Stop the DIY approach and call a professional if you see mould growing through the carpet, if the smell is still there after full drying, or if the odour has a distinctly biological, sour edge that doesn’t match anything you spilled.
Why does the musty smell keep coming back?
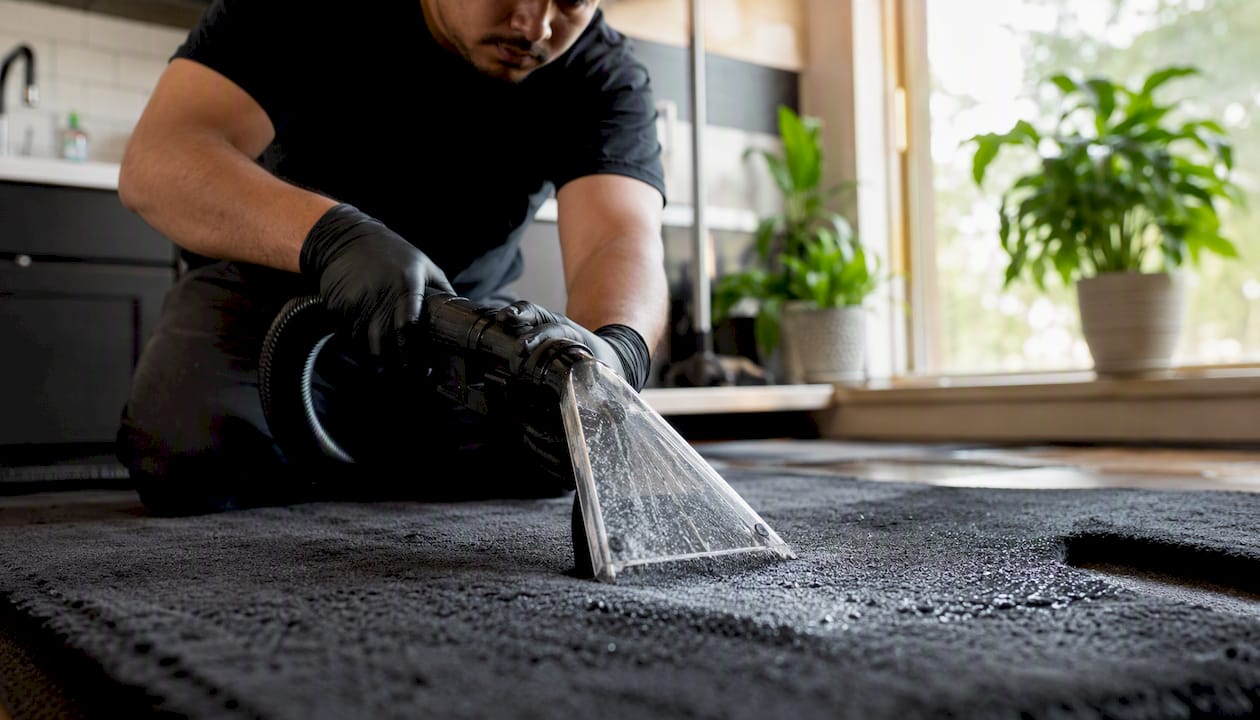
Car carpet isn’t a single layer, it’s carpet face fabric glued to a foam backing, sitting on top of underlay or padding, all bonded to the metal floor pan. Water doesn’t just sit on top, it works its way through every one of those layers, and the padding underneath holds moisture far longer than the visible carpet does. That’s the entire reason a musty smell can vanish for a week, then return the moment it rains again or the weather turns humid.
The usual hidden culprits:
- Soaked padding that never fully dried, even though the surface carpet felt fine.
- Trapped water pooled under the seat rails, out of sight and out of reach of a hand vacuum.
- Blocked drain channels near the windscreen or sunroof, letting water back into the cabin repeatedly.
- Condensation building up around the air-conditioning evaporator, which smells musty and gets blown through the vents every time you turn the AC on.
A few checks tell you a lot. Press down firmly on the carpet in a few spots, if you hear or feel a squelch, there’s still water underneath. Smell-test different zones of the cabin separately, footwells, under seats, boot, since a musty smell concentrated in one spot points to a localised source rather than general dampness. If you’re comfortable removing a sill trim or seat, take a look underneath, a moisture meter (cheap ones exist for building trades) gives you a proper reading rather than a guess.
Products and tools that actually work (and what to skip)
The right product depends entirely on what’s causing the smell, and this is where a lot of people waste money on the wrong fix. A perfumed air freshener does nothing to a carpet that’s still damp underneath, it just adds a second smell on top of the first one.
What’s worth having in the boot or garage:
- Wet/dry vacuum: the single most useful tool for pulling water out of carpet fast.
- Carpet extractor: proper wet extraction, hired or professional, gets embedded grime a vacuum can’t touch.
- Enzymatic cleaners: the right choice for organic odours like urine, spilled milk or food, since they break down the source rather than mask it.
- Baking soda and activated charcoal: cheap, effective odour absorbers, but only once the carpet is genuinely dry.
- Antimicrobial mould sprays: for treating actual mould growth rather than general dampness.
- A dehumidifier: speeds up drying dramatically compared to fans alone, and choosing the right capacity for the space makes a real difference to how fast a cabin actually dries out.
What to avoid: repeated light sprays of perfumed air freshener, which mask rather than remove the odour source, according to general consumer testing guidance on odour products. Ozone generators do remove some stubborn smells, but they carry real safety cautions around exposure and correct dosing, and they’re best left to professionals who know how to use them safely rather than a home unit run overnight in a closed garage.
Pro Tip: Always test a cleaner on a hidden patch of carpet first, boot corner or under a seat, and give it ten minutes before committing to the whole cabin. Some carpet dyes react badly to enzymatic cleaners and you’ll get a faded patch that’s more obvious than the smell ever was.
A rundown of recommended interior cleaning products covers specific brand options if you want a shortlist rather than categories.
When to call a professional detailer
Some jobs are genuinely a weekend fix. Others need equipment and expertise most people don’t have sitting in the garage, and pushing through with DIY methods past a certain point just delays the inevitable while the smell gets worse.
Call a professional when:
- You can see mould growing on or through the carpet.
- The padding stayed wet for more than 48 hours and still feels damp or smells sour.
- The smell persists after a full drying and extraction cycle.
- The contamination is biological, urine, vomit, or anything with a strong organic source.
- The musty smell comes through the air-conditioning vents rather than off the carpet itself, which usually points to evaporator contamination, a job that needs proper inspection of the ventilation system rather than carpet treatment.
Professional services typically run through this list, though not every job needs every step:
| Service | What it addresses |
|---|---|
| Full carpet extraction | Deep water and residue removal beyond what a home wet/dry vacuum can reach |
| Steam injection | Loosens embedded grime and organic matter in carpet fibres |
| Padding removal and replacement | Necessary when underlay has stayed saturated too long or shows mould |
| Ozone or fumigation treatment | Staged odour treatment, typically paired with extraction rather than used alone |
| Antimicrobial anti-mould treatment | Kills active mould growth rather than just cleaning around it |
| HVAC/evaporator cleaning | Removes musty smells coming through the vents rather than off the carpet |
Reputable detailers generally run ozone or fumigation as one stage within a broader assessment, extraction and cleaning process, rather than as a standalone fix, according to industry service descriptions from professional odour-removal operators. Most jobs where the damage is surface-level get sorted in a single visit. Padding replacement or a full strip-and-dry is a bigger job, and it costs more, but it’s the only real answer once the underlay itself has broken down.
What experienced detailers check that you might miss
Getting the order of operations right matters more than most people realise. Extract first, treat stains second, then do a final extract and dry, doing it in reverse order just pushes cleaning residue deeper into the padding instead of removing it.
A few spots that catch people out during inspection:
- Adhesive residues under the carpet edges that trap moisture against the floor pan long after the visible surface looks dry.
- Swollen foam underlay that’s absorbed water and expanded, a telltale sign the padding needs replacing rather than drying.
- Water pooled in seat rail channels and seams, completely invisible unless you actually lift the seat.
- Cabin air filter contamination, a cheap part that’s often the actual source of a musty smell people blame on the carpet.
A layered drying approach beats a single fan every time: fans plus a dehumidifier running together can cut total drying time down to about one to two days in straightforward cases, rather than the multiple days it takes with airflow alone. Moving fans every few hours so no single spot gets neglected, and tucking small open dishes of baking soda into cupholders and the boot while everything dries, are small habits that add up to a noticeably better result. A step-by-step interior cleaning process walks through this sequencing in more depth if you’re planning to tackle the whole cabin rather than just the carpet.
Preventing wet carpet smell before it starts
Most wet carpet problems trace back to a handful of repeatable habits, or the lack of them. Fixing the smell once is good. Not having to fix it again is better.
- Remove wet items from the cabin immediately, don’t leave wet togs, gym gear or umbrellas sitting on the floor overnight.
- Use rubber floor mats rather than carpet mats during wet weather, they’re far easier to dry and don’t hold moisture against the carpet.
- Replace your cabin air filter on schedule, a clogged filter holds moisture and contributes to musty smells you’ll wrongly blame on the carpet.
- Check and clear drain channels near the windscreen and sunroof so rainwater actually exits the car instead of pooling inside.
- Park undercover where you can, especially overnight, to cut down on condensation build-up.
After a beach trip or muddy weekend, air the car out properly rather than just closing it up wet. In humid months, a small moisture absorber left in the cabin overnight does more good than people expect, and a step-by-step humidity control routine built for staged drying translates well to car interiors, not just homes. A quick monthly check for damp patches under mats catches small leaks before they become a full carpet job.
How long does it actually take, and what does it cost?
Realistic expectations save a lot of frustration here. A straightforward damp carpet with good airflow and a dehumidifier dries in one to three days. Add a proper extraction and cleaning cycle on top, and you’re looking at several days total before the cabin’s genuinely usable again. If padding needs replacing or the whole carpet needs pulling and drying separately, budget several days, sometimes longer depending on parts availability.
| Job type | Typical timeframe | Rough cost range |
|---|---|---|
| DIY dry with fans/dehumidifier | 24 to 72 hours | Cost of equipment hire, roughly $40 to $150/day |
| Professional extraction and odour treatment | 1 to 3 days | A few hundred dollars |
| Padding replacement or full strip-and-dry | 2 to 5 days | Several hundred dollars or more, depending on vehicle |
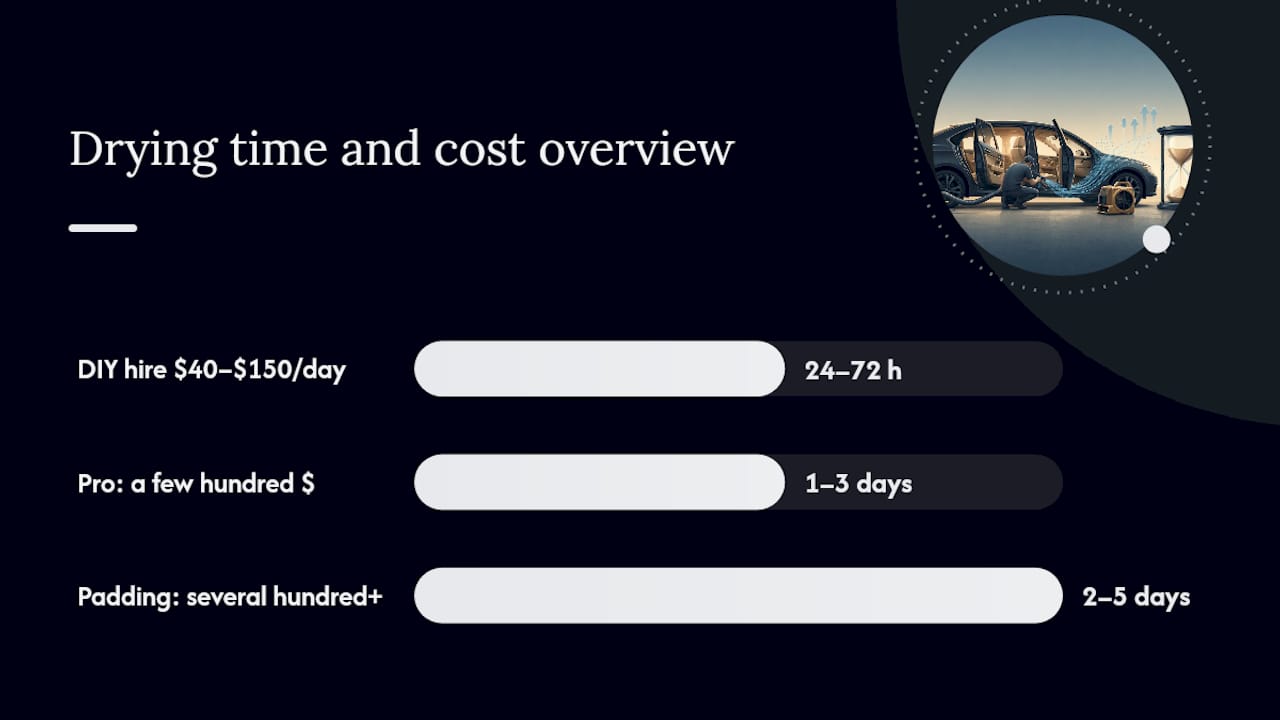
These figures are planning estimates only, actual pricing varies by region, vehicle size and how bad the contamination is by the time you call someone. A ute tray cab and a full-size SUV don’t cost the same to strip and dry, and a job caught early is always cheaper than one that’s had a month to set in.
A mobile detailer’s honest take on wet carpet jobs
Three scenarios come up again and again in this line of work, and they’re worth knowing before you decide whether to tackle it yourself or book someone.
The first is the quick-dry case: a spilled drink or a wet umbrella left on the floor overnight. Caught within a day, this is genuinely a DIY job, blot it, vacuum it, get airflow through the cabin, done. The second is the extraction-only case, where someone’s driven through standing water or left a window cracked during rain. The carpet looks fine on the surface but the padding underneath is saturated, and this is where a proper wet/dry vacuum and extraction cycle earns its keep, because surface drying alone leaves the smell coming back within a week.
The third case is the one that catches people out: padding that’s been wet for a week or more before anyone noticed, often from a slow leak rather than a single event. By the time the smell’s obvious, the underlay has usually started breaking down, and no amount of baking soda fixes that. A single-visit clean gets refused here, and replacement gets recommended instead, because putting a nice smell on top of decomposing padding just buys a week before the odour returns worse than before. Knowing which of these three you’re actually dealing with, rather than assuming the cheapest option, is most of the battle.
Get a professional to sort it properly, on your driveway
There’s a real gap between a home fix and what a mobile detailer can actually pull off with the right gear parked in your driveway. Isaac’s Pro Detailing runs the full workflow on-site, on-site wet extraction, antimicrobial treatments for active mould, padding assessment with replacement sourcing if the underlay’s gone too far, and HVAC or evaporator cleaning when the musty smell’s coming through your vents rather than off the carpet. Ozone and fumigation treatments are handled safely as part of a staged process, not a standalone spray-and-hope fix.
Booking is straightforward: an assessment on arrival tells you exactly what’s needed before any work starts, and most surface-level jobs are wrapped up in a single visit at your home, workplace, or wherever’s easiest for you across the Sunshine Coast. If the padding’s too far gone, you’ll know that upfront rather than after paying for a clean that doesn’t hold. Check the wash menu and service pricing to see what’s included, and get a proper assessment booked before that musty smell has another humid week to settle in.
Frequently asked questions
Can I get rid of a wet carpet car smell myself, or do I always need a professional?
Most surface-level cases, a spill, a rainy window left cracked, are genuinely fixable with a wet/dry vacuum, thorough drying and baking soda. Professional help becomes necessary once padding has stayed wet for days or mould is visible.
How long does a musty smell take to go away after the carpet dries?
If the odour was purely from surface moisture, it usually clears within 24 to 72 hours of full drying. If it lingers after that, the source is likely deeper in the padding or the air-conditioning system rather than the carpet surface.
Will baking soda alone fix a wet carpet smell?
No. Baking soda absorbs residual moisture and mild odours once the carpet is already dry, but it does nothing for standing water or established mould. It’s a finishing step, not a fix on its own.
Is it safe to use an ozone generator myself to remove car odour?
Ozone treatment works, but it carries genuine safety risks around exposure levels and correct timing, which is why it’s generally handled by trained professionals rather than DIY equipment.
This article provides general information and isn’t a substitute for a professional assessment. If you’re dealing with visible mould or a persistent musty smell, get a qualified detailer to inspect the vehicle before deciding on a fix.
Sources
- How to clean and dry flooded car carpet | Shell Australia
- How To Get Rid of Odour and Bad Smells in Your Car | RAC WA
- Consumerreports