
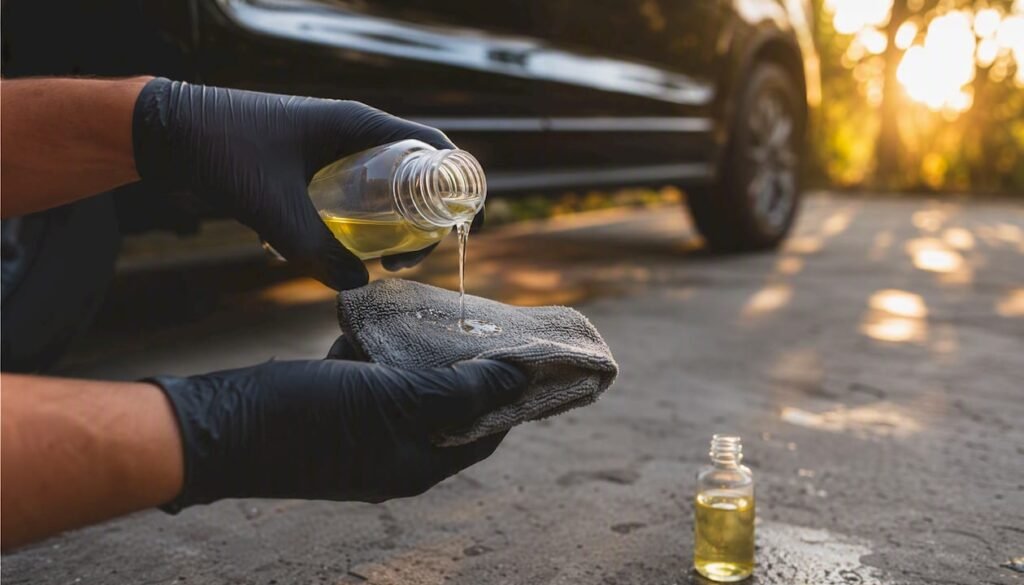
A purpose-built tar remover and the soak-and-lift technique is the safest way to remove tar spots from car paint without scratching the clear coat. Spray the remover onto the affected area, let it dwell for a few minutes, then blot gently with a clean folded microfibre towel. Never scrub. Rinse, rewash the panel, and reapply a wax or sealant immediately because solvents strip your paint’s existing protection.
Here is the short version of the process:
- Pre-wash the car to remove loose grit before touching any tar spot
- Test the remover on a hidden area and check for adverse reaction after two minutes
- Apply remover generously to the tar, let it dwell, then lift with a clean microfibre quarter
- Rinse the panel, rewash with pH-neutral shampoo, and dry
- Reapply spray wax, sealant, or ceramic coating to the treated panels
If the tar is baked on, sits near panel edges, covers paint protection film (PPF), or if your paint already shows swirl marks, consider booking a mobile detailer rather than risk further damage.
Key takeaways
The safest and most effective approach to tar removal from car paint is a purpose-built tar remover, adequate dwell time, gentle microfibre lifting, and immediate re-protection with wax or sealant.
| Point | Details |
|---|---|
| Use a purpose-built remover | Citrus or proprietary tar removers are safer for clear coat than household solvents. |
| Dwell time does the work | Fresh tar needs 2–3 minutes; hardened tar needs 5–8 minutes before you touch it. |
| Never scrub | Blot and lift with a clean microfibre quarter to avoid grinding grit into the clear coat. |
| Reapply protection immediately | Tar removers strip wax and sealant; treat the panel with spray wax or sealant after every removal. |
| Isaac’s Pro Detailing | For baked-on tar, PPF, or existing paint damage, Isaac’s Pro Detailing offers mobile decontamination across the Sunshine Coast. |
Table of Contents
- What tools and products do you need before you start?
- How do you remove tar from car paint step by step?
- Which products and solvents actually work, and what should you avoid?
- What risks and mistakes cause permanent paint damage?
- Why you must reapply paint protection after tar removal
- When should you book a professional detailer instead?
- How do you identify the type of tar or contaminant on your paint?
- How do you restore gloss and smoothness after tar removal?
- A detailer’s perspective on tar removal
- Isaac’s Pro Detailing: mobile tar removal and paint protection on the Sunshine Coast
- Sources
What tools and products do you need before you start?
Getting the right kit together before you touch the car prevents most of the mistakes that cause scratches. Here is what you need.
Essential tools and PPE
- Two buckets with grit guards and pH-neutral car shampoo (two-bucket wash method)
- Quality microfibre towels, folded into quarters for blotting
- A clay bar or clay mitt with clay lubricant
- Nitrile gloves (solvents absorb through skin)
- A plastic trim scraper for very thick deposits only
- Spray-bottle tar remover
Work in shade on a cool panel. Solvents evaporate faster on hot paint, which reduces dwell time and increases the risk of residue streaking.
Products available in Australia
| Product type | Example brands (AU) | Formula type | Notes |
|---|---|---|---|
| Purpose-built tar remover | Bowden’s Own Tarminator, Stoner Car Care Tarminator | Citrus or proprietary | Safest for paint; citrus formulas are more environmentally friendly but still strip wax |
| Petroleum-based solvent | Kerosene, white spirit | Petroleum | Effective on heavy tar; higher risk to trim and coatings |
| Household multi-use | WD-40 (AU) | Petroleum blend | Works in a pinch; strips wax and sealant — reprotect immediately |
Always read the product label for PPF or ceramic coating compatibility before applying. If you have PPF, check with your installer or a specialist in automotive paint protection film before using any solvent-based product.
Pro Tip: Buy a dedicated tar remover rather than reaching for a household solvent. The chemistry is designed for automotive clear coat, and the safety margin is much higher.
How do you remove tar from car paint step by step?
The soak-and-lift method is the detailer-approved approach. The chemistry does the work; your job is patience.
-
Pre-wash the car. Use the two-bucket method with pH-neutral shampoo to remove loose grit from the entire panel. Skipping this step means any grit left on the surface gets dragged across the paint when you wipe.
-
Test patch first. Apply a small amount of tar remover to an inconspicuous area (inside a door jamb or under the boot lid). Wait two minutes and wipe. If the finish looks unchanged, proceed.
-
Apply remover to the tar spot. Spray or apply generously so the spot is fully wet. Do not spread it thin.
-
Allow it to dwell. Dwell time matters more than pressure.
| Tar condition | Recommended dwell time |
|---|---|
| Fresh tar splatter (soft, sticky) | 2–3 minutes |
| Dried tar (firm but not baked) | 4–5 minutes |
| Hardened/baked-on tar | 5–8 minutes; repeat if needed |
-
Blot and lift. Fold a clean microfibre towel into quarters and press gently onto the tar. Lift straight up. Rotate to a clean quarter for each spot. Rushing and scrubbing traps grit into the clear coat, producing fine scratches that need compounding to fix.
-
Check and repeat if needed. If residue remains, reapply the remover and dwell again rather than increasing pressure. For stubborn, hardened deposits, a clay bar follow-up is commonly required after the chemical step.
-
Clay bar decontamination. Spray clay lubricant generously onto the panel. Glide the clay bar or mitt across the surface using light, overlapping passes. Knead the clay frequently to expose a clean face. The surface should feel glassy smooth when done.
-
Final wash and dry. Rewash the treated panels with pH-neutral shampoo, rinse thoroughly, and dry with a clean microfibre towel. Run your fingertips across the paint — any remaining roughness means the clay step needs repeating.
Pro Tip: Work on one panel at a time. Tar remover left to dry on paint in the sun can leave a residue that is harder to shift than the original tar.
Which products and solvents actually work, and what should you avoid?
Purpose-built tar removers are formulated to dissolve petroleum contamination on automotive finishes without attacking the clear coat directly. They sit at the top of the recommendation order for good reason.
Recommended order:
- Purpose-built tar remover (best choice). Citrus-based formulas from brands like Bowden’s Own are effective, widely available in Australia, and carry a lower environmental impact than older petroleum formulas. Proprietary blends from Stoner Car Care also work well. Both will remove your wax or sealant, so re-protection is non-negotiable afterwards.
- Kerosene or white spirit (heavy tar, use sparingly). Kerosene and white spirit are commonly used for heavy tar removal but carry a higher risk of stripping protection and affecting plastic trim. Use a small amount on a microfibre, work quickly, and rinse the panel thoroughly.
- WD-40 (last resort, not ideal). WD-40 will loosen tar and is widely available, but it is a petroleum blend that strips wax and leaves an oily residue requiring a full rewash. Use it only when nothing else is on hand.
What to avoid entirely:
- Acetone, nail polish remover, or brake cleaner — these can haze or soften clear coat permanently
- Abrasive pads or scourers — they will scratch
- Applying any solvent to a hot panel in direct sun
- Using a tar remover on PPF or a ceramic-coated car without first confirming compatibility with the coating manufacturer or your installer
If your car has a Gtechniq ceramic coating or similar professional coating, check the product’s maintenance guide before using any solvent. Some coatings tolerate light tar removers; others require a specific decontamination product.
What risks and mistakes cause permanent paint damage?
The most common mistake is mechanical: people scrub. Tar contains fine grit and road debris. When you scrub rather than blot, that grit acts like sandpaper on the clear coat, leaving swirl marks that are only fixable with a machine polish or cut and polish service.
Mistakes that cause lasting damage:
- Scrubbing with a dirty or folded-wrong microfibre towel
- Using household solvents (acetone, turps) that can soften or haze clear coat
- Applying remover to a hot panel, causing rapid evaporation and chemical streaking
- Skipping the pre-wash, so loose grit is still on the panel when you wipe
- Leaving solvent residue on the paint without rinsing and rewashing
Chemical risks are real too. Household solvent-based cleaners can strip wax or sealant layers, leaving paint exposed to UV and contaminants. Even purpose-built removers do this to some degree, which is why the re-protection step is not optional.
When to stop DIY and call a professional:
- Tar is baked on and not shifting after two full chemical applications
- The tar sits at or near a panel edge, where solvent can seep under trim
- The car has PPF or a wrap (wrong solvent can lift the film)
- You can already see swirl marks or paint damage before you start
- The contamination covers multiple panels after a road reseal event
Pro Tip: If the paint feels gritty after chemical treatment and the clay bar is not clearing it, stop. That is a sign of deeper contamination or existing clear coat damage that needs a professional assessment.
Why you must reapply paint protection after tar removal
Solvents break down greasy contamination, which is exactly why they work on tar. The problem is they do not distinguish between the tar and your wax or sealant. Both get dissolved. Leaving treated panels without protection exposes the clear coat to UV, bird droppings, and fresh contamination.
Aftercare steps, in order:
- Complete the final pH-neutral wash across all treated panels
- Rinse thoroughly and dry with a clean microfibre towel
- Run your fingertips across the paint. If it feels rough or gritty, clay the panel again with fresh lubricant
- Apply a spray wax or quick-detailer sealant to the treated panels immediately. Products like Bowden’s Own Boss Gloss or a spray sealant are fast, DIY-friendly options
- Buff off with a clean microfibre towel
For long-term paint protection options beyond spray wax, a professional sealant or ceramic coating offers significantly more durability and makes future tar removal easier because contaminants sit on the coating rather than the paint itself.
Compatibility notes:
- Spray wax: apply immediately after tar removal; reapply every 4–8 weeks
- Polymer sealant: longer-lasting than wax; apply after a full wash and decontamination
- Ceramic coating: not a DIY aftercare step post-tar removal; requires a clean, polished surface and professional application for best results. See the ceramic coating guide for Sunshine Coast owners for what the process involves
When should you book a professional detailer instead?
Some tar situations are beyond safe DIY territory. A professional brings controlled chemistry, the right mechanical tools, and the experience to read paint condition before choosing a method.
Decision checklist — book a pro when:
- Tar covers more than two or three panels (road reseal contamination)
- The car has PPF, a vinyl wrap, or a professional ceramic coating
- You can see existing swirl marks, scratches, or paint chips before starting
- The tar is baked on and has not shifted after two chemical applications
- You are not comfortable working with solvents or reading paint condition
What a professional will do differently:
- Select the correct solvent for the specific coating type and tar hardness
- Use controlled mechanical decontamination (clay, iron remover, compounding) in the right sequence
- Perform paint correction if swirl marks or scratches are present
- Re-protect with a professional-grade sealant or ceramic coating that lasts years, not weeks
- Document the paint condition before and after, which matters for warranty or insurance purposes
Isaac’s Pro Detailing operates as a fully mobile service across the Sunshine Coast, which means the detailer comes to your home, workplace, or wherever the car is parked. For baked-on tar after a road reseal trip, or for owners who want a guaranteed finish without the risk of DIY damage, a mobile detailing appointment is the straightforward next step.
How do you identify the type of tar or contaminant on your paint?
Not everything that looks like tar is tar. Getting the identification right changes which product you reach for.
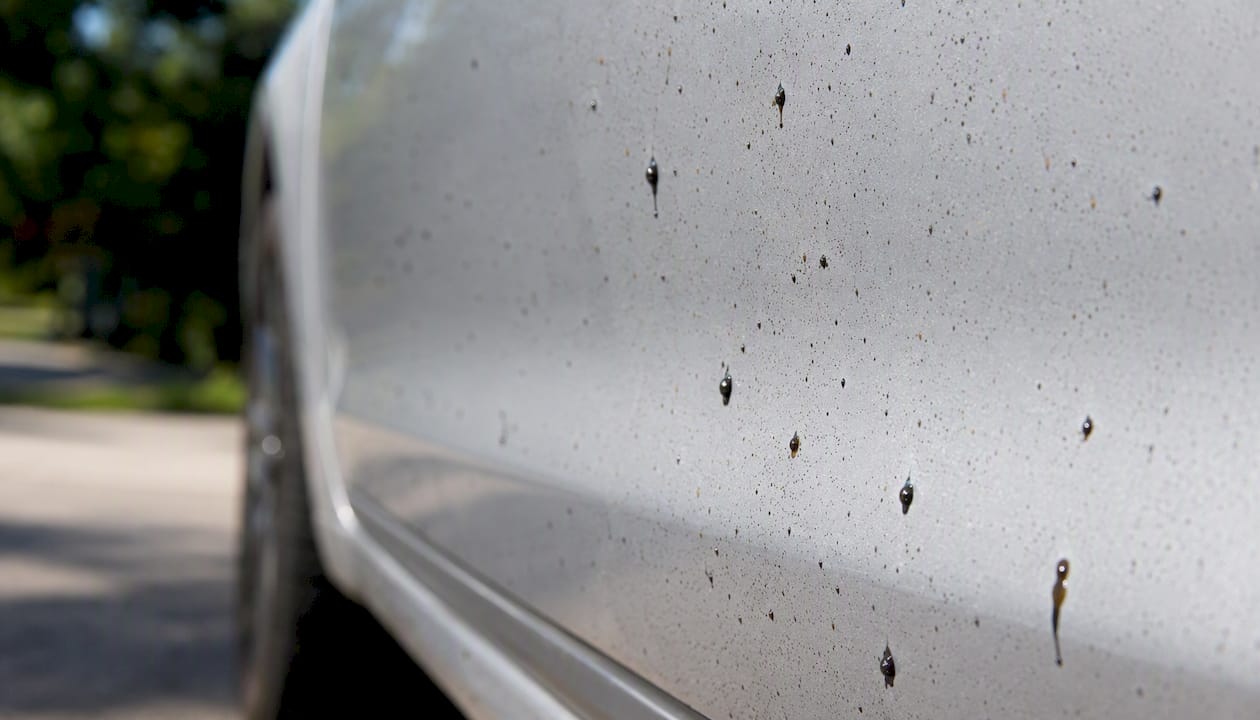
Fresh road tar is soft and sticky, often appearing as small black droplets along the lower panels and sills after driving on freshly sealed roads. It smears when touched and lifts relatively easily with a purpose-built remover and a short dwell time.
Hardened or baked tar has dried to a firm, raised spot. It does not smear. This type needs a longer dwell time and often a clay bar follow-up. If it has been on the paint through several hot Queensland summers, it may need mechanical decontamination.
Bitumen overspray from road works looks similar to tar splatter but tends to cover larger areas in a fine mist rather than distinct droplets. It responds to the same chemistry but requires more product and more passes.
Iron contamination looks like tiny orange or brown specks embedded in the paint, often confused with fine tar spots. An iron remover (not a tar remover) is the correct product. Iron removers turn purple on contact with ferrous particles, which confirms the identification.
Tree sap and bug residue are organic rather than petroleum-based. Citrus-based tar removers often work on these too, but dedicated bug and sap removers are more targeted. The Stoner Car Care approach of treating tar, sap, and bug residue as a related family of contaminants is practical: the same soak-and-lift method applies, with product selection adjusted for the contaminant type.
How do you restore gloss and smoothness after tar removal?
Chemical decontamination cleans the paint but does not restore its optical clarity. If the tar has been sitting for a while, or if the removal process has left any micro-marring, the finish may look dull or feel slightly rough even after claying.
Light polishing with a finishing polish is the first option. Applied by hand with a foam applicant pad, a finishing polish (such as Bowden’s Own Paint Polish or a similar product) removes very light surface haze and restores depth. This works well when the clear coat is in good condition and the dullness is superficial.
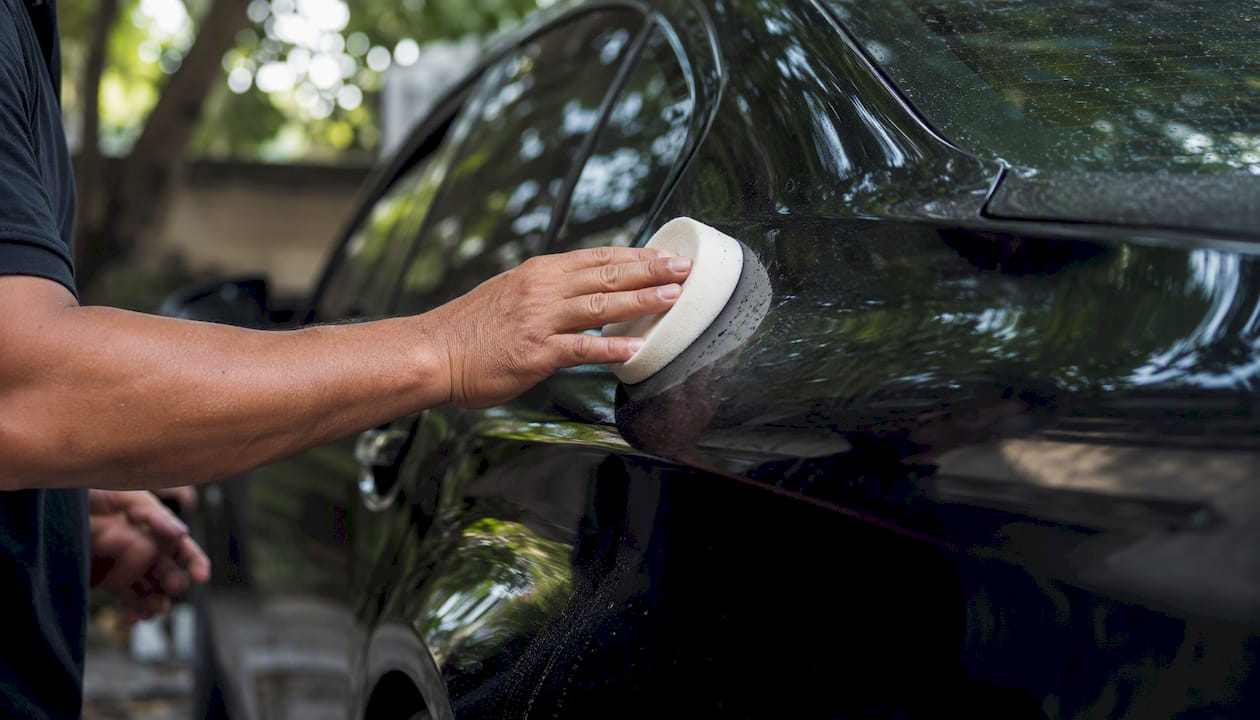
Machine polishing is the step up. A dual-action (DA) polisher with a light cutting compound removes fine swirl marks and micro-scratches that hand polishing cannot reach. This is where most DIY owners reach their limit, because incorrect pad and compound selection on a DA polisher can create new problems. If you are not experienced with machine polishing, this is the point to hand the car to a professional.
Cut and polish is the professional-grade option for paint that has visible swirl marks, oxidation, or deeper scratches from previous tar removal attempts. A cut and polish service uses a rotary or DA polisher with a cutting compound to remove a controlled amount of clear coat, then finishes with a finer polish to restore gloss. The result is a noticeably deeper, cleaner finish than any hand-applied product can achieve.
After any polishing step, the paint surface is bare and needs protection applied immediately. This is the right moment to consider a vehicle protection method that suits your maintenance habits and how often the car is exposed to road tar.
A detailer’s perspective on tar removal
The chemistry of tar removal is straightforward. The patience required to do it safely is where most people come unstuck.
Every week, cars come through with swirl marks that were not there before the owner tried to remove tar. The cause is almost always the same: wiping too soon, with too much pressure, on a panel that still had grit on it. The tar remover had not finished its job, so the owner helped it along mechanically. The clear coat paid the price.
The soak-and-lift method works because it lets the solvent break the bond between the tar and the paint surface. Once that bond is broken, the tar lifts with almost no pressure. If you are pressing hard, the chemistry has not finished yet. Wait longer.
On the Sunshine Coast, road reseal events are common, particularly after summer storm damage repairs. A car that has driven through a fresh seal can come back with dozens of tar spots across the lower panels, sills, and bumpers. That scale of contamination is where DIY becomes genuinely risky, not because the method is wrong, but because fatigue sets in and shortcuts follow. One dirty microfibre quarter used twice is enough to leave a scratch that needs compounding.
Re-protection after tar removal is not a bonus step. It is the step that determines whether the clean paint stays clean. Unprotected clear coat in Queensland UV is vulnerable within days.
Isaac’s Pro Detailing: mobile tar removal and paint protection on the Sunshine Coast
Tar removal done right takes time, the correct chemistry, and a clean set of tools. When the contamination is heavy, the paint is at risk, or you simply want the job done without the guesswork, Isaac’s Pro Detailing brings the full decontamination process to your driveway.
The service covers tar removal, clay bar decontamination, paint correction, and professional-grade re-protection, including ceramic coatings that make future contamination far easier to clean. The mobile setup means no dropping the car off and waiting. Isaac’s comes to your home, workplace, or preferred location across the Sunshine Coast.
For owners dealing with road reseal tar across multiple panels, or anyone whose paint already shows the marks of a previous DIY attempt, the wash and detail packages are the practical next step. Check availability and book directly through the site.
Sources
The following sources were used to compile this guide. Product pages link directly to Australian suppliers or manufacturers.
- How Do You Get Tar Off Car Paint Without Damaging the Clear Coat? – AutoDetailPedia
- How To Remove Tar From Car Paint Safely | Chemical Guys
- How to remove tar, sap and bug residue from car paint without damaging the finish | Stoner Car Care
- Easy and effective tar removal from your car | Bowden’s Own
Test any product on an inconspicuous area before full application, and always follow the manufacturer’s label instructions.