
TL;DR:
- Thorough surface preparation is essential for durable ceramic coating bonding and must not be rushed. Proper technique, controlled environment, and disciplined post-curing care are key to a flawless, long-lasting finish. Skipping steps or rushing the process leads to defects that no buffing can fix and diminishes the coating’s effectiveness.
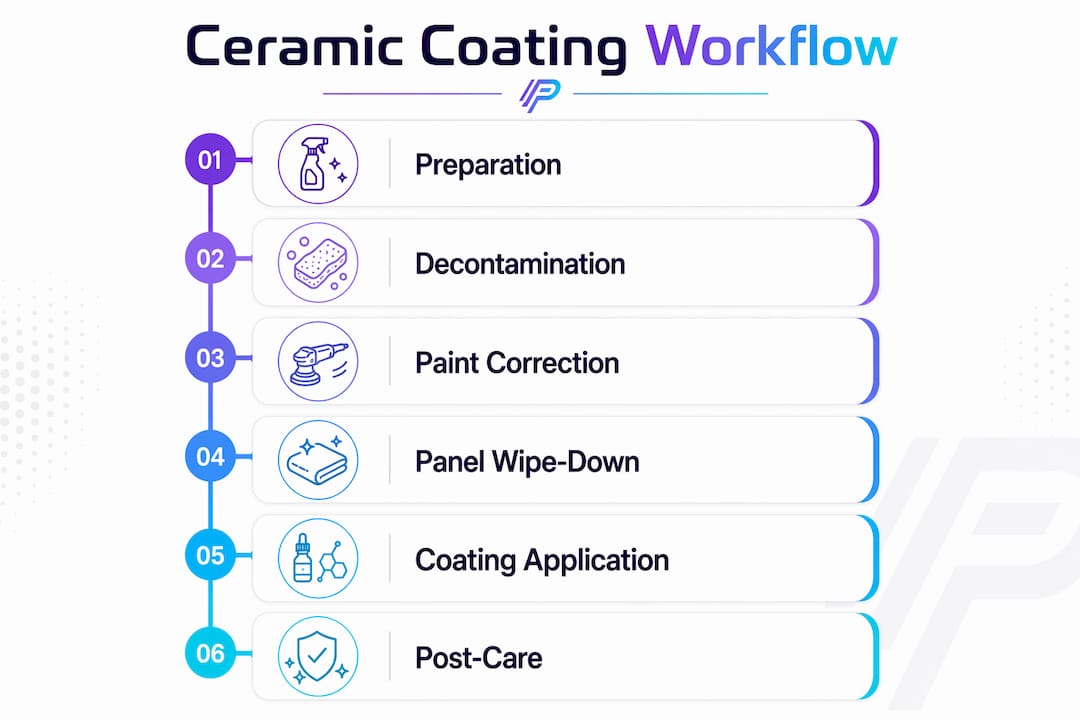
A successful workflow for ceramic coating is the complete sequence of steps from surface preparation through to full curing that determines whether your coating bonds correctly and lasts for years. Skip a step and you risk locking in defects, poor adhesion, or streaky high spots that no amount of buffing will fix. Products like GYEON Q²M and Adam’s Polishes deliver outstanding results, but only when the process behind them is sound. This guide covers every stage of the ceramic coating process, including what most enthusiasts get wrong and how to avoid those mistakes.
What are the essential preparation steps before applying ceramic coating?
Preparation consumes 80% of total professional detailing time, with coating application itself taking only 2–4 hours. That ratio exists because the coating bonds directly to the paint surface. Any contamination, oil, or defect underneath becomes permanent once the coating cures.
Washing and chemical decontamination
Start with a thorough wash using the two-bucket method and a pH-neutral shampoo. One bucket holds clean soapy water, the other holds rinse water for your wash mitt. This stops dirt from transferring back onto the paint. After washing, apply a dedicated fallout remover or iron remover to dissolve embedded metallic particles. These particles are invisible to the eye but create a rough surface that disrupts bonding.
Clay bar and mechanical decontamination
Once chemical decontamination is complete, use a clay bar or clay mitt to remove bonded surface contaminants. Run it across the paint with a lubricant spray and feel for resistance. A smooth glide means the surface is clean. Clay decontamination is not optional. It removes industrial fallout, tree sap residue, and rail dust that washing alone cannot lift.
Paint correction
Coating over swirl marks permanently locks those defects under the coating. Paint correction using a dual-action or rotary polisher removes scratches, swirls, and oxidation before the coating goes on. The level of correction depends on the paint’s condition. A light one-stage polish may suffice for newer vehicles, while older paint may need a two-stage cut and polish.
Panel wipe-down
Skipping the panel wipe with an IPA (isopropyl alcohol) solution is one of the most common preparation errors. Polishing compounds leave behind oils that prevent the coating from bonding to the paint. Wipe every panel with a 70/30 IPA-to-water mix using a clean microfiber cloth immediately before coating. This step takes minutes but protects hours of prior work.
Pro Tip: Work panel by panel during the wipe-down stage. Wipe one panel, coat it, then move to the next. Wiping the entire car at once allows airborne dust to resettle before you apply the coating.
For a deeper look at exterior cleaning best practices before coating, that resource covers washing technique in detail.
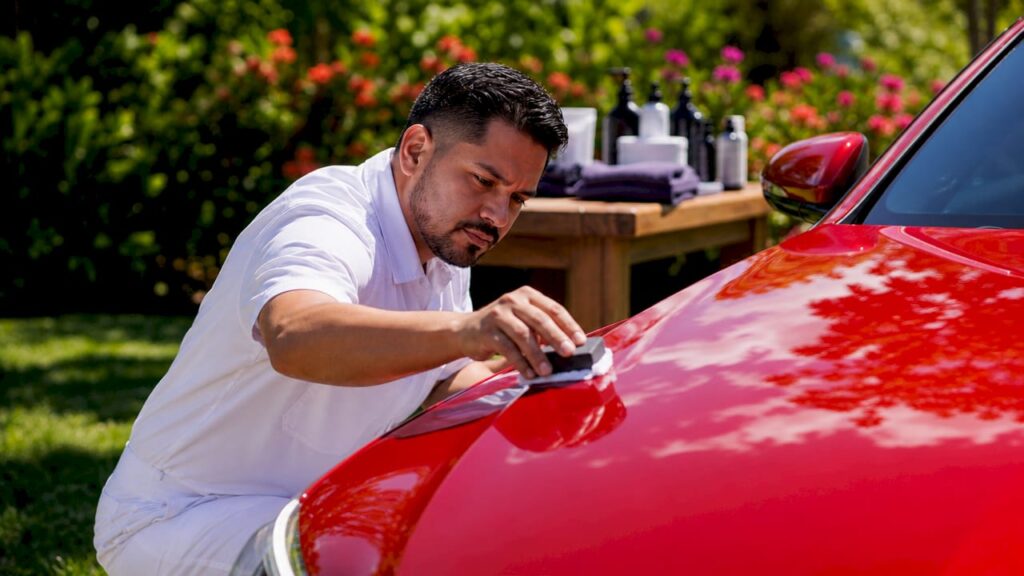
How is the ceramic coating applied step-by-step for best results?
The ceramic coating application guide below follows the sequence that professional detailers use. Deviation from this order is the leading cause of high spots and uneven coverage.
- Gather your tools. You need a suede applicator pad, a foam block to back it, and at least two clean, high-quality microfiber towels per panel. Suede pads distribute the coating evenly without absorbing too much product.
- Apply product to the pad. 3–6 drops suffice per 2×2 foot section. More product does not improve protection. It causes uneven coverage and wastes an expensive product.
- Work in a crosshatch pattern. Apply the coating in straight horizontal lines, then go over the same area in vertical lines. This crosshatch method covers the surface evenly and prevents missed spots.
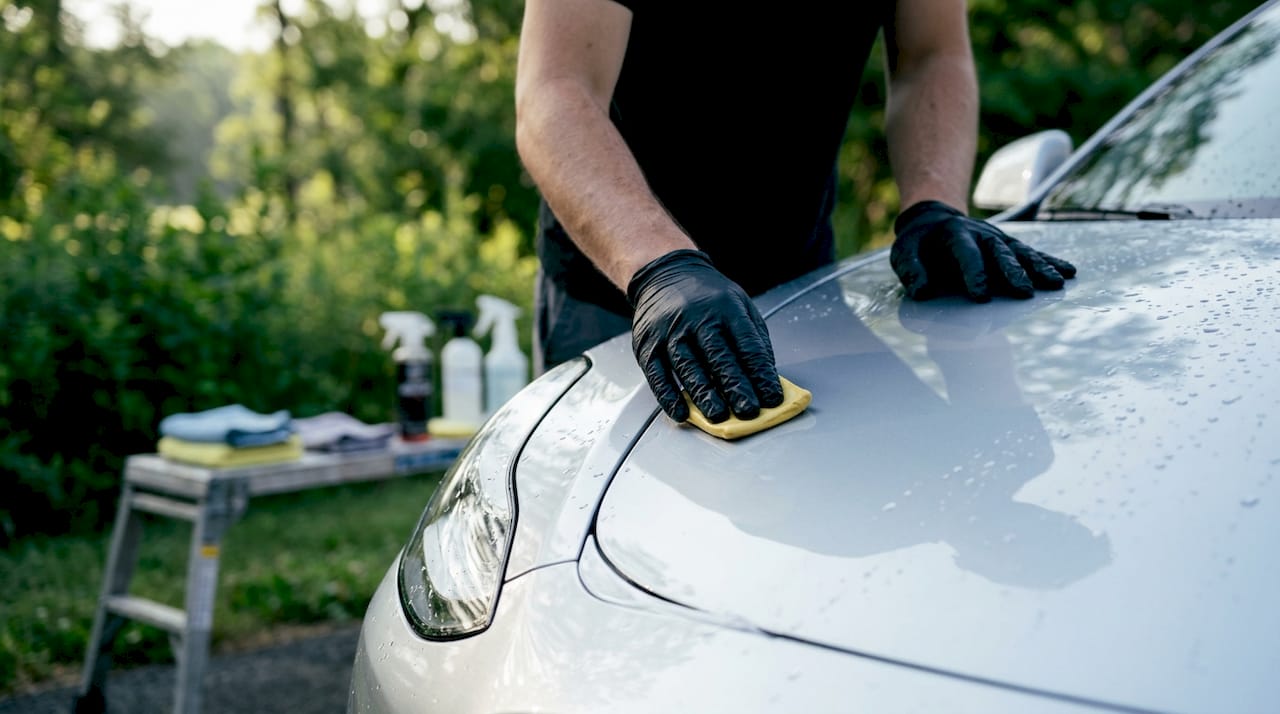
- Observe the flash time. Flash time ranges from 30 seconds to 5 minutes depending on temperature and humidity. Watch for the coating to shift from a wet, glossy look to a slightly hazy or rainbow-like appearance. That visual change signals it is ready to level.
- Level and buff. Use the first microfiber towel to remove the bulk of the residue with light, overlapping wipes. Follow immediately with a second clean towel to final-buff the panel to a clear, streak-free finish.
- Follow a logical panel sequence. Work from the roof down: roof, bonnet, boot lid, doors, bumpers. This order prevents coating residue from dripping onto already-finished panels.
Statistic to know: Professional-grade ceramic coatings last up to 5 years, consumer-grade products last 1–2 years, and two-part systems can last up to 7 years. The product grade you choose should match the preparation effort you are willing to invest.
Pro Tip: Keep a panel lamp or LED work light nearby. Angle it across the surface after buffing each panel to check for high spots or streaks before moving on. Catching them early means a quick fix rather than a full rework.
What environmental and timing factors affect ceramic coating quality?
Environmental control is not a bonus step. It is a core part of how to apply ceramic coating correctly. The wrong conditions cause the coating to flash too fast or too slow, leading to bonding failures and surface defects.
The ideal application environment sits between 10°C and 30°C with humidity below 60%. Working outside of these ranges creates predictable problems:
- High humidity (above 60%): The coating absorbs moisture from the air and cures unevenly. High spots form before you can level the product.
- High temperature (above 30°C): Flash time shortens dramatically. The coating can haze over in under 30 seconds, leaving you no time to level it properly.
- Low temperature (below 10°C): The coating becomes sluggish and may not bond correctly to the paint surface.
- Direct sunlight: Heats the panel surface independently of air temperature, accelerating flash time unpredictably.
- Wind: Carries dust and debris onto freshly applied coating before it cures.
“Environmental conditions such as temperature and humidity critically influence flash time. Professionals monitor and adjust their application pace accordingly for consistency.” — Complete Guide: How to Apply Ceramic Coating
Work in a shaded, enclosed space whenever possible. A garage with the door closed is ideal. If you are working outdoors on the Sunshine Coast, choose early morning when temperatures are lower and wind is minimal. Check the humidity forecast before you start.
How to troubleshoot and avoid the most common ceramic coating mistakes?
Most ceramic coating problems are avoidable. They follow predictable patterns that appear when the workflow is rushed or a step is skipped.
Common mistakes and how to fix them:
- Applying coating to multiple panels at once. Flash time does not wait. Coating three panels before levelling the first means the product on panel one has already hardened. Work one panel at a time without exception.
- Overapplication. Excess product causes uneven coverage and wastes money. Use 3–6 drops per section and resist the urge to add more.
- Skipping the panel wipe. Polishing oils left on the surface prevent the coating from bonding. This mistake is only discovered weeks later when the coating peels or beads inconsistently.
- Using one towel to level. Streaking results from leftover residue. The two-towel method is the fix: the first towel removes the bulk of the residue, the second towel final-buffs the panel clean.
- Poor lighting. High spots are nearly invisible under standard workshop lighting. Use a panel lamp or a strong LED torch angled at 45 degrees to the surface after every panel.
Pro Tip: If you discover a high spot after the coating has hardened, do not try to buff it off dry. Apply a small amount of fresh coating over the spot, let it flash briefly, then level it out. This reactivates the surface and allows you to remove the defect cleanly.
Avoiding contamination during application also matters. Keep your applicator pad in a sealed bag between panels and never let it touch anything other than the coating bottle and the paint surface.
What post-application care maintains ceramic coating performance?
The coating is applied, but the process is not finished. Post-application care determines whether the coating reaches its full potential or degrades prematurely.
The vehicle must stay dry for 24–48 hours after application. Water contact during this window disrupts the curing process and can cause water spotting that bonds into the coating permanently. Full curing takes up to 7 days. During that period, avoid bird droppings, tree sap, and automatic car washes.
| Care stage | Recommended practice |
|---|---|
| First 24–48 hours | Keep the vehicle dry and away from rain, sprinklers, and dew |
| Days 2–7 (full cure) | Avoid contaminants; hand wash only if absolutely necessary |
| Ongoing washing | Use pH-neutral shampoo and hand washing; avoid automatic brushes |
| Maintenance coating | Apply a ceramic maintenance spray every 2–3 months to top up hydrophobic properties |
| Wheels and glass | Use dedicated ceramic wheel coating and glass coating for full vehicle protection |
For wheel coating options that complement paint protection, that guide covers the key differences between wheel-specific products.
Avoid waxes and sealants on top of a ceramic coating. They do not bond well to the ceramic surface and can reduce the coating’s hydrophobic performance. Stick to ceramic-compatible maintenance sprays from brands like GYEON or Adam’s Polishes.
Key takeaways
A correct workflow for ceramic coating requires thorough preparation, controlled application, and disciplined post-cure care to achieve a durable, defect-free finish.
| Point | Details |
|---|---|
| Preparation is 80% of the job | Washing, decontamination, paint correction, and panel wipe all happen before the coating touches the car. |
| Flash time controls everything | Watch for the hazy visual shift and level within the 30-second to 5-minute window for each panel. |
| Environment must be controlled | Work between 10°C and 30°C with humidity below 60% in a shaded, enclosed space. |
| Use the two-towel method | First towel removes residue; second towel final-buffs to a streak-free finish. |
| Cure time is non-negotiable | Keep the vehicle dry for 24–48 hours and allow up to 7 days for full cure. |
What I have learned after years of ceramic coating on the Sunshine Coast
The most common mistake I see is not a product choice or a technique error. It is impatience during preparation. Enthusiasts spend money on premium coatings like GYEON Q²M and then rush the clay bar stage or skip the IPA wipe because they are eager to get to the satisfying part. The coating goes on, it looks great for a week, and then the bonding fails because the surface was never truly clean.
My honest view is that paint correction is where most DIYers underestimate the time commitment. Correcting a full vehicle properly takes a full day on its own. If you are not prepared to spend that time, a professional-grade coating is wasted on an uncorrected surface. A consumer-grade product applied over perfectly corrected paint will outperform a professional coating applied over swirls.
The other thing I tell every enthusiast: your workspace matters as much as your product. I have seen flawless application technique produce terrible results because someone worked in a dusty shed with the roller door open on a 35-degree afternoon. Control your environment and the coating process becomes far more predictable.
Invest in a good panel lamp before you invest in a more expensive coating. It will show you defects you did not know existed and save you from discovering high spots three days after the coating has hardened. For car owners on the Sunshine Coast, the humidity and heat here make environmental control even more critical than in cooler climates. Early morning application in a closed garage is the standard I recommend without exception.
— Isaac’s
Professional ceramic coating on the Sunshine Coast
Isaac’s Pro Detailing brings the full ceramic coating process to your driveway, workplace, or wherever your vehicle is parked across the Sunshine Coast.
Every job follows the same disciplined workflow: thorough decontamination, paint correction where needed, IPA panel wipe, and careful coating application in a controlled environment. The team uses premium products and the two-towel levelling method on every panel. If you want a professional detailing workflow applied to your vehicle without the guesswork, get in touch with Isaac’s Pro Detailing for a free quote. The ceramic coating service covers paint, wheels, and glass for complete vehicle protection.
FAQ
How long does the ceramic coating process take from start to finish?
A full ceramic coating job including preparation, paint correction, and application typically takes one to two full days. Curing adds another 24–48 hours before water contact and up to 7 days for full hardness.
Can I apply ceramic coating without paint correction?
Paint correction is strongly recommended before any ceramic coating application. Coating over defects permanently seals swirl marks and scratches under the coating, making them impossible to remove without stripping the coating entirely.
How many drops of ceramic coating should I use per section?
Use 3–6 drops per 2×2 foot section. Applying more product does not improve protection and causes uneven coverage that is difficult to level correctly.
What happens if it rains after I apply ceramic coating?
Rain within the first 24–48 hours can cause water spotting that bonds into the curing coating. Keep the vehicle sheltered and dry for at least 48 hours after application to protect the finish.
How do I maintain a ceramic coating long-term?
Wash with a pH-neutral shampoo by hand and apply a ceramic maintenance spray every 2–3 months to preserve hydrophobic performance. Avoid automatic car washes with abrasive brushes and never apply wax over a ceramic coating.