
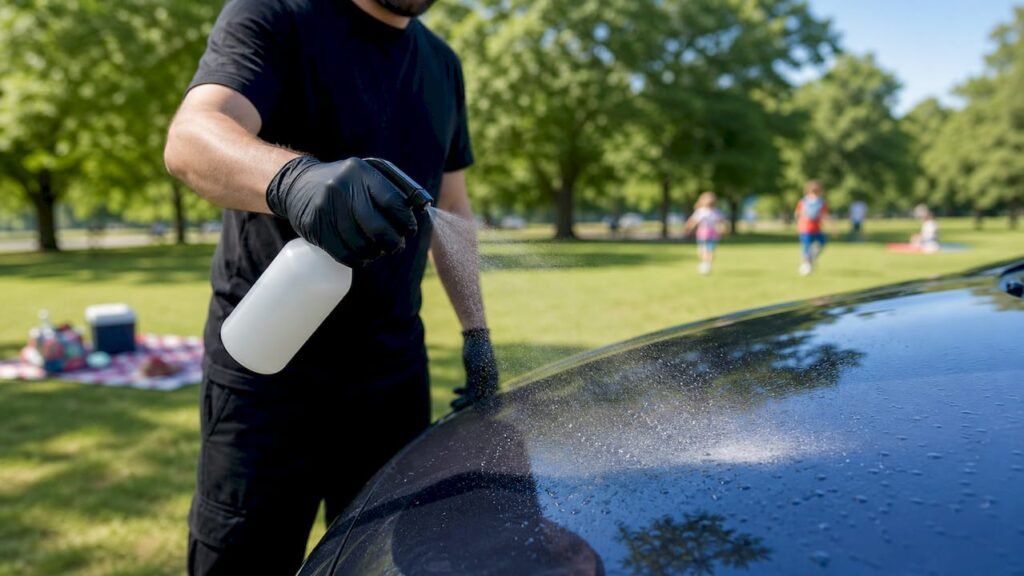
Iron contaminants are one of the most underestimated threats to automotive paint, and removing them is preventative maintenance, not just a cosmetic touch-up. Left untreated, embedded iron particles oxidise inside the clear coat, forming micropits, accelerating rust, and turning a simple decontamination job into an expensive paint correction. Three things happen when you skip it: your paint dulls and develops orange or brown speckling, structural damage works its way through the clear coat toward bare metal, and every subsequent wash grinds those abrasive particles deeper.
- Cosmetic dulling and pitting: iron particles oxidise and expand, creating visible speckling and rough texture.
- Structural paint damage: oxidising iron breaches the clear coat and can reach bare metal, triggering rust.
- Higher repair costs: the longer contamination sits, the more correction work (and cost) is needed to fix it.
Key takeaways
Removing iron contaminants is the single most overlooked step in paint maintenance, and skipping it makes every other product you apply less effective and shorter-lived.
| Point | Details |
|---|---|
| Iron damages paint chemically | Embedded particles oxidise, expand, and form micropits that washing alone cannot remove. |
| Decon before clay or coating | Chemical iron removal must come first; reversing the order causes marring and premature coating failure. |
| Maintenance interval | Every 6–8 months for typical drivers; every 3–4 months for high-exposure situations near rail or industry. |
| Hire a pro for heavy contamination | Visible pitting, pre-coating prep, or rail dust contamination warrants professional chemical decon and clay work. |
| Isaac’s Pro Detailing | Mobile iron decontamination service on the Sunshine Coast, covering inspection, chemical decon, clay, and protection. |
Table of Contents
- Why remove iron contaminants: what’s actually happening to your paint
- What puts iron particles on your car
- How to tell if your car already has iron contamination
- Safe step-by-step DIY: how to remove iron contaminants at home
- Products and tools that work
- Important safety notes and OEM/manufacturer cautions
- How to reduce future iron fallout and protect paint
- When to hire a professional and what a pro does differently
- What happens to paint when iron contamination is ignored
- The honest view from a pro detailer
- Isaac’s Pro Detailing handles iron removal for you
- Sources
Why remove iron contaminants: what’s actually happening to your paint
The short answer is chemistry. When a superheated metal particle, shed from brake rotors, rail lines, or grinding equipment, lands on your paint, it doesn’t just sit on the surface. It embeds into the clear coat while still hot, then begins to oxidise in place. As it oxidises, it expands, creating micropits and acting as an abrasive every time you wash the car. That gritty feeling you notice when you run your hand across a panel? That’s iron contamination doing slow, cumulative damage.
Routine washing does not remove bonded iron particles. A standard shampoo can’t dissolve the chemical bond between oxidised iron and clear coat, which is why a dedicated iron remover is necessary. The chemistry works by converting iron oxide into a water-soluble compound that rinses away cleanly.
What puts iron particles on your car
Common sources are more varied than most owners realise:
- Brake dust: the most widespread source; every hard stop sheds superheated metal particles from rotors and pads.
- Rail and railroad dust: vehicles parked near train lines or transported by rail pick up heavy iron fallout that’s notoriously difficult to shift.
- Industrial fallout: grinding, welding, and heavy machinery near worksites or factories release airborne iron particles that settle on nearby vehicles.
- Construction sites: metal cutting and drilling generate fine metallic debris that travels further than you’d expect.
- Road debris: general traffic grinds metal from road surfaces and surrounding vehicles.
According to the OEM service bulletin on iron particle contamination, rail dust and industrial sources create particularly heavy contamination that often requires repeated chemical decontamination and mechanical clay work to fully address.
Pro Tip:Check horizontal panels (bonnet, roof, boot lid), wheel faces, lower door quarters, and the area directly behind each wheel arch first. These zones collect the highest concentration of iron fallout.
How to tell if your car already has iron contamination
You don’t need a lab to spot it. The signs are visible and tactile.
Visual indicators:
- Orange, red, or brown speckling on paint, especially obvious on white, silver, or light-coloured finishes.
- Tiny rust-coloured dots that appear or worsen after washing.
- A dull or hazy appearance on panels that should look glossy.
Tactile check:
- Slide your hand (or a clean plastic bag over your fingers) across a freshly washed, dry panel. If it feels rough or gritty rather than glass-smooth, iron particles are embedded in the clear coat.
Location cues:
- Heaviest contamination typically sits on wheel arches, lower doors, the boot edge, and bonnet leading edge.
As Auto Care HQ notes, orange or rust-coloured spots that persist after a wash are a reliable indicator of iron contamination, not a staining issue that polishing will fix.
Take a before photo. Document the affected panels under direct light before you start treatment. It’s the clearest way to confirm the product is working and to track improvement over time.
Safe step-by-step DIY: how to remove iron contaminants at home
Follow this sequence. Skipping steps, particularly doing clay before chemical decon, causes extra marring and wastes product.
- Pre-wash the vehicle thoroughly to remove loose dirt and grit. Work in shade on cool panels.
- Put on PPE: nitrile gloves and eye protection before handling any iron remover.
- Apply iron fallout remover to a wet panel. Products like CarPro Iron X or Meguiar’s D2002 Iron Removing Spray are applied to a wet surface, not dry paint.
- Allow the product to dwell for the time specified on the label, typically 3–5 minutes. Watch for the purple colour change: that reaction confirms the chemistry is dissolving iron oxide.
- Rinse thoroughly with a strong stream of water before the product dries. If it starts to dry, rewet immediately.
- Repeat on heavily contaminated areas if the purple reaction was intense and speckling remains.
- Clay bar or iron-decon clay mitt on any panels that still feel rough after rinsing. The chemical step makes clay work significantly easier and reduces the risk of marring.
- Final wash to remove all residue, then apply a sealant or protective coating.
Chemical decontamination must come before claying or coating because locked contaminants cause premature coating failure and additional marring during polishing if the sequence is reversed.
Pro Tip:Test any iron remover on a small, inconspicuous area first, particularly on matte finishes, vinyl wraps, or paint protection film. Not all formulations are compatible with every surface.
Products and tools that work
Choosing the right product for your contamination level matters more than brand loyalty.
- Iron fallout removers (chelator-based): CarPro Iron X is the benchmark in this category, widely used by professional detailers for its strong colour-change reaction and effectiveness on moderate to heavy contamination. Meguiar’s D2002 Iron Removing Spray is a professional-grade option that suits both paint and wheel surfaces. Consumer-grade iron removers work for light contamination; heavy rail dust or industrial fallout usually needs a pro-strength formulation.
- Clay bars and clay mitts: a traditional clay bar gives more tactile feedback and works well for localised spots. An iron-decon clay mitt covers larger panels faster and is more beginner-friendly. Detailing community experience consistently shows that Iron X-style products significantly weaken embedded particles, making the clay step faster and less likely to induce marring, but no chemical alone removes every particle without some mechanical follow-up.
- pH-balanced wheel cleaner: wheel faces carry the highest iron load. A dedicated wheel cleaner used alongside an iron remover addresses both brake dust and embedded particles in one step.
- Microfibre towels: use fresh, clean towels for drying and product removal. A contaminated towel reintroduces the problem you just solved.
Pro Tip:Avoid highly acidic iron removers on paint protection film, rubber trim, and bare aluminium. Always read the product label for compatibility, and rinse any overspray from plastics immediately.
Important safety notes and OEM/manufacturer cautions
The OEM service bulletin is specific about how to work safely with iron contamination products:
Do not:
- Polish or machine-buff a panel before completing chemical decontamination. Polishing over embedded iron grinds particles into the paint and causes deeper scratching.
- Allow concentrated iron remover to contact unpainted rubber trim, bare plastics, or chrome for extended periods.
- Work in direct sunlight. Heat accelerates drying and increases the risk of product staining.
- Dispose of rinse water near drains without checking local disposal regulations for chemical runoff.
How to reduce future iron fallout and protect paint
Prevention is simpler than remediation. A few consistent habits cut re-contamination significantly:
- Avoid parking near rail lines, heavy industry, or active construction sites where possible.
- Rinse the car promptly after heavy traffic or hard braking sessions, particularly on the lower panels and wheel arches.
- Wash wheels separately with a dedicated pH-balanced cleaner at every wash. Brake dust is the most consistent iron source for most drivers.
- Reapply a paint sealant or ceramic coating on schedule. Coatings and paint protection film reduce how firmly iron particles bond to the surface, making the next decontamination easier, though they don’t prevent contamination entirely.
- Professional detailers recommend routine chemical decontamination roughly every 6–8 months for typical drivers, and every 3–4 months for high-exposure situations (regular highway driving, proximity to rail, track days).
For a broader look at vehicle protection methods that complement regular decontamination, the range of options from sealants to PPF is worth understanding before your next service.
When to hire a professional and what a pro does differently
DIY decontamination is genuinely effective for moderate contamination on a well-maintained car. But there are situations where a professional delivers results that home treatment can’t match.
- Visible pitting or rust spots that persist after chemical decon and clay. These need paint correction before any coating goes on.
- Heavy rail dust or industrial contamination that requires repeated treatments and mechanical work beyond a clay mitt.
- Pre-coating preparation. Applying a ceramic coating over insufficiently decontaminated paint causes premature failure. A pro confirms the surface is truly clean before committing to a coating.
- Limited access to shade, water, or equipment. Iron removers need controlled conditions; a driveway in full sun on a hot day is a recipe for product staining.
- No confidence with chemicals. If you’re uncertain about dilution ratios or product compatibility, the risk of damage outweighs the cost of a professional visit.
A professional detailer performs a full visual and tactile inspection, applies measured chemical decontamination, follows with fresh clay or a mechanical decon pad, and corrects any remaining paint defects before recommending a protective coating or PPF. Isaac’s Pro Detailing includes this sequencing as part of its mobile detailing workflow, coming to your location with the right products and tools for the job.
What happens to paint when iron contamination is ignored
The timeline is gradual but the endpoint is expensive. In the early stages, embedded iron creates the orange-brown speckling and rough texture described above. Left for months, the oxidising particles expand within the clear coat, forming micropits that trap water and accelerate further corrosion. Washing the car in this state grinds the particles against the paint, creating swirl marks and fine scratches that compound the deterioration.
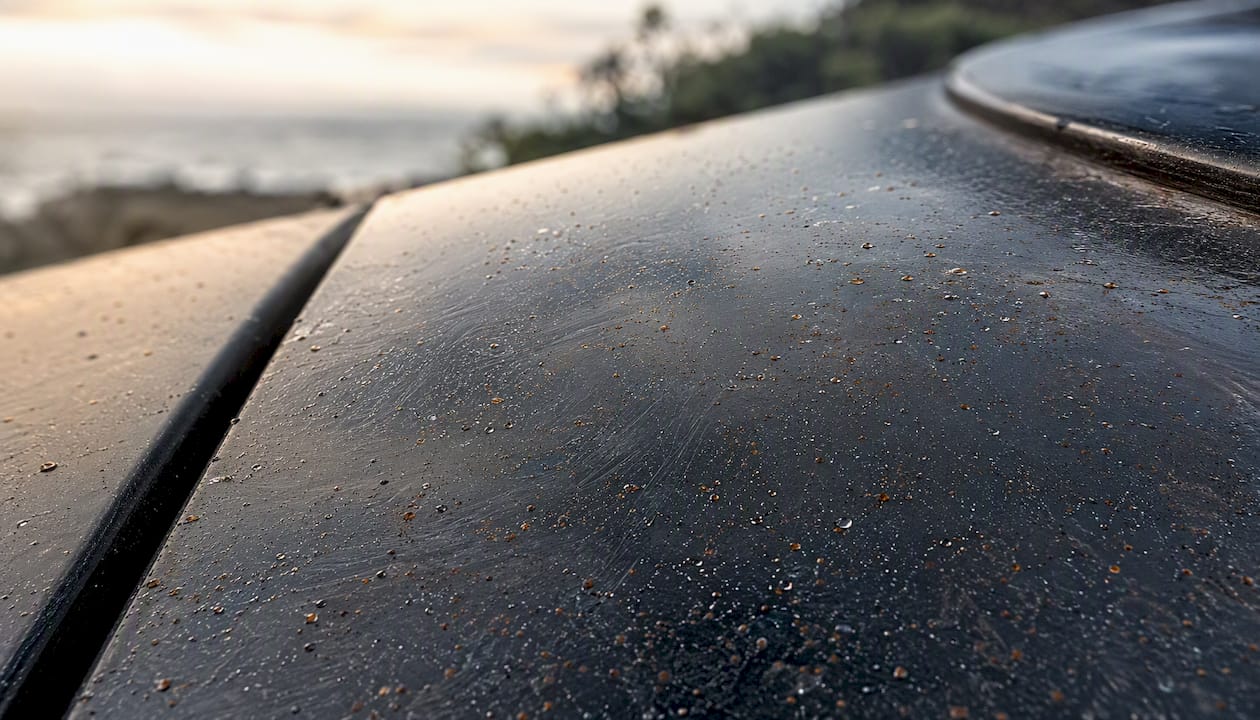
Over a longer period, iron contamination that reaches bare metal through a compromised clear coat triggers rust formation. At that point, the damage moves beyond detailing and into bodywork repair territory. Resale value drops noticeably when paint shows pitting, rust, or heavy swirl damage, and no amount of polishing reverses structural rust once it takes hold.
The honest view from a pro detailer
Most owners who come in with paint problems didn’t ignore their cars. They washed regularly, kept the car garaged, and thought they were on top of maintenance. The gap is almost always decontamination. A standard wash, no matter how thorough, cannot remove bonded iron. It’s not a technique problem; it’s a chemistry problem.
The mistake I see most often is owners polishing or applying a coating over contaminated paint. The coating locks the particles in, the paint feels smooth initially, and then within months the coating starts failing in patches and the underlying speckling returns. Chemical decon before any mechanical or coating work isn’t optional; it’s the foundation everything else sits on.
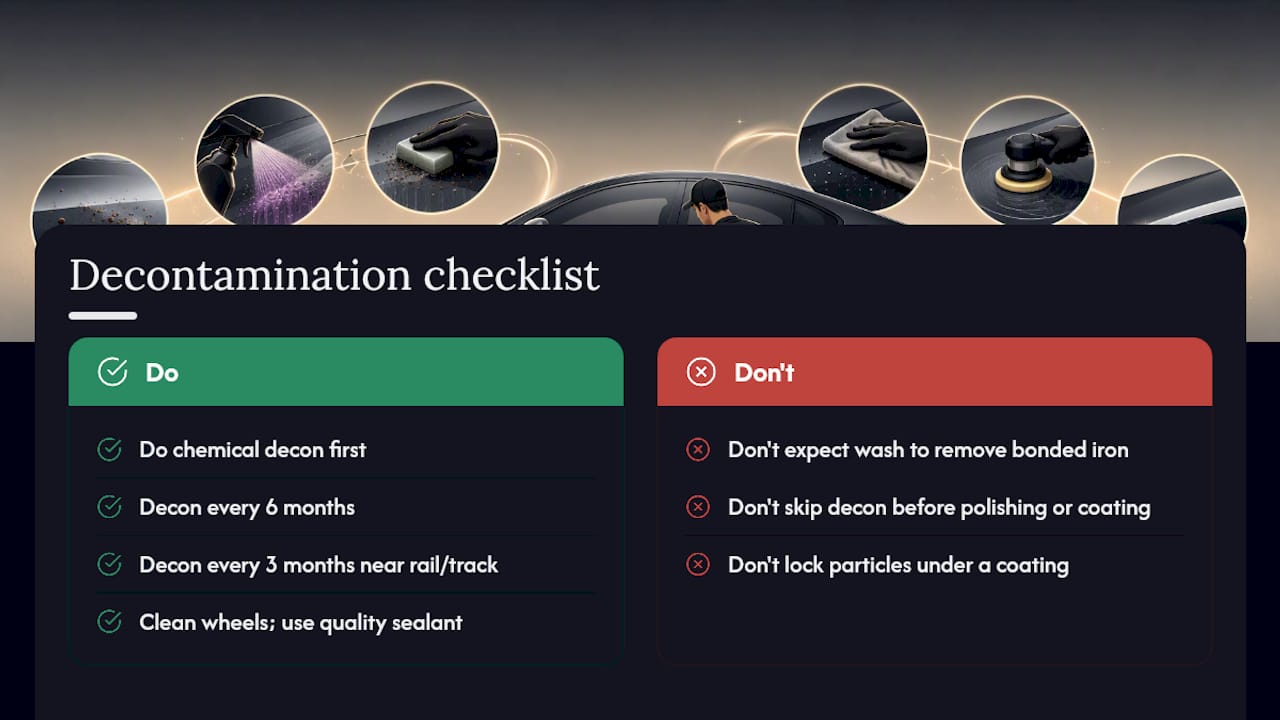
For most drivers, a decontamination service every 6 months combined with regular wheel cleaning and a quality sealant keeps paint in genuinely good condition. If you’re near rail lines or do track days, move that to every 3 months. It’s a small time investment compared to a full paint correction.
Isaac’s Pro Detailing handles iron removal for you
Skipping the DIY process entirely is a legitimate choice, particularly when contamination is heavy or you’re preparing for a ceramic coating. Isaac’s Pro Detailing comes to your home, workplace, or wherever your car is parked on the Sunshine Coast, fully equipped for chemical iron decontamination, clay work, and protective finishing in a single mobile visit.
The service covers a full visual and tactile inspection, pH-balanced pre-wash, iron fallout remover application with dwell and rinse, clay or mechanical decon on remaining rough spots, and aftercare advice tailored to your exposure level. Most iron decontamination visits take 1–2 hours depending on contamination severity. For vehicles heading toward a ceramic coating, the decon step is included as part of the prep sequence. Check the special services page for current options, or book directly through the mobile detailing workflow page to get started.
Sources
- Iron Particle Rust Contamination Repair
- Iron fallout and brake dust: what they do to your paint | EuroLuxe Detailing
- Exterior Paint Decontamination for Cars | Paint Decontamination Explained
- How to Remove Orange Spots on Car Paint (Full Guide) | Auto Care HQ