
TL;DR:
- DIY car carpet extraction involves deep cleaning carpets with specialized tools and cleaning agents to remove embedded dirt and moisture. It requires thorough preparation, multiple extraction passes, and complete drying to prevent mold and odours, with patience during drying being crucial. Investing in quality equipment and proper techniques ensures a professional-level clean and avoids common mistakes like over-wetting or insufficient drying.
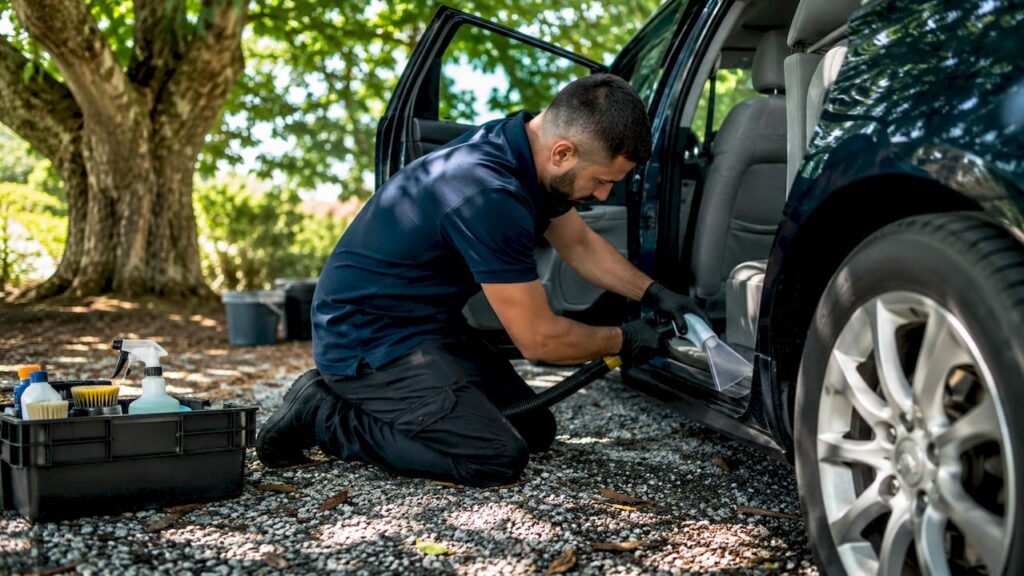
DIY car carpet extraction is the process of deeply cleaning your vehicle’s carpets using specialised tools and cleaning agents to remove embedded dirt, stains, and moisture from fibres and padding. Done correctly, it restores appearance, eliminates odours, and extends carpet life significantly. The method relies on three phases: thorough preparation, controlled cleaning and extraction, and complete drying. Skip any phase and you risk mould, residue, or damaged fibres. This guide walks you through every step, flags the mistakes most car owners make, and tells you exactly which tools and products to use.
What tools and materials do you need for DIY carpet extraction?
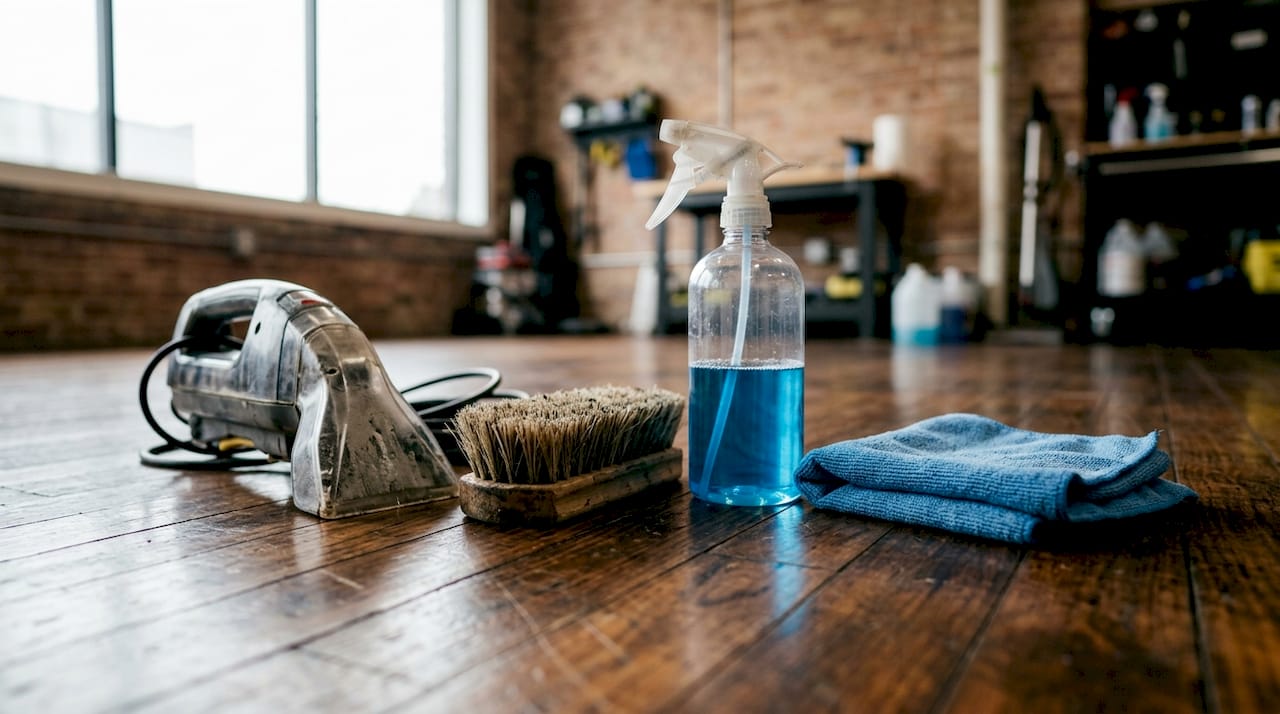
The right equipment separates a genuinely deep clean from a surface scrub that leaves moisture and residue behind. For home carpet extraction, you need a wet/dry shop vacuum as the minimum requirement. A portable carpet extractor such as the Bissell SpotClean Pro or Hoover CleanSlate is optional but makes a measurable difference, particularly in pulling moisture from the padding beneath the carpet fibres.
Your core kit should include:
- Wet/dry shop vacuum (at least 5-litre capacity for continuous use)
- Stiff carpet brush or detailing brush for agitating cleaner into fibres
- Microfiber towels for blotting and moisture wicking
- Spray bottle for controlled cleaner application
- Portable carpet extractor (optional but strongly recommended)
Choosing the right cleaner matters as much as the equipment. Enzymatic cleaners break down protein-based stains such as food, blood, and urine. Solvent-based cleaners target oil and grease. pH-neutral formulas suit delicate or synthetic fibres where aggressive chemistry would cause colour loss or fibre damage. Matching stain type to cleaner chemistry is critical, and a spot test on a hidden area is mandatory before full application.
| Cleaner type | Best for | Caution |
|---|---|---|
| Enzymatic | Food, urine, blood | Allow full dwell time (5-10 min) |
| Solvent-based | Oil, grease, tar | Ventilate well; test on fibres first |
| pH-neutral | Synthetic and delicate fibres | Least aggressive; may need repeat passes |
| Alkaline foam | General dirt and grime | Avoid over-application on backing |
Portable carpet cleaners are designed mostly for spot cleaning, so expect lower extraction performance compared to full-sized units. Typical hose lengths run 7 to 9 feet and cord lengths 20 to 29 feet. Check both before buying to confirm they reach the rear seats and floor wells without awkward repositioning.
Pro Tip:Investing in a portable extractor rather than relying solely on a wet/dry vac cuts drying time by roughly half and pulls moisture from the padding, not just the surface fibres.
How do you prepare and pre-treat car carpets before extraction?
Preparation is where most DIY attempts fall short. Skipping or rushing this phase turns dry grit and debris into a muddy paste that embeds deeper into fibres once liquid is introduced. Spending 10 to 15 minutes vacuuming with slow, overlapping passes is the standard recommendation before any cleaner touches the carpet.
Follow these steps in order:
- Remove floor mats completely. Clean them separately outside the vehicle so they do not recontaminate the carpet during the main clean.
- Move seats forward and backward to expose hidden floor sections. Vacuum under seats thoroughly using a crevice tool attachment.
- Vacuum the entire carpet using slow, overlapping strokes in multiple directions. This lifts fibres and dislodges grit sitting at the base of the pile.
- Identify stain types before applying any product. Check for oil spots, food residue, or organic stains so you can match the correct cleaner.
- Spot test your chosen cleaner on an inconspicuous area such as the carpet under the seat. Wait two minutes and check for colour change or fibre damage.
- Pre-treat stains by applying the appropriate cleaner directly to the affected area. Allow it to dwell for the time specified on the product label, typically three to ten minutes depending on stain severity.
Different stain types require specific dwell times and chemistries. Enzymes need time to break down organic matter, so cutting the dwell short produces poor results. Solvents work faster but require a post-treatment neutraliser to prevent residue from attracting fresh dirt.
Controlled application is the other key principle here. Use a spray bottle rather than pouring cleaner directly onto the carpet. The goal is to dampen the fibres, not saturate the backing. Over-wetting at the pre-treatment stage compounds the problem during extraction and dramatically extends drying time.
Pro Tip:For stubborn stains, work the pre-treatment cleaner in gently with a stiff brush using circular motions before the dwell period. This opens the fibre pile and gives the chemistry direct contact with the stain.
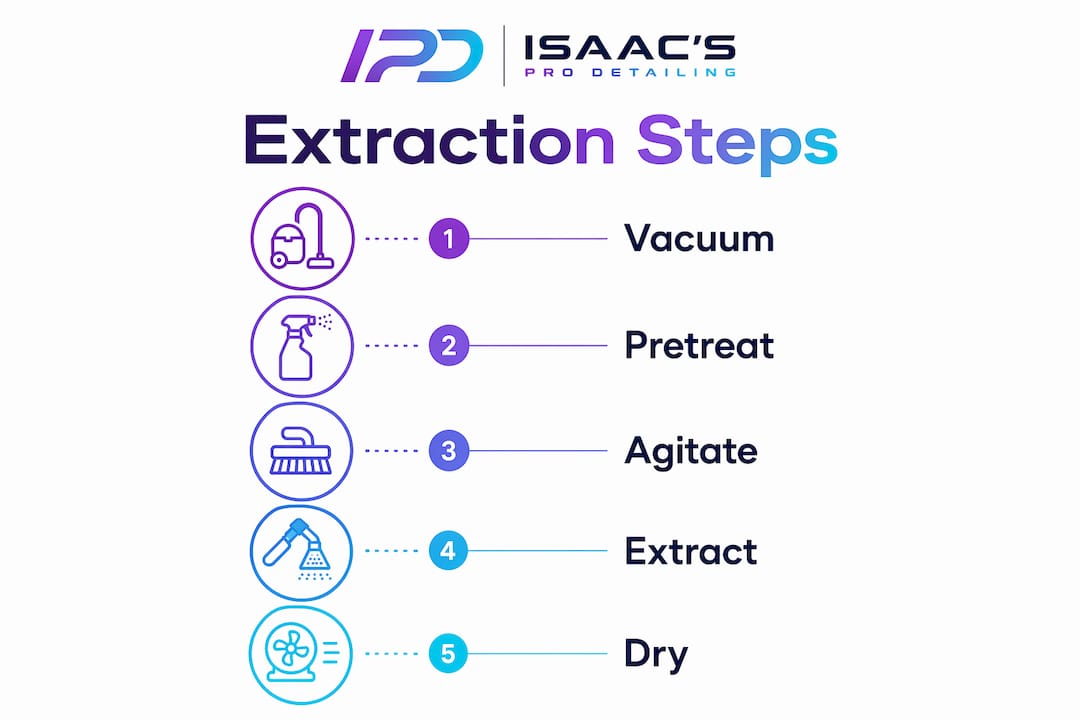
What is the step-by-step process for performing DIY carpet extraction?
Systematic zone-based cleaning produces far better results than working randomly across the carpet. Divide the floor into four sections: driver front, passenger front, driver rear, and passenger rear. Complete each zone fully before moving to the next.
- Apply cleaner lightly to one zone using a spray bottle. Aim for even, light coverage. The carpet should look damp, not wet.
- Agitate with a carpet brush using circular motions followed by back-and-forth strokes. This works the cleaner into the fibre pile and loosens embedded dirt.
- Extract with firm nozzle pressure. If using a portable extractor, press the nozzle firmly against the carpet and move slowly. If using a wet/dry vac, use a wide floor nozzle and apply downward pressure.
- Make at least three extraction passes per zone. Multiple passes with firm nozzle pressure draw moisture from the fibres and padding, not just the surface. Each pass removes progressively more dirty water.
- Repeat the apply-agitate-extract cycle if the extracted water is still heavily discoloured after three passes. This signals significant embedded dirt that needs another round.
- Perform a final dry-suction pass over each completed zone. A dry-suction pass after extraction reduces residue and speeds drying significantly compared to extraction alone.
A few additional points worth noting during the extraction phase:
- Work from the rear of the vehicle toward the front so you are not kneeling on already-cleaned sections.
- Keep the extractor or vac nozzle moving at a consistent pace. Pausing in one spot over-wets that area.
- Avoid oversaturating carpets with water or shampoo. Excessive moisture saturates the backing and padding, creating conditions for mould and persistent odours.
- Empty the dirty water tank on your extractor regularly. A full tank reduces suction and leaves more moisture behind.
Using minimal cleaner and letting agitation do the work, followed by repeated extraction passes, yields better deep cleaning than heavy foaming or saturating. This is the principle that separates a professional result from an amateur one.
How to dry your car carpets properly after extraction
Drying is the phase most car owners underestimate, yet extraction success hinges more on moisture control and thorough drying than on visible cleanliness. A carpet that feels dry on the surface can still harbour significant moisture in the padding beneath, and that moisture is where mould and odours originate.
Use these techniques immediately after extraction:
- Open all doors and windows to maximise airflow through the cabin.
- Use a portable fan or blower directed at the carpet surface to accelerate evaporation.
- Blot with microfiber towels to wick out surface moisture. Microfiber towels combined with ventilation accelerate drying and reduce odour formation. Avoid paper towels as they leave lint in the carpet pile.
- Run the vehicle’s climate control on a warm, low-humidity setting with the fan on high if weather conditions are poor.
- Check padding moisture by feel. Press firmly on the carpet with your palm. If you feel resistance or dampness, the padding is still wet.
Drying time varies considerably based on conditions:
| Conditions | Expected drying time |
|---|---|
| Warm, dry weather (25°C+) | 2 to 2.5 hours |
| Mild, overcast conditions | 4 to 6 hours |
| Cold or rainy weather | 3 to 5+ hours |
Drying padding beneath the carpet is as important as surface drying. Wet padding can harbour mould even when the carpet surface feels dry. For heavily saturated sections, professionals recommend pulling back the carpet to expose the padding directly to airflow. Never reinstall floor mats until both the carpet and padding are completely dry. You can check for odour prevention after drying if any residual smell persists.
Pro Tip:If you cleaned on a cool or overcast day, leave the doors open in a shaded, well-ventilated area rather than in direct sun. Direct sun heats the cabin unevenly and can bake residual moisture into the padding rather than drawing it out.
What are the common mistakes in DIY car carpet extraction?
Many DIYers treat extraction like shampooing only, which leads to over-wetting, residue build-up, and carpets that smell worse after cleaning than before. Understanding the failure points prevents wasted effort and potential carpet damage.
The most frequent mistakes are:
- Skipping thorough vacuuming. Applying liquid to a carpet with loose grit turns debris into a paste that embeds deeper. Always vacuum first, every time.
- Applying too much cleaner or water. More product does not mean a deeper clean. It means longer drying times, residue that attracts fresh dirt, and a real risk of mould in the padding.
- Too few extraction passes. One or two passes leaves significant moisture and dirty water in the fibres. Three passes per zone is the minimum.
- Replacing mats before carpets are fully dry. Mats trap moisture against the carpet and create the exact conditions mould needs to establish.
- Using the wrong cleaner for the stain type. An alkaline cleaner on an oil stain, or a solvent on a protein stain, produces poor results and can damage fibres or set the stain permanently.
“The most common call-back I see after a DIY clean is mould smell two weeks later. The carpet looked fine, but the padding was never dry. Always check the padding, not just the surface.”
Signs that your extraction was incomplete include a sour or musty smell within 48 hours of cleaning, carpet that feels stiff or crunchy when dry, and visible residue lines where the cleaner dried without full extraction. If any of these appear, re-extract the affected zones with clean water only to rinse out residue, then dry thoroughly again. For a full overview of the interior cleaning tools that help avoid these issues, it is worth reviewing your equipment before the next clean.
Key takeaways
Effective DIY car carpet extraction requires thorough vacuuming, controlled cleaner application, multiple extraction passes, and complete drying of both carpet and padding to prevent mould and odours.
| Point | Details |
|---|---|
| Vacuum before any liquid | Spend 10 to 15 minutes vacuuming with overlapping passes to prevent grit embedding. |
| Match cleaner to stain type | Use enzymatic cleaners for organics, solvents for oils, and pH-neutral for delicate fibres. |
| Three extraction passes minimum | Multiple firm passes per zone pull moisture from padding, not just surface fibres. |
| Dry padding, not just surface | Press the carpet to check padding moisture before reinstalling mats or closing doors. |
| Drying time varies by weather | Allow 2 to 6 hours depending on conditions; cold or wet days require significantly longer. |
What I have learned doing this on the Sunshine Coast
After years of working on car interiors across the Sunshine Coast, the single biggest lesson I keep relearning is that patience during drying is worth more than any premium product or expensive extractor. I have seen beautifully extracted carpets develop mould within a fortnight because the padding was never fully dried. The Sunshine Coast’s humidity makes this worse than most places. Even on a warm day, if there is moisture in the air, padding holds onto it longer than you expect.
My honest view on equipment is this: a quality wet/dry shop vac with a wide floor nozzle outperforms a cheap portable extractor every time. If you are going to spend money, spend it on a vac with strong suction rather than a low-end extractor with a small tank and weak motor. The agitation and extraction passes matter far more than the brand of cleaner you use.
On product choice, I have found that enzymatic cleaners do the heavy lifting for most car carpet stains. The majority of what ends up in a car carpet is organic: food, drink, mud, and body oils. A good enzyme formula with a proper dwell time handles all of those. Solvents are for the occasional oil or grease job, and pH-neutral foam is what I reach for on light maintenance cleans between deeper extractions.
The one thing I would tell any car owner attempting this for the first time: do not rush the pre-treatment phase. Letting the cleaner dwell properly is free. It costs you nothing except a few minutes, and it does more work than any amount of extra scrubbing.
— isaac’s
Take your car’s interior to the next level with Com
DIY extraction gets you a long way, but some jobs need professional-grade equipment and expertise to finish properly. Com offers fully mobile interior detailing services across the Sunshine Coast, including deep seat and carpet extraction using commercial extractors that pull moisture from padding far more effectively than portable home units.

Whether you need a one-off deep clean after a tough stain, a full interior detail before selling, or ongoing maintenance to protect your investment, Com comes to your home, workplace, or wherever suits you. Explore the full range of professional cleaning packages and find the right option for your vehicle. No trailer, no hassle, and no compromise on results.
FAQ
What is DIY car carpet extraction?
DIY car carpet extraction is the process of using a wet/dry vacuum or portable carpet extractor, combined with appropriate cleaning agents, to remove embedded dirt, stains, and moisture from a vehicle’s carpet fibres and padding. It differs from basic vacuuming by actively injecting and extracting liquid to clean deep into the carpet pile.
How many extraction passes do you need per section?
At least three passes per zone with firm nozzle pressure are recommended, followed by a final dry-suction pass. Each pass removes progressively more dirty water from the fibres and padding.
How long does it take for car carpets to dry after extraction?
Drying time ranges from 2 to 2.5 hours in warm, dry conditions to 4 to 6 hours under typical conditions, and up to 5 or more hours in cold or rainy weather. Always confirm the padding is dry before reinstalling floor mats.
Can I use a household carpet cleaner on car carpets?
Yes, but check that the formula is safe for automotive carpet fibres and always spot test first. Enzymatic cleaners and pH-neutral formulas are the safest choices for most car carpet materials.
Why does my car carpet smell after cleaning?
A sour or musty smell after cleaning almost always indicates that the padding beneath the carpet was not fully dried. Re-extract the affected area with clean water, then use fans and open doors to dry the padding completely before replacing mats.