
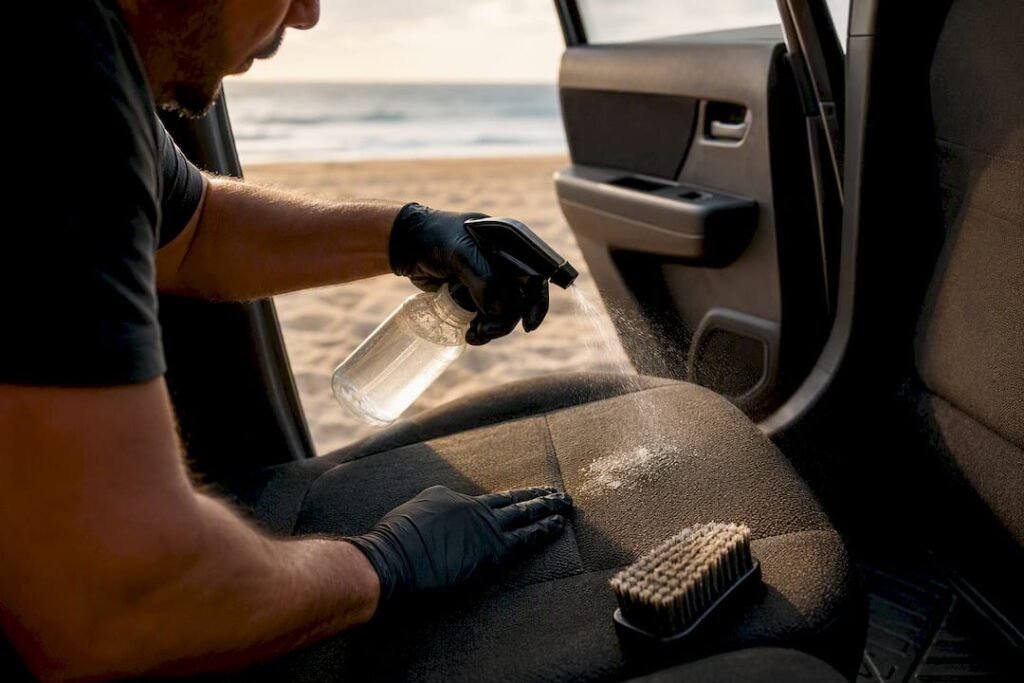
Blot the urine dry, hit it with an enzyme cleaner that soaks past the fabric into the padding, then extract and dry the area fast. That sequence matters more than the product you grab off the shelf, because enzymes break down the uric acid crystals that cause the smell, extraction pulls the dissolved residue back out, and quick drying stops any leftover moisture reactivating the odour later.
Here’s what to have within reach before you start:
- Microfiber towels (plenty of them)
- An enzymatic pet urine cleaner, not just a surface spray
- A wet/dry vacuum or small carpet extractor
- Baking soda for surface absorption once the wet work is done
Work through it in this order:
- Blot, don’t scrub, the wet patch
- Saturate with enzyme cleaner and let it dwell
- Extract with water, then dry with fans or open windows
Pro Tip: Skip the hairdryer. Heat sets the proteins in urine into the fabric permanently, which is the single biggest mistake we see in cars that never lose the smell.
Key Takeaways
Removing pet urine from a car permanently requires enzymatic treatment that reaches the padding, repeated extraction to pull out dissolved residue, and full drying to stop the smell reactivating.
| Point | Details |
|---|---|
| Act in the first hour | Blot immediately, apply enzyme cleaner, and extract before urine wicks into padding. |
| Never mix chemicals | Keep bleach and ammonia products apart, and avoid heat, which sets urine proteins into fabric. |
| Match cleaner to surface | Use enzymatic products on fabric and carpet, water-based leather wipes on leather, and light steam on headliners. |
| Two wet, two dry passes | Repeat extraction cycles until the area tests clean rather than stopping after one pass. |
| Call a pro when odour returns | Recurring smell after correct DIY usually means contamination below the surface, where Com’s mobile enzymatic treatment and extraction service can finish the job on-site. |
Table of Contents
- Pet urine in a car seat: what to do in the first hour
- How do you clean different car surfaces after a pet accident?
- What if urine has soaked into the padding or foam?
- Which cleaners actually work on pet urine, and which are risky?
- What tools do you need for a proper extraction job?
- How do you get rid of pet odour permanently, not just temporarily?
- How long does it take for the smell to fully go away?
- When should you call a professional detailer instead?
- Ready to skip the DIY and get it sorted properly?
- Sources
Pet urine in a car seat: what to do in the first hour
The first sixty minutes decide whether this is a fifteen minute fix or a job for a professional. Urine sits on the surface of most fabrics for a short window before it wicks down into the foam underneath, so speed genuinely counts here.
Start with containment. Get pets and passengers out, crack the windows or open the doors, and throw a towel over the spot so nobody sits in it while you gather supplies.
- Minute 0 to 5: Blot the puddle with dry towels, pressing firmly and working from the outside of the stain inward so you’re not spreading it wider.
- Minute 5 to 15: Once it’s no longer wet to the touch, apply your enzyme cleaner generously enough to reach the same depth the urine did.
- Minute 15 to 60: Let the cleaner dwell per the label, then blot again and start extracting or wet vacuuming if you have the gear.
A few things to avoid doing, no matter how tempting:
- Don’t rub the stain. Rubbing pushes urine deeper into the weave and can fray fibres.
- Don’t reach for bleach or ammonia based cleaners, and never mix them. Combining bleach and ammonia produces toxic chloramine gas, and ammonia’s chemical similarity to urine can actually encourage pets to remark the same spot.
- Don’t blast the area with a hair dryer or leave the car in direct sun to “dry it faster.” Heat sets uric acid proteins into upholstery fibres, which locks the odour in rather than removing it.
- Don’t oversaturate the fabric. A heavy soak just pushes contamination further into the padding below.
Pro Tip: Keep a folded towel and a small enzyme spray in the glovebox if you regularly travel with pets. Treating a fresh accident in the first five minutes is far easier than treating one that’s had an hour to sink in.
How do you clean different car surfaces after a pet accident?
Every surface in a cabin reacts differently to urine, and using the wrong method on the wrong material either fails to clean it or damages the surface trying.
Fabric and cloth upholstery
Test your cleaner on a hidden patch of seat fabric first, then blot up excess liquid, apply the enzyme cleaner, and agitate gently with a soft brush to work it into the weave. Extract with clean water, repeat if the smell persists, and pay close attention to seams and stitching, where urine likes to pool and hide.
Carpet and floor mats
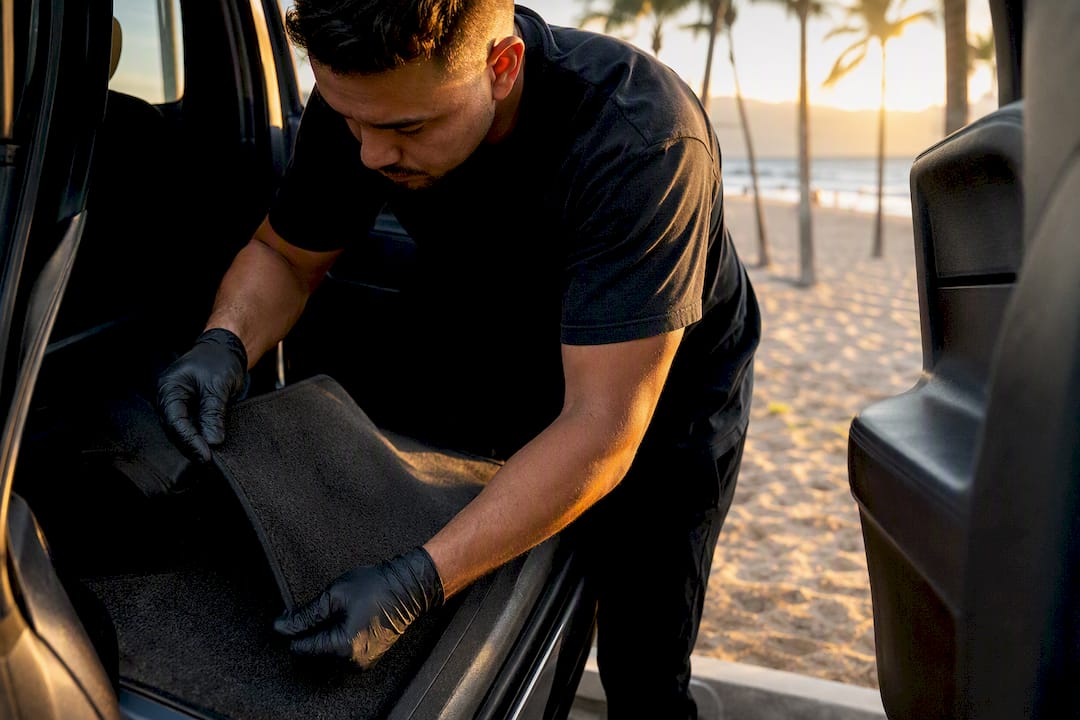
Urine on carpet tends to wick sideways under the backing before you even notice a stain on top, which is why surface cleaning alone often leaves a smell that seems to come from nowhere. If a floor mat took the hit, pull it out and treat it separately where you can extract from both sides. For fitted carpet, extraction from above is your best shot at pulling contamination back up through the pile.
Leather and vinyl
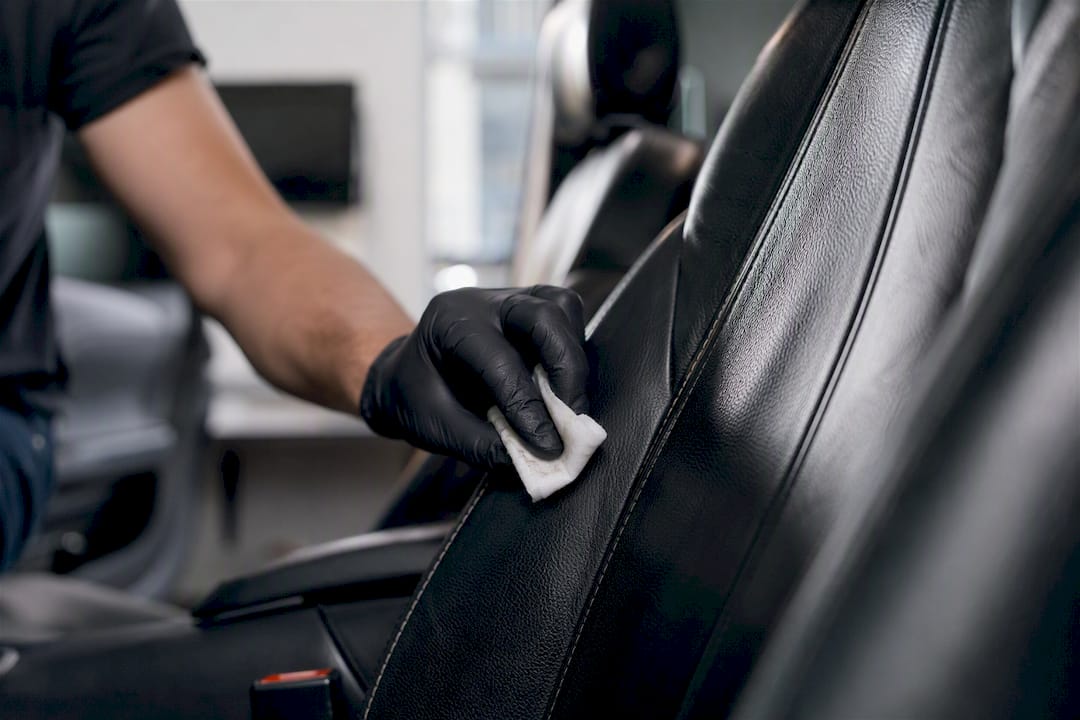
Leather and vinyl don’t absorb the way fabric does, but urine can still sit in stitching and seams and cause staining or odour over time. Use a leather-safe, water-based enzymatic wipe rather than a heavy-duty fabric cleaner, and steer well clear of strong alkaline products, which strip the finish and dry out leather over repeated use.
Headliner and seat belts
These need the lightest touch of anything in the cabin. A light steam pass or a diluted enzymatic spray applied sparingly works better than soaking a headliner, because oversaturation risks delamination, the glue letting go and the fabric sagging away from the backing. Enzyme-based products penetrate biological residues effectively, but headliners specifically call for minimal moisture to protect that adhesive bond.
| Surface | What to do | What to avoid |
|---|---|---|
| Fabric upholstery | Blot, enzyme treat, agitate, extract | Rubbing, oversaturating |
| Carpet/floor mats | Extract from both sides, remove mats if needed | Surface cleaning only |
| Leather/vinyl | Leather-safe enzymatic wipes | Alkaline cleaners |
| Headliner/seat belts | Light steam or diluted spray | Heavy saturation |
Pro Tip: If urine has landed on exterior paintwork near a door sill, rinse it off sooner rather than later. Uric acid and other compounds in pet accidents can affect car paint if left to sit.
What if urine has soaked into the padding or foam?
Surface cleaning that doesn’t fix the smell is the clearest sign contamination has gone deeper than the fabric face. Uric acid forms crystals that stay dormant when dry but reactivate with humidity or heat, which is exactly why a car can smell fine in the morning and rank by afternoon.
Check for these signs before assuming a quick clean will do it:
- The seat or carpet still feels damp hours after you cleaned it
- You can see a darker ring wicking outward along a seam or under trim
- The smell comes back within a day or two of treating the surface
- Pressing on the padding produces a faint odour even when the top feels dry
If any of those apply, the contamination has reached the foam. That’s a different job to a surface wipe.
- Reapply enzyme cleaner generously and let it dwell longer than the label suggests, since it needs to travel as deep as the urine did
- Extract repeatedly, doing multiple wet and dry passes rather than one heavy pass
- Reassess after each cycle, and if the odour persists after two or three genuine attempts, the foam or backing may need to come out
Household wet/dry vacs and small extractors struggle to pull embedded urine from foam the way commercial extraction equipment can, simply because they lack the suction and heat needed to fully lift dissolved residue back out.
Pro Tip: If you can smell it but can’t see it, trust your nose over your eyes. Odour without a visible stain almost always means the contamination is below the surface you’re looking at.
Which cleaners actually work on pet urine, and which are risky?
Enzymatic cleaners are the standard for a reason: they contain live bacterial cultures that consume the uric acid and organic compounds in urine rather than just perfuming over them. That’s the difference between eliminating the smell and hiding it for a day.
A few household options genuinely help, within limits:
- Diluted white vinegar (roughly one part vinegar to two parts water) can neutralise fresh, surface-level odour and mild alkaline residue, though it won’t touch anything that’s soaked in.
- Baking soda sprinkled over a dry, cleaned area and left for several hours before vacuuming absorbs lingering surface odour well, but it’s a mop-up step, not a treatment.
- Hydrogen peroxide and dish soap mixes are sometimes recommended online, but they can bleach dyed fabric and shouldn’t be used on anything you’re not prepared to discolour. Patch-test first, always.
Now the warnings that matter more than any product recommendation:
- Never mix bleach and ammonia based products. Together they release toxic chloramine gas.
- Avoid heat of any kind while treating urine. It sets the proteins into the fibres instead of breaking them down.
- Patch-test every product on a hidden section before applying it to a visible seat or panel.
- Choose products labelled specifically for “urine” or “enzymatic” cleaning rather than general upholstery sprays, and respect the dwell time on the label. Wiping it off too soon is the most common reason enzyme cleaners “don’t work.”
Pro Tip: Enzymes need time and moisture to do their job. Spraying and immediately wiping is close to useless. Let it sit, covered if possible, for the full time stated on the bottle.
What tools do you need for a proper extraction job?
You don’t need a professional rig to get real results, but you do need more than a spray bottle and a rag.
Build a basic kit from:
- Absorbent microfiber towels
- A soft bristle brush for agitation
- A spray bottle for even enzyme application
- A wet/dry vacuum or a small carpet/upholstery extractor
- A fan or dehumidifier for the drying phase
The process itself is simple to repeat and works whether you’re treating a fresh stain or a set-in one:
- Pre-extract or blot any remaining moisture first
- Saturate the area with enzyme cleaner, matching the depth of the original contamination
- Let it dwell for the time stated on the product
- Run two wet extraction passes to lift the dissolved residue
- Follow with two dry passes to pull out as much moisture as possible
- Test the area once dry, and repeat the cycle if any smell remains
Professional extraction protocols typically call for exactly this two wet, two dry pass structure, because a single pass tends to leave cleaning residue behind along with whatever urine it missed. A simple touch test tells you plenty: if the area still feels cool or faintly damp after a few hours of airflow, it’s not done drying yet.
Pro Tip: Run a sniff test with the car sealed up and sitting in warmth for an hour before deciding the smell is gone. Heat brings any leftover odour straight back to the surface.
How do you get rid of pet odour permanently, not just temporarily?
Air fresheners mask the smell for a few hours and then it’s back, because they do nothing to the embedded uric acid and organic residue sitting in the fibres and foam. Heat and humidity cause that residue to re-emit odour, which is why a car can smell fine at 8am and reek by 2pm in summer.
A staged approach works far better than masking: remove the contaminant physically, treat the stain with enzymes, extract thoroughly, then sterilise the area. Skipping straight to a spray-and-hope product misses the first three steps entirely.
Ranked by what actually shifts the smell:
- Repeated enzyme treatment paired with extraction, run through as many cycles as it takes
- Activated charcoal or baking soda placed in the cabin overnight to adsorb residual odour molecules once the source is gone
- Professional ozone treatment or fogging, but only after physical contamination has been removed, since ozone works on airborne odour, not embedded stains
Where a detailer earns their keep is extraction power your home vacuum can’t match, controlled ozone application that’s genuinely calibrated for a vehicle cabin, and proper post-treatment ventilation. If you’d rather understand the full odour removal process from start to finish, it’s worth a read before you decide how far to take the DIY route.
Pro Tip: Never spray an air freshener over an unresolved urine smell before a test drive with a buyer or a valuation. Heat from the cabin will bring the real smell straight back within minutes.
How long does it take for the smell to fully go away?
Run fans or a dehumidifier through the cabin for anywhere from two to four hours after a straightforward extraction, checking the padding underneath for damp patches before you call it done. If you find any dampness, run another extraction and drying cycle rather than leaving it to air out on its own.
For prevention going forward:
- Washable, removable seat covers save your factory upholstery from ever taking a direct hit
- A cargo liner in the boot handles wet dogs and muddy paws without touching the carpet
- Quick-absorb towels kept in the car mean you can blot within seconds, not minutes
- A spare towel dedicated to “wet outings” saves you reaching for whatever’s nearest, which is usually the wrong thing
Retest the cabin after a day in the sun, since heat is the truest test of whether odour is really gone or just temporarily suppressed. A fresh, surface-only accident should clear within a few hours of proper treatment. Anything that soaked into padding can take several days of repeated cycles before it’s genuinely gone.
When should you call a professional detailer instead?
DIY has a ceiling, and knowing where it is saves you wasting a weekend on a job that was never going to work with household gear.
Call a pro when you notice:
- The smell returns within a day or two of a proper enzyme and extraction attempt
- Contamination has clearly reached the padding or foam, not just the fabric surface
- Multiple accidents have happened in the same spot over time
- The headliner or a hard-to-reach area is involved
If odour comes back after you’ve genuinely done the DIY steps correctly, the contamination is almost always sitting below the fabric surface, which is exactly the kind of job professional equipment is built for.
What a professional visit typically involves:
- Targeted enzymatic saturation that reaches deeper than a spray bottle can manage
- Hot-water extraction with multiple wet and dry passes using commercial-grade suction
- Controlled ozone treatment or fogging where the smell is severe or long-standing
- Padding or backing replacement in the rare cases where the material itself can’t be salvaged
A mobile detailer brings that equipment to your driveway rather than the other way around, which matters when the car in question is your daily driver and you can’t afford to be without it for a week.
Detailers’ perspective: common patterns and the fastest wins
Most DIY jobs fail for the same three reasons: cleaning only the visible surface, using heat to “speed things up,” and stopping after one extraction pass instead of two. The fastest wins are unglamorous. Blot immediately, give the enzyme cleaner real dwell time, then extract with two wet passes followed by two dry ones. Skip the shortcuts, keep bleach and ammonia well apart, and always test a hidden patch first.
Ready to skip the DIY and get it sorted properly?
If your own attempts at extraction and enzyme treatment have stalled, or the smell keeps creeping back after a hot afternoon, a mobile visit fixes it without you lifting a seat cushion. Com’s mobile detailing service brings the extraction power and controlled ozone equipment your garage doesn’t have, straight to your driveway, workplace car park, or wherever your car happens to be parked on the Sunshine Coast.
A typical visit starts with an on-site odour diagnosis to work out how deep the contamination sits, followed by targeted enzymatic treatment, hot-water extraction, and controlled drying, with ozone finishing available for stubborn or long-standing cases. When you call or book, mention when the accident happened, which surfaces are affected, and what you’ve already tried, since that shapes exactly which treatment cycle the job needs. Browse the full interior cleaning and odour-elimination options on the wash menu, or check what a full mobile detailing appointment actually looks like from start to finish before you book.
Sources
- Dog Urine Odor Elimination: A Pro’s Guide for Cars & Home – The Mobile Buff
- How to get rid of pet odor in vehicles
- How to get dog pee out of car seat | Shoozer Pets
- How to Remove Pet Odour from Car | Eco Shine Detailing Wollongong