
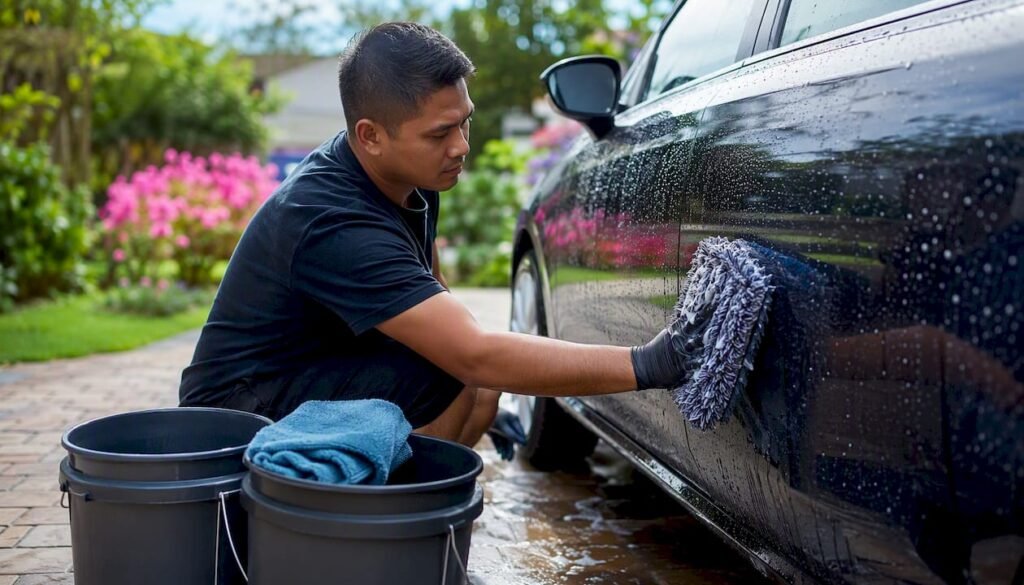
Wait at least several days before your first full wash after ceramic coating, and always follow your installer’s specific cure window. Detailers widely recommend a short initial curing timeframe, because the first week is the most critical for bonding. When you do wash, use a low-friction, pH-neutral hand wash with the two or three-bucket method. That’s the whole rule in one sentence.
- Avoid automatic or brush car washes during the entire cure period
- Avoid any high-pressure chemical contact in the first 48 hours
- Avoid touching painted surfaces unnecessarily in the first 48 hours
- Acceptable in the first 48 hours: a light rinse with low-pressure water if unavoidable
- Acceptable: blotting (not rubbing) bird droppings or sap with a damp microfibre
Pro Tip:If you’re unsure about your installer’s cure window or you lack the right products, book a mobile detailer for the first wash. It protects your warranty and removes the guesswork entirely.
Key takeaways
Wait the full installer-recommended cure window, then use a pH-neutral hand wash with the two-bucket method for maintenance to keep your ceramic coating performing at its best.
| Point | Details |
|---|---|
| Wait before washing | Follow your installer’s cure window; commonly 5–7 days, up to two weeks for some professional coatings. |
| Use the right method | Two or three-bucket method with grit guards and soft microfibre mitts protects the coating on every wash. |
| Avoid automatic washes | Brush car washes and harsh chemicals can void your warranty and degrade the coating permanently. |
| Maintain a regular schedule | Full hand wash every 2–3 weeks; professional decontamination every 3–12 months depending on exposure. |
| Isaac’s Pro Detailing | Mobile first wash and maintenance service on the Sunshine Coast, using warranty-safe, pH-neutral products. |
Table of Contents
- What to do in the hours and days after coating
- Why waiting matters: how ceramic coatings cure
- How to do the first wash safely, step by step
- Products and tools that are safe for the first wash
- Common mistakes that damage a newly cured coating
- Ongoing care after the first wash: your maintenance schedule
- When to book a professional first wash or maintenance service
- A Sunshine Coast detailer’s practical note
- Isaac’s Pro Detailing: mobile first wash and maintenance on the Sunshine Coast
- Sources
What to do in the hours and days after coating
The coating is most vulnerable immediately after application. Contamination that adheres in the first 48 hours can bond into a partially cured layer, which is why the actions you take right away matter as much as the first wash itself.
| Phase | What’s happening | What you can do |
|---|---|---|
| first 48 hours | Initial set; coating is soft and highly sensitive | Keep car garaged or covered; no washing, no touching paint |
| — | Surface hardening begins | Still avoid washing; blot contaminants only |
| Days 3–7 | Crosslinking progresses | Keep dry where possible; no chemical contact |
| Days 7–30 | Coating approaches full cure | First full hand wash permitted after installer’s window |
A few practical habits for the first 48 hours:
- Park undercover or use a car cover to reduce exposure to dew, rain, and tree sap
- If a bird dropping lands on the car, blot it immediately with a damp microfibre; never rub
- Avoid touching the painted surfaces with bare hands, which can leave oils and fingerprints
Ceramic Pro’s aftercare guidance advises against washing for at least two weeks and stresses keeping the vehicle dry during the initial cure hours. Some professional-grade coatings carry that longer window, so always document your installer’s specific instructions and keep them with your warranty paperwork.
Why waiting matters: how ceramic coatings cure
Ceramic coatings cure in two stages. The first is an initial surface set, where the coating firms up enough to resist light contact. The second is full crosslinking, where the silica or SiO2 molecules form a dense, interlocked network across the paint surface. That second stage is what delivers the hardness, hydrophobic performance, and chemical resistance you paid for.
Getting the coating wet before it fully cures can leave water marks or cause uneven performance. Water itself isn’t the only risk. Alkaline or acidic substances during the cure window can interfere with crosslinking, and physical abrasion, even light wiping, can disrupt the layer before it has locked in.
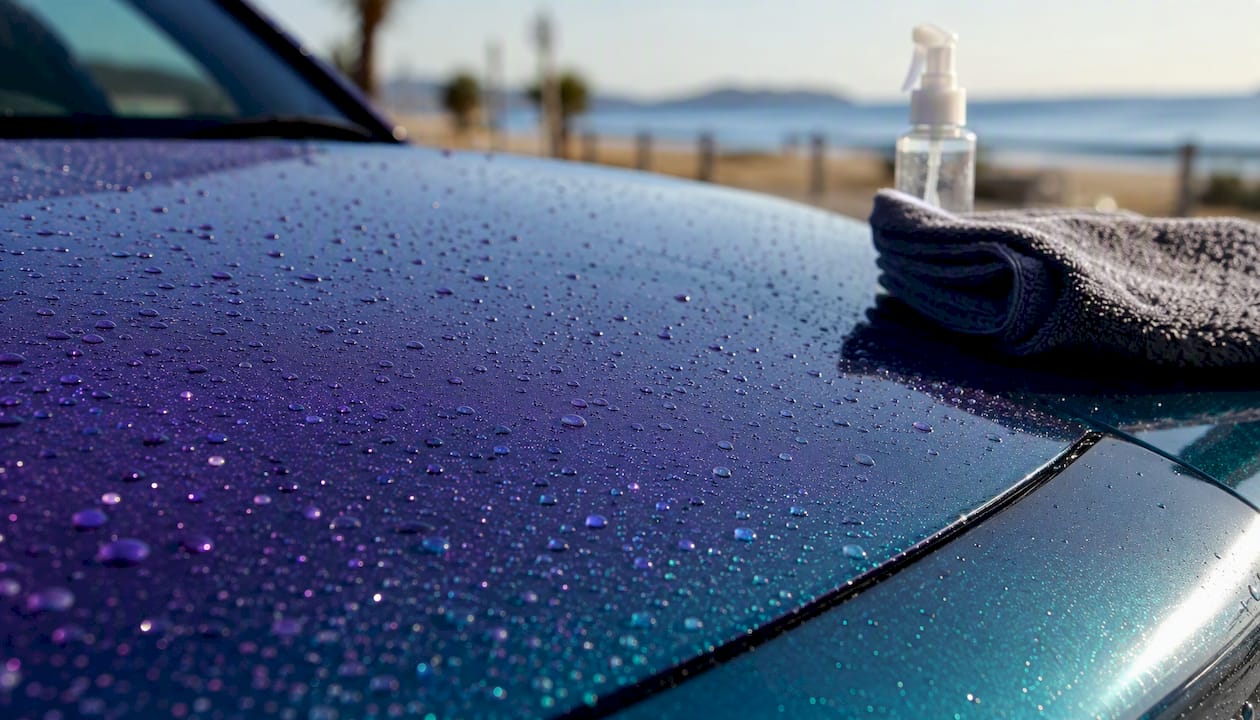
The result of premature exposure isn’t always obvious immediately. You might notice hazing, water spots that won’t shift, or patchy hydrophobic behaviour weeks later, all of which trace back to those first few days.
Pro Tip:Australia’s environment adds extra pressure during cure. Coastal salt air on the Sunshine Coast, hard bore water, eucalyptus sap, and intense UV all increase the risk of etching or water spotting on a partially cured surface. If you can’t garage the car, a breathable car cover is worth using for the first week.
How to do the first wash safely, step by step
Once your installer’s wait period has passed, here’s how to wash a ceramic coated car without damaging the finish. Work in the shade, in mild temperatures, and never on a hot panel.
What you’ll need on hand:
- Two or three clean buckets with grit guards
- pH-neutral car shampoo
- Foam gun or pump sprayer (optional but helpful)
- Two soft microfibre wash mitts (one for the body, one for lower panels)
- Separate wheel brush and bucket
- Multiple clean microfibre drying towels
The wash sequence:
- Choose your location. Work in shade, ideally early morning or late afternoon. Avoid washing in direct sun or when panels are hot to the touch.
- Pre-rinse. Use a hose on low pressure or a pressure washer on a wide fan setting from a safe distance. Rinse top to bottom to remove loose grit before any contact.
- Foam or pre-soak. Apply a diluted pH-neutral shampoo via foam gun or pump sprayer and let it dwell briefly. This lifts surface contamination before you touch the paint.
- Two or three-bucket wash. Fill one bucket with shampoo solution and one (or two) with clean rinse water. Dip your mitt in the shampoo bucket, wash one panel at a time using straight lines (not circles), then rinse the mitt in the clean bucket before reloading. This method, combined with soft microfibre mitts, is the field-tested standard for protecting ceramic coatings.
- Wheels last. Use a dedicated bucket, brush, and mitt for wheels. Brake dust and road grime are abrasive; cross-contaminating your paint mitt is a common mistake.
- Final rinse. Rinse the whole car top to bottom with low pressure. A sheeting rinse (hose without a nozzle) helps water run off quickly.
- Dry immediately. Don’t let the car air-dry. Use a clean, plush microfibre drying towel and pat or blot the surface rather than dragging the towel across it. Work panel by panel. A second dry towel for finishing removes any remaining moisture.
Pro Tip:Rinse water quality matters more than most people realise. Hard tap water leaves mineral deposits that can etch a fresh coating. If your local water is hard, use a filtered hose attachment or dry the car quickly before water spots form.
Products and tools that are safe for the first wash
You don’t need an expensive kit, but the wrong products can strip or weaken a new coating. Stick to these categories:
- pH-neutral car shampoo. This is non-negotiable. Choosing a pH-neutral shampoo protects the coating’s chemistry and avoids the alkaline or acidic damage that standard household detergents cause. Look for products labelled “coating safe” or “pH balanced.”
- Microfibre wash mitts. High-pile, soft mitts trap grit away from the paint surface. Avoid sponges, which hold grit against the panel.
- Grit guards. Fit one in each bucket. They trap dirt at the bottom so your mitt doesn’t pick it back up.
- Microfibre drying towels. Use a plush, waffle-weave, or twisted-loop towel rated for paint-safe use. At least two per wash.
- SiO2 maintenance spray. A monthly SiO2 spray applied during or after the wash refreshes hydrophobic performance and is commonly recommended by Australian detailers. Apply to a damp panel and buff off with a clean microfibre.
- Iron fallout remover (pH-neutral). For decontamination washes every few months, not the first wash.
Most of these products are available at local auto parts retailers across the Sunshine Coast and broader Australia, including Repco and Supercheap Auto. Pro-grade versions from specialist detailing suppliers offer better lubricity and coating compatibility, and typically cost more than entry-level supermarket alternatives.
Pro Tip:Keep a small bottle of SiO2 maintenance spray and a folded microfibre in your boot. A quick spray on a clean, damp panel after a rinse takes two minutes and keeps the hydrophobic effect sharp between full washes.
Common mistakes that damage a newly cured coating
Most coating failures in the first month aren’t product failures. They’re aftercare failures. These are the mistakes worth knowing before you start.
- Automatic or brush car washes. The brushes and harsh chemicals used in tunnel washes are among the fastest ways to degrade a coating. Australian aftercare advice consistently warns against them, and most installer warranties are voided by their use.
- Acidic or alkaline cleaners. Wheel cleaners, bug removers, and all-purpose cleaners are often highly alkaline. Even a single use on a fresh coating can weaken its bond.
- Single-bucket washing. Washing with one bucket reintroduces grit to the paint surface with every pass. Swirl marks from this are permanent without a machine polish.
- Abrasive cloths or dirty mitts. A mitt that’s been used on wheels, or a cloth that’s been sitting on a garage floor, carries grit. One pass is enough to scratch.
- Polishing over a fresh coating. Polish contains abrasives that will cut into or remove the coating layer. Never polish a coated car unless you intend to reapply.
Watch for these warning signs during and after the first wash:
- Water spots that don’t shift after drying (mineral deposits or etching)
- Hazing or streaking in direct light (possible contamination during cure)
- Patchy water beading (uneven cure or coating damage)
If you see any of these, don’t try to fix them yourself with a random product. Contact your installer first.
Warranty risk is real. Most professional ceramic coating warranties require you to follow the installer’s aftercare instructions precisely. Using the wrong products, washing too early, or visiting an automatic car wash can void your warranty entirely. Keep a written record of your installer’s instructions, the date of application, and every wash you perform. That documentation matters if you ever need to make a warranty claim. See Isaac’s Pro Detailing’s coating warranty terms for an example of what installers typically require.
Ongoing care after the first wash: your maintenance schedule
A ceramic coating doesn’t maintain itself. Regular washing remains necessary, with a recommended cadence ranging from weekly spot rinses to a full hand wash every 2–3 weeks and professional decontamination every 3–12 months depending on how much exposure the car gets.
| Task | Frequency | Notes |
|---|---|---|
| Light rinse or spot clean | Every 7–10 days | Remove bird droppings, sap, and road grime quickly |
| Full pH-neutral hand wash | Every 2–3 weeks | Two-bucket method; dry immediately |
| SiO2 maintenance spray | Monthly | Apply to damp panel; buff off with microfibre |
| Iron fallout removal | Every 3–6 months | Use a pH-neutral iron remover; rinse thoroughly |
| Professional decontamination | Every 6–12 months | Clay bar, iron removal, coating inspection |
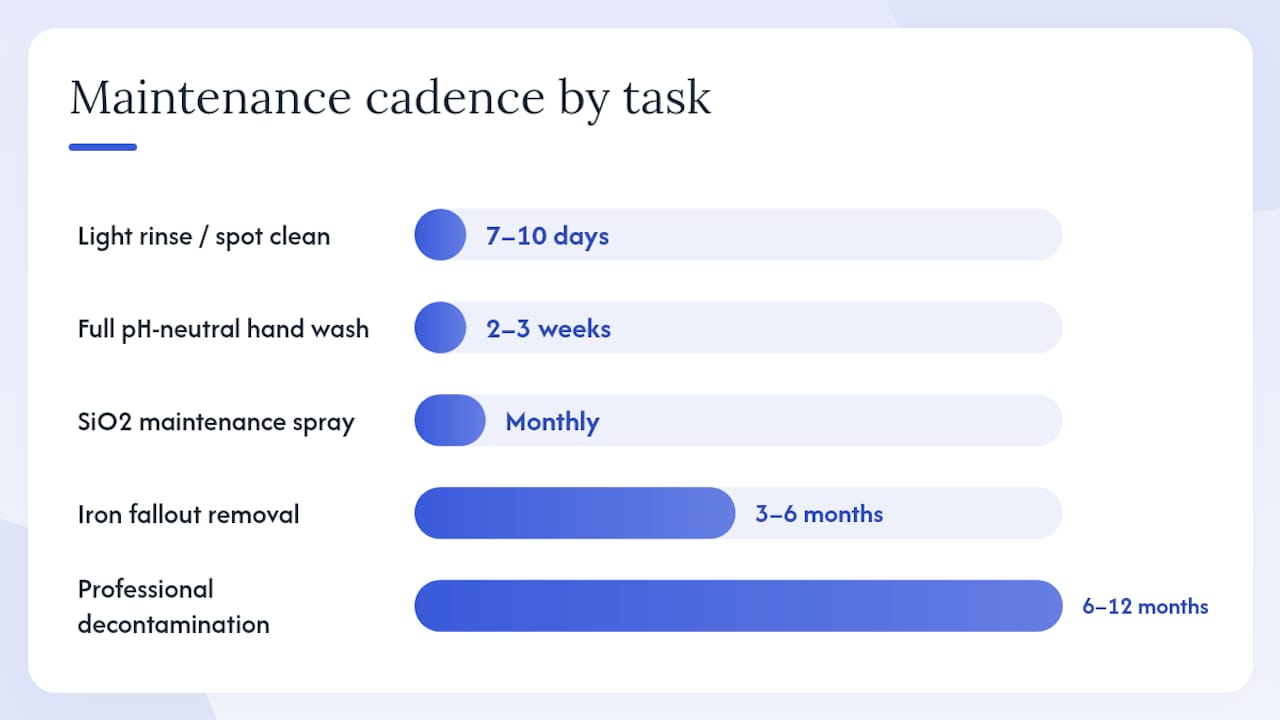
Decontamination means removing bonded contamination that regular washing can’t shift. Iron fallout from brake dust embeds in the coating surface over time; a pH-neutral iron remover dissolves it safely. Clay bar treatment removes other bonded particles. Both are best done by a professional on a coated car, particularly in the first year.
Ceramic Pro Australia recommends hand washing with pH-neutral products and avoiding automatic car washes, and advises washing frequently enough to prevent contamination from building up. On the Sunshine Coast, where salt air, UV, and tree sap are constant factors, erring toward the shorter end of the wash cadence makes sense.
When to book a professional first wash or maintenance service
Some situations make a professional wash the smarter call, not just the easier one.
- Your installer recommends a professional maintenance wash as a warranty condition
- The car has heavy contamination from bird droppings, tar, or iron fallout
- You don’t have the right tools (grit guards, quality mitts, pH-neutral shampoo)
- You’re unsure whether a product you own is coating-safe
- You want a safe bird droppings removal done without risk to the coating
A professional first wash or maintenance service typically includes a pre-rinse inspection, a safe two-bucket hand wash, light decontamination if needed, and a SiO2 maintenance spray to refresh the hydrophobic layer. You leave with a clean car, a documented service record, and no risk of having voided your warranty through an honest mistake.
Pro Tip:Mobile detailing is particularly well-suited to the first wash window. The detailer comes to you, uses their own water supply and products, and works in a controlled environment. That removes the two biggest risks: wrong products and washing in direct sun on a hot driveway. Check the Isaac’s Pro Detailing wash menu for available options on the Sunshine Coast.
A Sunshine Coast detailer’s practical note
The Sunshine Coast’s combination of intense UV, salt air, and eucalyptus trees creates conditions that test a fresh coating harder than most parts of Australia. The salt air alone accelerates water spotting on a partially cured surface, and gum sap can etch paint within hours if left untreated.
The single habit that makes the biggest difference for local car owners is keeping a small SiO2 maintenance spray and two clean microfibres in the boot. After a beach run or a park under a gum tree, a quick spray and wipe takes less than five minutes and keeps the coating performing the way it should between full washes. It’s not glamorous advice, but it’s the thing that separates coatings that still look sharp at the three-year mark from ones that look average at twelve months.
Isaac’s Pro Detailing: mobile first wash and maintenance on the Sunshine Coast
Protecting a fresh ceramic coating starts with getting the first wash right, and that’s exactly where a professional mobile service pays for itself. Isaac’s Pro Detailing comes to your home, workplace, or wherever the car is parked across the Sunshine Coast, using warranty-safe, pH-neutral products and the correct two-bucket method every time.
Services include mobile maintenance washes, SiO2 top-ups, iron fallout removal, and full decontamination washes, all performed with eco-friendly products that won’t compromise your coating or your warranty. No tunnel wash risk, no wrong products, no guesswork. Book a mobile maintenance wash through the wash menu and have your coating looked after by someone who knows exactly what it needs.
Sources
- Aftercare Instructions
- Ceramic Coating Aftercare: What to Do in the First 30 Days | KM Auto
- How to Maintain a Ceramic Coating | Aftercare & Maintenance
- The Do’s And Dont’s Of Ceramic Aftercare. — Detailia
- Ceramic Coating Cure Time Explained: A Complete Guide