
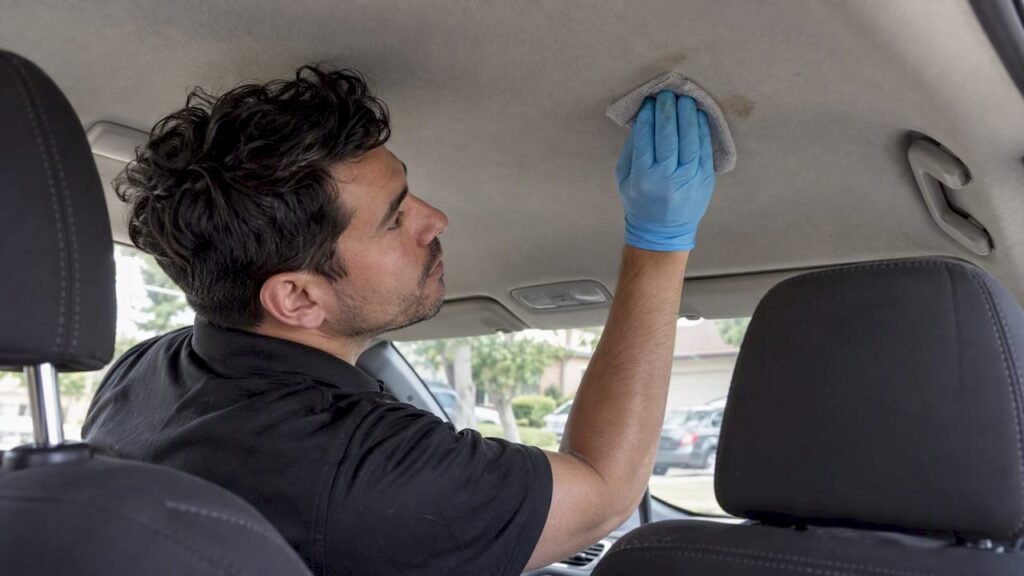
Blot the makeup gently with a clean white cloth rather than rubbing. Then use a low-moisture, fabric-safe cleaner, tested on a hidden spot first. If your headliner is glued or moulded, keep it barely damp, since soaking can break the glue bond and make the lining sag.
TL;DR:
- Check whether the liner is suspended cloth or glued fabric over foam; if its construction is unclear, treat it as glued and fragile.
- Lift loose powder before cleaning; blot oil based makeup first, and use mild isopropyl alcohol only if the fabric care code permits.
- Apply neutral upholstery cleaner to a pad, work from the stain’s edge inward, rinse by blotting, and remove residue to prevent dirt and water rings.
- Stop and call a professional for a large greasy stain, bubbling, sagging, peeling, brittle foam, or fabric that lifts or changes texture during cleaning.
Table of Contents
- Why does acting quickly matter for makeup on fabric?
- How do you tell what type of headliner you have?
- What is the safest low-moisture method for removing makeup from a headliner?
- Which common mistakes make headliner stains worse?
- When should you stop and call a professional?
- How do you finish the job and prevent the next stain?
- Why do trained detailers prefer low-moisture techniques on headliners?
- Need a hand with a stubborn headliner stain on the Sunshine Coast?
- FAQ
- Sources
Why does acting quickly matter for makeup on fabric?
Many substances cure as they dry and bond to the fibres, which is why a fresh smear of foundation comes out far more easily than one that has sat through a few hot days. Blotting straight away can help limit the spread of the product across the surrounding fabric.
Not all makeup behaves the same way, so it helps to know what you are dealing with before you reach for a cleaner:
- For oil-based products such as lipstick, cream blush and concealer sticks, blot first and check the fabric care code before choosing a cleaner.
- For water-based products such as some liquid foundations and tinted moisturisers, check the fabric care guidance before choosing a cleaner.
- Lift loose powder such as pressed powder and eyeshadow off before applying a cleaner.
- For mixed formulas such as long-wear foundations, use a light treatment and follow the product and fabric care instructions.
Stain advice aimed at laundry also points to blotting rather than rubbing and repeating the treatment instead of scrubbing harder. On a headliner, that patience is even more important, because the fabric is thin and sits over foam.
How do you tell what type of headliner you have?
Your headliner type decides how much moisture is safe, so check this before you spray anything. There are two main types: suspended cloth with an air gap behind it, and moulded fabric glued over foam.
A few quick checks help you work it out:
- Look for seams and stitching. A suspended cloth liner often shows seams or sits slightly loose over the roof.
- Press lightly on a hidden corner. If the fabric moves freely over an air gap, it is probably suspended. If it feels firm and bonded to a rigid shell, it is likely moulded and glued.
- **Think about the car’s age. Older glued headliners can be at higher risk of delamination, so use extra caution with moisture or pressure.
- Check for existing sagging. Bubbling or drooping near the edges means the glue is already tired, so treat that panel with extra caution.
Glued and moulded liners can delaminate if they get too wet, while suspended liners are more forgiving. If you cannot tell which you have, treat it as the fragile kind and stay with the low-moisture approach below, or ask a professional to look.
What is the safest low-moisture method for removing makeup from a headliner?
Work slowly, use very little liquid, and let each step dry before you judge the result. Fabric care guidance consistently says to spot clean and test on an inconspicuous area, so build that into your routine.
What you need: soft white cloths, a clean microfibre cloth, cotton buds, a soft applicator pad, a small spray bottle of distilled water, a neutral pH upholstery cleaner, a mild isopropyl alcohol solution for oil-based stains, and a vacuum with a soft brush.
Test every cleaner on a hidden patch first, such as the fabric near a pillar trim, and check for colour loss or any change in the fabric once it dries. Then work through these steps:
- Remove loose solids. Brush off powder gently or lift it with a vacuum on a soft brush. Do not press it into the weave.
- Blot excess product. Press a clean white cloth onto the makeup and lift. Use a fresh section each time so you do not redeposit pigment.
- Create a perimeter ring. Dampen a clean cloth with distilled water and lightly trace a ring just outside the stain. This may help limit spreading when you start cleaning.
- Apply cleaner sparingly. Put a small amount of neutral cleaner on the applicator pad, not on the headliner. Work from the outside edge towards the centre with gentle side-to-side motions, flipping to a clean part of the pad often.
- Rinse and blot repeatedly. Use a barely damp cloth with distilled water to lift out residue, then blot with a dry one. Residue left behind attracts dirt and leaves a ring. Do not over-saturate the fabric when rinsing.
- Dry gently. Let the area air dry with the doors open, or use a hairdryer on low from a good distance. Keep heat away from the fabric, since headliner adhesives are sensitive to it.
For stubborn oil-based makeup, a mild isopropyl alcohol solution on a cotton bud can break down the greasy binder, but only where the fabric care code allows it. Fabric care guidance suggests a mild alcohol solution for stubborn stains, and notes that delicate fibres such as wool and silk are best left to professionals. Stronger solvents are not worth the risk.
Pro Tip:A stain can look different while damp, so wait until the panel is fully dry before deciding whether to repeat a step. Avoid over-wetting a glued headliner.
If you want a wider routine for the rest of the cabin afterwards, our step-by-step car interior cleaning guide walks through it in order.
Which common mistakes make headliner stains worse?
Most headliner damage comes from too much force or too much liquid. These are the habits that cause the most trouble:
- Scrubbing or circular rubbing. It pushes makeup deeper into the fibres and roughs up the fabric surface. Fabric stain guidance says to avoid scrubbing and to work from the outer edge inwards.
- Soaking a glued liner. Over-saturating a glued liner can break the glue bond and cause sagging. Use very little liquid.
- Reaching for harsh household products. Avoid bleach, ammonia and strong solvents unless the fabric care code explicitly permits them.
- Using steam or high-pressure extraction. On a glued headliner, heat and pressure risk delamination, and the adhesives used in headlining work are sensitive to heat and solvents.
- Skipping the hidden-spot test. A cleaner that looks gentle can still leave a pale halo, and finding that out on the visible part of the roof is an expensive lesson.
When should you stop and call a professional?
Some jobs are not worth a DIY attempt. Stop and get help if you notice any of these:
- The stain is large, greasy, or difficult to remove.
- The headliner is bubbling, peeling or visibly sagging.
- The foam backing feels brittle or crumbles when touched.
- Your own cleaning has made the fabric lift or change texture.
A trained detailer works differently. Australian training units cover cleaning vehicle interior trim with correct equipment, manufacturer specifications and safety procedures. When a lining has to come out, units such as AURVTT010 and AURV330964A describe removal and replacement following manufacturer procedures and safe work practices.
There is a safety side too. CarsGuide notes that old adhesives and headliner debris can be hazardous, so professionals wear PPE and vacuum debris promptly. That is not something to improvise in your driveway.
How do you finish the job and prevent the next stain?
Aftercare is where a clean result stays clean. Keep these points in mind:
- Remove every trace of product. Keep blotting with a damp cloth, then a dry one, until nothing transfers. Fabric cleaning guidance warns that over-wetting causes water marking, so dry the area fully before closing the car up.
- Check for rings. Look at the panel in daylight once dry. If a faint ring remains, repeat the perimeter step lightly rather than adding more cleaner.
- Consider fabric protection. Where the fabric care code permits, a professional protection treatment lowers the risk of future staining. Our car fabric protection workflow explains why we clean first and protect second.
- Vacuum gently and treat spills fast. A soft brush on low suction keeps dust from building up, and a quick blot beats any cleaner.
- Store makeup sensibly. A closed pouch in the console keeps a loose lipstick or open compact from ending up overhead in the first place.
If you are choosing a neutral upholstery cleaner, our roundup of the best car interior cleaning solutions is a useful starting point. For another low-moisture reference, this UK headliner cleaning guide covers a similar approach.
Why do trained detailers prefer low-moisture techniques on headliners?

In our experience, the most common homeowner error is simple enthusiasm: too much liquid, too much scrubbing, and a stain that grows from a fingertip-sized mark into a palm-sized patch. The fabric may look fine at first, then the roof can start to droop along an edge.
A technician’s habits are plainly boring by comparison. We use controlled amounts of neutral pH product, keep the liquid on the pad rather than the roof, and turn to a clean pad face constantly so soil is lifted away, not pushed back in. We also stop early. Dealing with a fresh makeup mark promptly may help avoid further damage to the headliner. The urge to keep going is the habit worth resisting.
— isaac’s
Need a hand with a stubborn headliner stain on the Sunshine Coast?
If the stain is stubborn, the lining is old, or you simply do not want to risk the glue, we come to you. Our mobile team handles interior cleaning, extraction and fabric protection at your home, workplace or wherever the car is parked across the Sunshine Coast.

On the day, we inspect the headliner and work out which type it is, then clean with a low-moisture method or controlled extraction suited to the fabric, and add fabric protection if it makes sense. Pricing depends on vehicle size and the service you choose; current prices for our Fabric Guard treatment are on our website. To prepare, give us clear access to the car and point out the stain. Check our services and book your mobile interior detail today.
FAQ
How do you get stains out of a headliner in a car?
Blot the stain with a clean white cloth, then apply a small amount of neutral cleaner with a pad, working from the outside in. Keep the fabric only lightly damp, because moulded headliners can delaminate if over-saturated.
How do you get makeup marks off a car interior?
Fabric responds to a neutral detergent solution, while stubborn oil-based makeup may need a mild isopropyl solution if the fabric care code allows it.
Will makeup get ruined in a hot car?
Heat may affect creams, lipsticks and some foundations, so keep makeup secured to reduce the risk of leaks and stains. Keeping makeup in a closed pouch out of direct sun reduces the risk of a mess on seats or trim.
How do you remove soda stains from a headliner?
Treat it like any other water-based stain: blot immediately, then use a damp cloth with a neutral cleaner and rinse by blotting. Avoid soaking the panel, and let it dry fully before repeating.
Sources
- How to use our car care products Interior how to guides Cleaning marks from car hoodlinings Fabric Hoodliners
- Multimaster | Fabric | Tips | Stains
- Cleaning Guide | Warwick Fabrics