
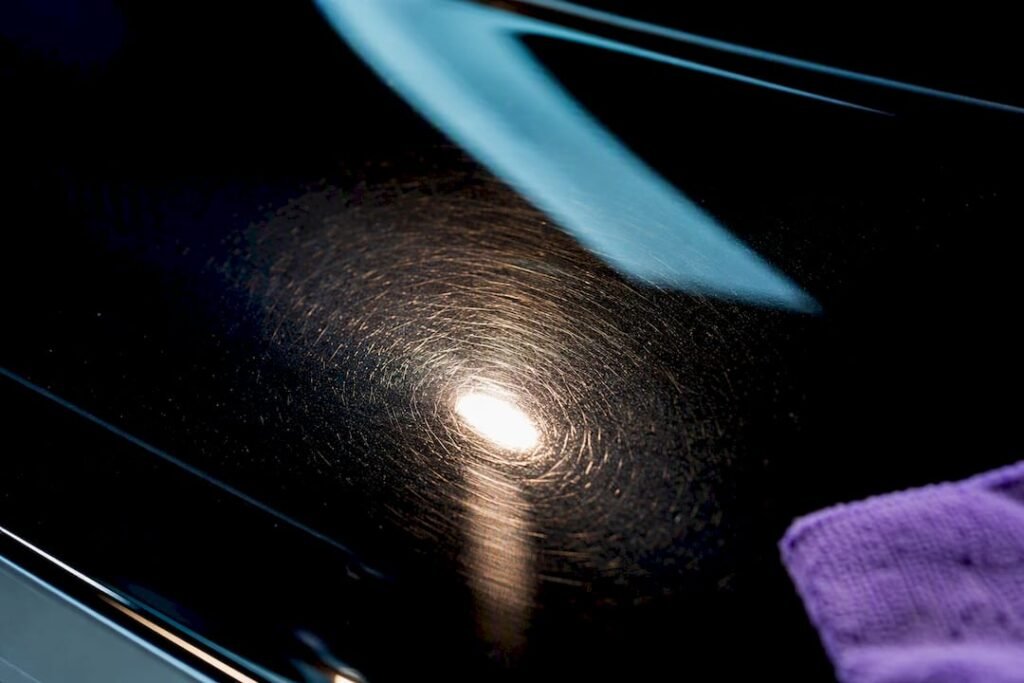
Swirl marks are microscopic scratches in the clear coat, not something wrong with the paint colour underneath, and the reliable fix is to decontaminate, run a test spot, then correct with the least aggressive polish that works, ideally with a dual-action machine. Skip straight to a heavy compound and you risk cutting into clear coat you can’t put back. Fix the marks properly once, then change your wash habits so you’re not creating new ones every weekend.
TL;DR:
- Proper decontamination of the paint surface is essential before polishing to prevent turning light swirls into deeper scratches.
- Using the two-bucket wash method with grit guards and dedicated mitts greatly reduces the introduction of grit that causes swirl marks.
- Dual-action polishers are the safest DIY tool, as they are less likely to burn through the clear coat compared to rotary tools.
- Correcting swirl marks effectively requires staged testing with a mild polish and thorough inspection under proper lighting and IPA wipes.
- Regular wash habit improvements and protective coatings can significantly reduce the chances of swirl marks returning after correction.
Table of Contents
- What are swirl marks on a car and why do they look like webs?
- What causes swirl marks on a car?
- How do you prepare a car before polishing out swirl marks?
- Hand polishing vs machine polishing vs professional correction
- How do you actually polish out swirl marks safely?
- How do you protect your car’s paint from swirl marks coming back?
- How much clear coat can you safely remove, and when should you call a pro?
- What years of intake inspections reveal about swirl marks
- If you’d rather leave it to a pro
- Sources
- FAQ
What are swirl marks on a car and why do they look like webs?
Swirl marks are shallow scratches sitting in the clear coat, the transparent top layer sprayed over your car’s colour coat to protect it from UV and everyday knocks. They’re not in the paint itself. The clear coat is what takes the hit, and it’s also thin enough that careless polishing can grind straight through it if you’re not paying attention.
The webbed, spider-like pattern you see under sunlight or a shop light isn’t the scratches lining up in circles. It’s light scattering unevenly off thousands of tiny, randomly-angled grooves, and your eye reads that scatter as a swirl pattern radiating outward. Dark colours, especially black, show this far more obviously because there’s no background colour noise to hide the light bounce against. A white car with the same scratch density can look almost clean.
To check how bad it is:
- Use an LED inspection light or torch held at a low angle, not overhead sunlight, since raking light reveals far more than a flat midday glare.
- Look from multiple angles. Swirls that vanish at one angle can look severe at another.
- Try the fingernail test on any deeper mark, dragging a nail gently across it; if your nail catches, it has likely gone through the clear coat and needs more than polish.
- Treat the fingernail test as a rough guide only. It won’t tell you how deep a scratch actually runs, and it can miss defects a proper paint-depth gauge would catch.
What causes swirl marks on a car?
Most swirl marks are self-inflicted, and usually during the exact routine meant to keep the car clean. Understanding the mechanism makes it obvious why the fix has to include changing habits, not just buffing out the damage and repeating the same mistakes next Saturday.
- Single-bucket washing. Dunking a dirty mitt back into the same bucket you rinsed it in means you’re reloading grit onto the mitt, then dragging that grit across the paint on your next pass.
- Automatic brush and tunnel washes. The rotating brushes touch dozens of other cars before yours, picking up grit, brake dust and road debris that then gets dragged across your panels under pressure.
- Contaminated mitts and towels. A wash mitt or drying towel that’s been dropped on the driveway, or one that’s simply worn out and stiff, carries embedded grit that acts like sandpaper.
- Dry wiping. Brushing dust off with a dry cloth, even a microfibre one, drags whatever particles are sitting on the surface straight across the clear coat.
- Poor lubrication. Not enough soap, or a soap with weak lubricity, means more friction between the mitt and the paint on every single pass.
- Improper drying technique. Dragging a towel across the surface in long swipes, rather than lifting and patting, is one of the most common moments swirls actually happen, right at the end of an otherwise careful wash.
None of these causes are dramatic. That’s the problem. They’re baked into how most people wash their car without ever noticing the damage accumulating.
How do you prepare a car before polishing out swirl marks?
Polishing over embedded contamination is how you turn light swirls into deeper scratches, so decontamination isn’t optional, it’s the step that determines whether correction actually works.
Start with a touchless pre-wash, a snow foam or citrus pre-spray, left to dwell and break down grime before anything physical touches the panel. This loosens dirt so your wash mitt is lifting it away rather than grinding it in.
For the wash itself:
- Use the two-bucket method, one bucket of soap solution, one of clean rinse water, with a grit guard in each to trap particles at the bottom away from your mitt.
- Use a separate wheel mitt and bucket entirely. Wheels carry brake dust and road grit that’s far more abrasive than anything on your bodywork.
- Choose a plush microfibre or lambswool mitt, and retire any mitt that’s gone stiff or matted.
Once the car is washed, feel the paint with your hand inside a sandwich bag. If it feels gritty rather than glass-smooth, you’ve still got bonded contamination like iron fallout sitting on the surface, and no amount of polish will fully correct paint that’s still contaminated. An iron fallout remover dissolves those embedded metal particles, usually with a visible colour-change reaction as it works. Follow with a clay bar or clay mitt, using plenty of quick detailer spray as lubricant so you’re never dragging the clay dry across the surface.
Pro Tip:Fold your clay bar to a fresh, clean side every few passes. Once it’s picked up grit, kneading it back in and reusing that same face is functionally the same as scrubbing your paint with sandpaper.
Drying is a high-risk moment for reintroducing swirls right after you’ve done everything correctly. A high-velocity blower avoids contact altogether. If you’re towel drying, use a large, thick, waffle-weave or plush towel, pat rather than drag, and wring it out often so you’re never spreading collected water and grit across a wide area.
Hand polishing vs machine polishing vs professional correction
Removing swirl marks means levelling the clear coat down to just below the depth of the scratch, and how you do that changes your results, your risk, and your time on the job dramatically.
Hand polishing is the lowest-risk, lowest-cost option, and also the least effective for anything beyond the lightest haze of marks. You can generate some heat and friction by hand, but nowhere near what’s needed to properly abrade clear coat with consistent pressure across a whole panel. It’s realistic for spot-treating a small area, not for correcting an entire car.
Dual-action (DA) polishers are the sensible middle ground for most owners. The pad oscillates rather than spinning on a fixed axis, which makes it far more forgiving than a rotary tool. It’s genuinely difficult to burn through clear coat with a DA if you’re using reasonable technique, which is exactly why it’s the recommended tool for anyone attempting correction at home. Pros use rotary polishers for heavier correction work, but only with real experience behind them, since a rotary generates far more heat and cuts far more aggressively per pass, and a DA is considered the safer option for exactly that reason.
Professional multi-stage correction earns its cost on cars with heavier defect density, thin or previously-corrected clear coat, or when you want a genuinely flawless finish rather than “much improved.” A professional detailer works through compound, polish and finishing stages with pad and product combinations matched to the paint’s actual hardness, something that takes real judgement to read correctly.
The trade-offs, broadly:
- Hand polishing: Cheapest, safest, but limited to very light marks only.
- DA machine polishing: Moderate cost (a decent DA polisher runs a few hundred dollars), low risk, strong results on light to moderate swirls.
- Professional correction: Highest upfront cost, lowest risk to the paint since it’s done by someone reading the paint properly, and the most consistent, longest-lasting finish, particularly on cars with heavier or long-neglected swirl marks.
How do you actually polish out swirl marks safely?
Correction isn’t one pass with whatever polish is on the shelf. It’s a staged, test-driven process, and skipping the testing stage is how DIYers end up with holograms, burn marks or patchy correction.
- Pick a test spot. Choose a section roughly 60cm by 60cm on a less visible panel, like a boot lid or rear quarter, that’s fully clean and decontaminated.
- Start with the mildest combination. A finishing polish on a soft foam pad is the safest starting point; don’t reach for a heavy cutting compound first.
- Run two to three passes, working the pad flat against the surface with slow, overlapping strokes, and keep the machine moving rather than dwelling in one spot.
- Inspect under a bright inspection light. If the swirls are gone, you’ve found your product and pad combination. If not, step up to a slightly more aggressive polish or pad and repeat.
- Avoid edges, badges and raised panel lines, where clear coat is naturally thinner and heat builds up faster.
- Wipe the panel with isopropyl alcohol or a dedicated panel-prep spray before your final inspection. Polishing oils and glazes can visually fill light swirls and make the surface look corrected when it isn’t; an IPA wipe strips those oils away so you’re looking at the actual result.
Pro Tip:If the swirls reappear after the IPA wipe, they were masked, not removed. Go back to your test spot and step up to the next product grade rather than assuming the job’s done.
Once your test spot gives you a clean result under both the inspection light and the IPA check, that’s your formula for the rest of the car. Work panel by panel, testing again if you move onto a different colour panel or a section with visibly deeper marks.
How do you protect your car’s paint from swirl marks coming back?
Correction without a change in habits is a cycle you’ll repeat every few months, so protection and better technique matter as much as the polishing itself.
A layer of wax, synthetic sealant or ceramic coating adds a slicker, more sacrificial surface that makes it harder for light grit to bite into the clear coat directly. None of them make paint swirl-proof; a ceramic coating still needs careful wash habits underneath it to actually earn its keep. Think of it as raising the threshold for damage, not removing the risk entirely.
Beyond that layer, the habits that matter most:
- Always pre-wash with a foam or spray before any mitt touches the panel.
- Stick to the two-bucket method with grit guards, every wash, not just the ones where you’re feeling thorough.
- Use plush mitts and dedicate separate towels to wheels, glass and paint so contamination never crosses over.
- Launder microfibre towels on their own, without fabric softener, which clogs the fibres and reduces their ability to lift dirt safely.
- Retire towels and mitts the moment they feel stiff, matted or rough, since a worn-out mitt is a scratching tool no matter how careful you are with it.
A ceramic coating or sealant stretches the time between corrections considerably, but the wash routine underneath it is still what actually determines whether new swirls form.
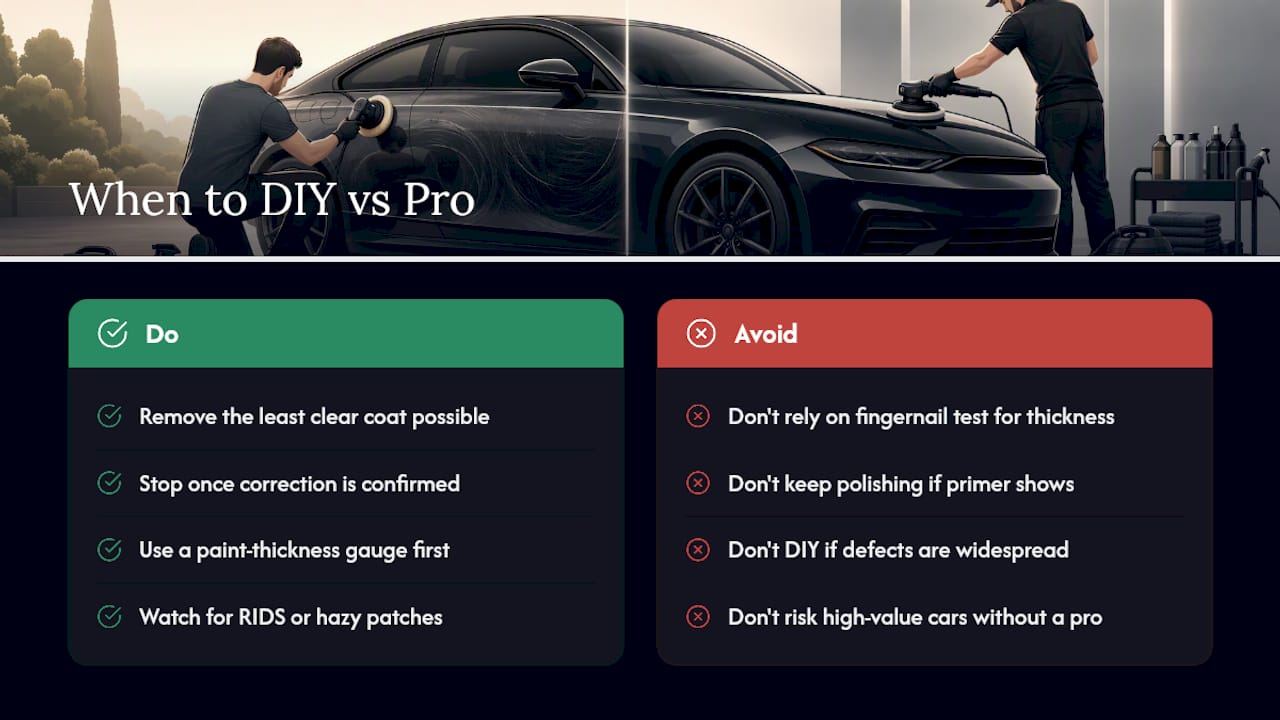
How much clear coat can you safely remove, and when should you call a pro?
Clear coat is finite, typically only a few tens of microns thick from factory, and every polishing pass removes a small amount of it permanently. There’s no universal number that applies to every car, since clear coat thickness varies by manufacturer and by panel, which is why a paint-thickness gauge is the only genuinely reliable way to know how much room you’ve got to work with before you start.
A common guideline is to remove the least amount of clear coat necessary to level the defect and to stop polishing once correction is confirmed. The fingernail test indicates if a scratch is deep but does not measure clear coat thickness.
Watch for RIDS (random isolated deep scratches) that don’t respond to your test-spot process, or any dull, hazy patch that looks slightly different in colour or texture after polishing; that can indicate exposed primer, which means the clear coat is already gone in that spot. At that point, more polishing only makes it worse.
Call in a professional if defects are widespread across multiple panels, if you suspect the clear coat is already thin from a previous correction, or if the car is high-value enough that a mistake is expensive to fix. A proper cut and polish service includes paint-depth checks before any cutting starts, plus a protective layer applied afterward so the freshly corrected paint isn’t left exposed.
What years of intake inspections reveal about swirl marks
Paint-depth checks and test spots are commonly used to assess swirl marks. Owners who wash weekly sometimes have worse swirling than those who wash less often, indicating technique is more important than frequency. Effective fixes include decontaminating properly, testing products before full application, and verifying results with IPA wipes rather than relying on lighting. Mobile correction can assist owners lacking gear or time by providing on-site assessment and correction with a proper process.
— isaac’s
If you’d rather leave it to a pro
DIY correction works when you’ve got the time, the right pad and polish combination, and the patience to test properly before committing to a full panel. If any of that sounds like more effort than you want to put in on a Sunday, a mobile detail solves the same problem without you having to buy a DA polisher you’ll use twice a year.

A typical mobile correction visit with Isaac’s Pro Detailing covers the full process outlined above: a proper wash and decontamination, a test spot to find the right product before touching the rest of the car, machine correction with a DA polisher, and a protective layer applied once the swirls are gone, all done at your home, workplace or wherever the car happens to be parked that day. A paint-depth check is done before any cutting starts to ensure safe correction. If you’re weighing up whether your car needs a full correction or just a protective refresh, the wash and detailing menu lays out what’s included at each level, and you can book a time that suits your week rather than losing a weekend to it.
Sources
- How to remove swirl marks · CarCareTruth
- How to remove swirl marks from car paint · AutoCareGenius
- How to remove swirl marks from paint · RACV
FAQ
How do you fix swirl marks on a car?
Decontaminate the paint with a proper wash, iron remover and clay, then run a test spot with the mildest polish and a DA polisher, escalating only if needed, and verify with an IPA wipe before calling it done.
Is it normal for cars to have swirl marks?
Very common, yes, particularly on cars washed at automatic brush tunnels or dried with a dry towel, but common doesn’t mean unavoidable; changed wash habits prevent most of them.
Does car wax get rid of swirl marks?
No. Wax can temporarily fill light swirls with oils and make them less visible, but the scratch is still there underneath and reappears once the wax wears off or the surface is wiped with alcohol.
Why am I getting swirl marks when buffing?
Usually it’s dirty or worn pads, too much pressure, working too small an area repeatedly and building heat, or skipping decontamination first so you’re grinding leftover grit into the clear coat as you polish.